


jonnyblagwind
-
Posts
12 -
Joined
-
Last visited
Content Type
Profiles
Forums
Store
Gallery
Events
Alphard Videos
Guides
Posts posted by jonnyblagwind
-
-
Turns out mine is a blown bulb 💡
-
On 2/11/2025 at 9:15 PM, big_boz said:
There is a plug on the back, il bet yours isn't plugged in, you have to remember to do it when you take the panel off to change the head into for example. Forget to do it and you wont know I til it gets dark.
Pull the panel up and plug it in, it's under the storage bin with the flap on it.
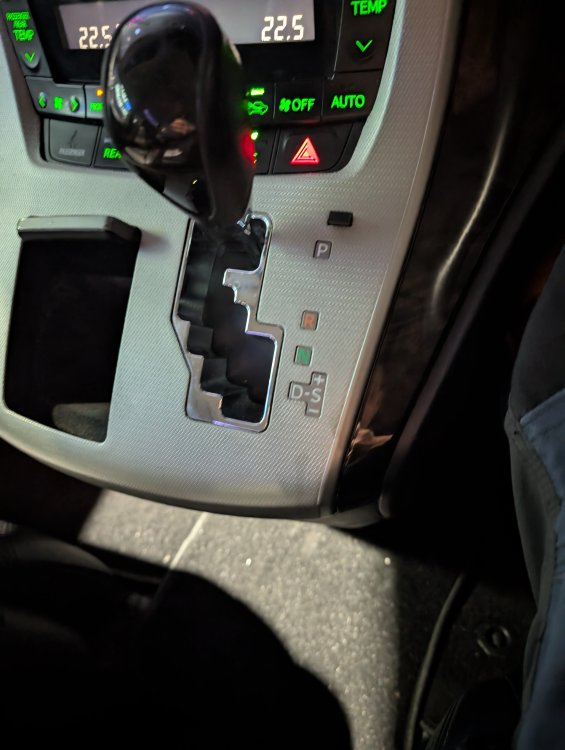
The little black button above park is the manual way to move the shifter if you need to, for example getting it in N when the engine is off
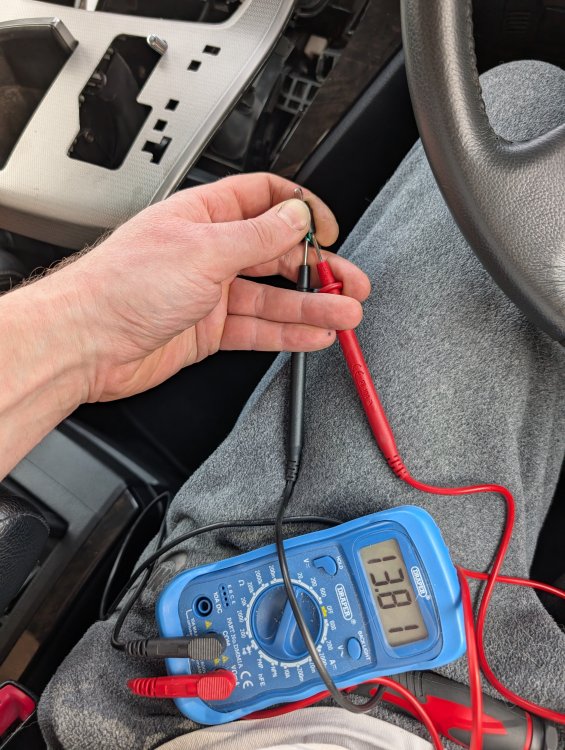
Did have this out last week need to check out with a multi meter as it was plugged in 🤙🏼
-
On 11/30/2023 at 5:10 PM, Chris.ac said:

Is there a fuse or bulbs for this mine doesn't seem to light up at all just also noticed the small square button above the P what is that for?
-
On 12/18/2021 at 4:09 PM, Chris.ac said:
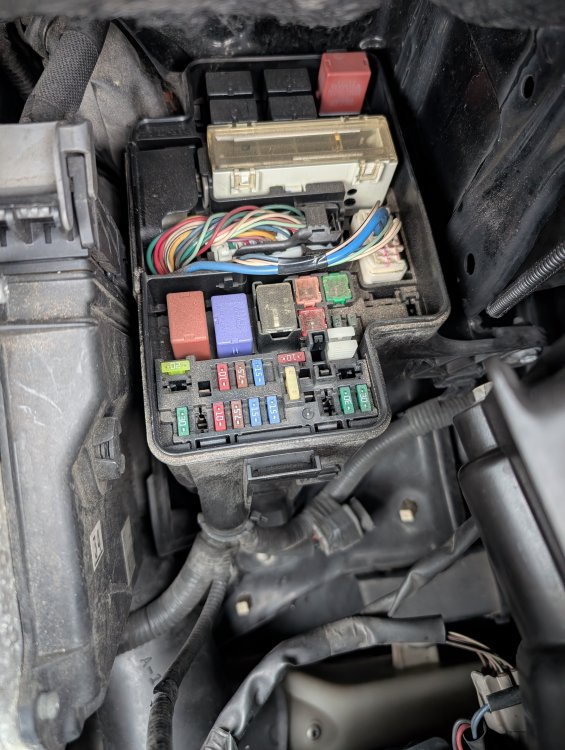
Part number 84140-42080 - common to several high end toyotas, the standard part is 84140-42070 - the wiring loom is already set up for the rear fog, even the fuse was present - I had to add the relay in the passenger side footwell.
I bought part from here:
https://www.amayama.com/en/part/toyota/8414042080
next step is to drop bumper and connect the fogs to the existing plug that is attached to the driver side rear sonar sensor
Did this come with both parts for the left and right side of the stalk and an I correct in saying you have a 20 series ?
-
On 1/3/2025 at 9:44 AM, Simbad said:
Following with interest. What year is your car? I’m sorting my stalk and fog lamp on Monday. As previously mentioned I have a relay but mine is supposed to be located underneath the passenger footwell not in the engine bay as you showed - is this even the correct place for you? I have a 2012 facelift Alphard 3.5.
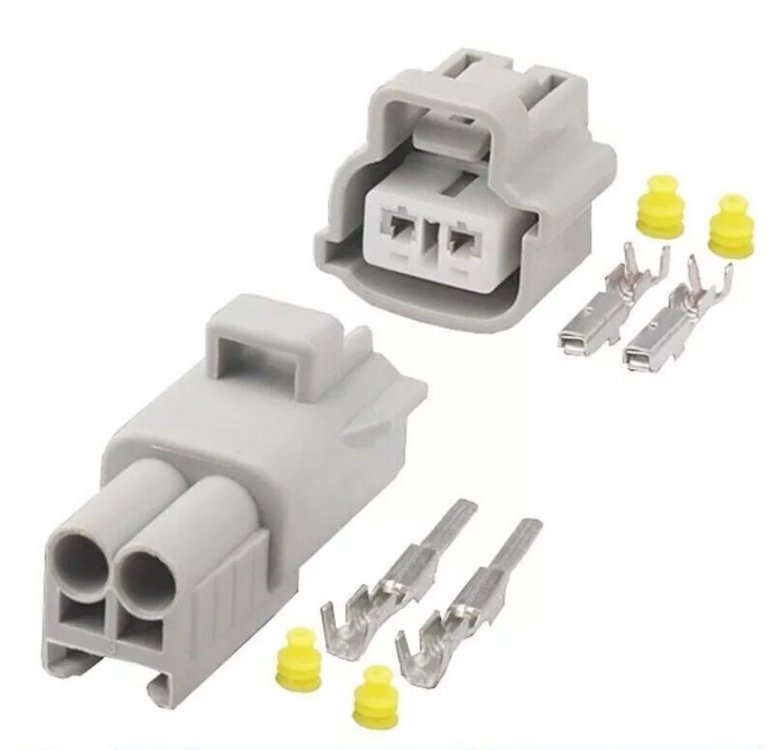
Based on all the info I sourced, my plan was to install the stalk, possibly add the relay (many mentioned their cars already had this present) that is located underneath the passenger side footwell and then just install the fog lamp to the blank connector that is supposed to be on the right side behind the bumper using the plug connector I bought on eBay (pic below).The reason I ask is because my method seems to be plug and play only.
Mines a 2014 3.5 that looks like the plug though 🤙
-
15 hours ago, Simbad said:
I recently finished installing the stalk, relay, and fog lights on my 2012 Alphard. I'm grateful for the help I received from the forum members—the information shared here was invaluable.
I've begun documenting all the modifications I make to my Alphard, from the day I got it to this latest fog light installation. I'm creating a video tutorial demonstrating each step of the OEM fog light retrofit (including the stalk and lamps) to simplify the process for others. This video will provide a single, easy-to-follow guide, saving others the time and effort of extensive research. Here's the first video:
What stalk did you use I've just tried an avensis but the switches ended up all messed up in how they worked had also tried a RAV4 stalk which was turning on the fog light light on the dashboard but ended up sending it back because it didn't fit on the original hole which I've ended up packing it in the second attempt with the avensis one?
-
On 12/24/2024 at 3:58 PM, Chris.ac said:
If you have an etc unit in the small coin box to the right of steering wheel, you can grab an illumination and a switched live connection from the socket, it's not useful as an etc unit in the uk.
I have the nano switch which seems to have a light on it maybe can use that?
-
From various information I've pieced together from this thread,
I should 1:
be using the blue wire from the stalk plug in the right by the steering wheel to feed the new switch
2:
For a relay of the same type as the others under the engine bay I'm the empty slot.
3:
Connect the new fog light to the spare cable in the bumper
Does that all sound correct?

-
3 hours ago, arcascomp said:
Not sure if I'm understanding you correctly. Are you referring to the aftermarket fog light switch wiring or the wiring in the stalk?
Assuming you are talking about the aftermarket switch, then it needs to earth the wire I extended from the stalk connector briefly to trigger the light on or off. Most aftermarket fog light switches latch on or off, so I had to butcher mine to no longer latch so it became a momentary switch. I used a test tool to determine which off the switch wires did what. I presume they spare wires light up the switch icon when the headlights are on, something I meant to do, but have never got around to yet.
Ok interesting so essentially with the aftermarket switch I would want a 12v for light/latch and then two grounds for each the light and the blue signal cable
-
On 8/29/2024 at 10:21 PM, arcascomp said:
@Chris.ac You are a total legend! Fog light in, working on original loom with tell tale light in dash being illuminated. Thanks for all your help, really appreciate it.
For anyone else looking to do this it's not that hard and you can do it without removing the steering wheel if you're not changing the stalks.
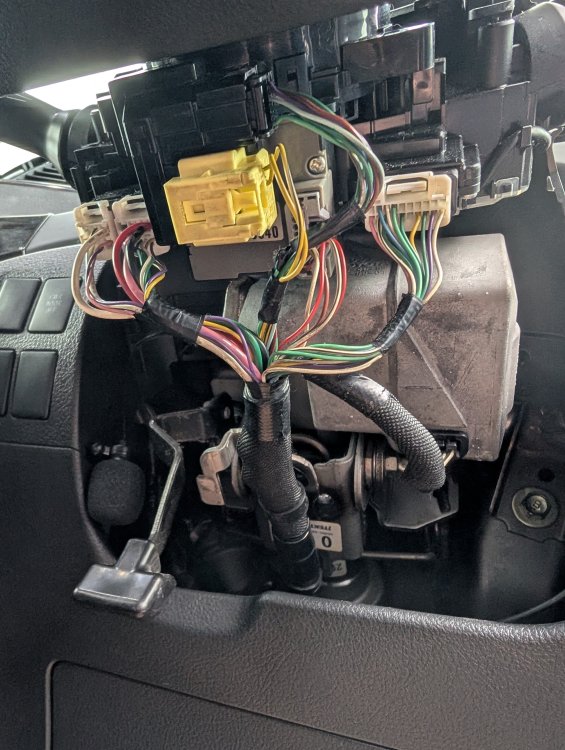
All that needs removing is the cowl behind the wheel so you can get access to the lighting wiring. This needs two clips releasing that you can see once the steering wheel is rotated out of the way. Then use a trim tool to pop the two sections and drop the lower part out off the way.
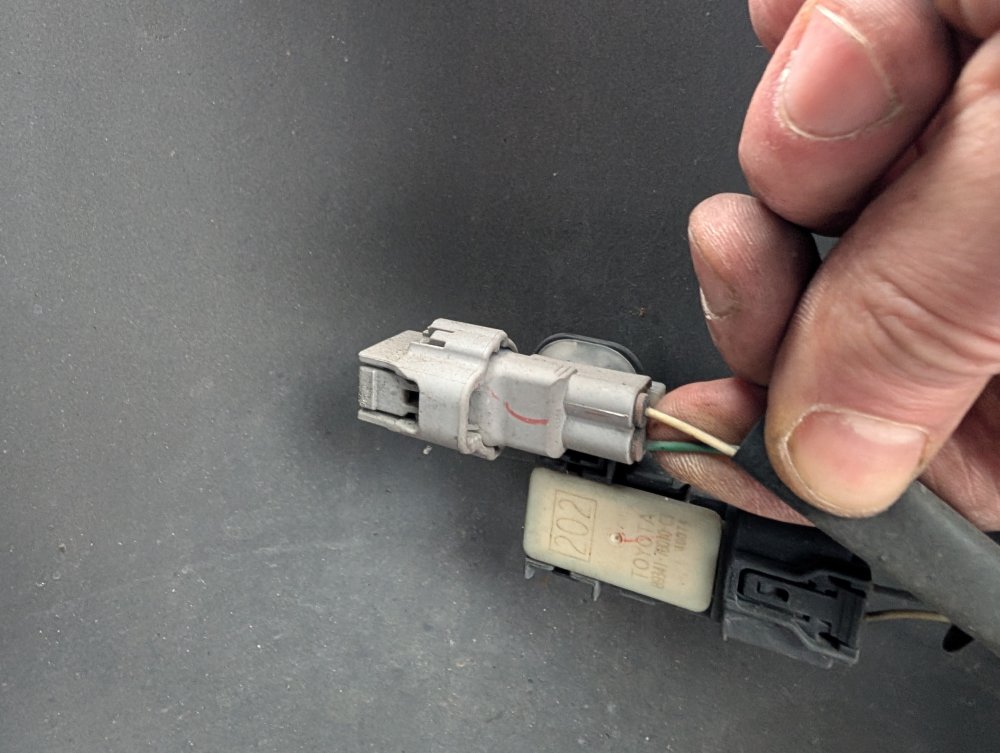
The lighting stalk connector has two rows of wiring, the lower row is nearly fully populated, the upper has three wires only. The rear fog one is the blue wire in that upper row nearest the steering column.

In the picture I've already depinned that blue wire and run a lead from it to a Toyota rear fog switch fitted to one of the blanks. The other side of that switch needs to be connected to earth. I dismantled the switch to disable the latching mechanism so it became a momentary switch like the factory stalk.

Not sure why I chose that particular blank! With a relay fitted in the passenger footwell and the lights and front foglight turned on, pressing this switch makes the relay click and the tell tale light illuminated on the dash.
Final step was to access the connector behind the rear bumper. Listen to what Chris said above, it's so, so much easier to remove the bumper than it seems and taking off the wind baffle is indeed no good for access. The connector fitted has the female side plugged in for you already, all you need to add is the correct pins. I forgot to photo the actual plug but it was different from the one I bought in eBay but the pins were exactly what was needed.

For now, to get an MOT sorted I've fitted a round smoked LED light where the towing eye cover should be as that was missing anyway. I don't think the light will last too long, but I might get a winter if I'm lucky. I'll get the proper ones from Japan next time.

Doesn't look terrible, but not the nicest.

But it does light up!
So thanks again to everyone, especially Chris.ac.
I see the switches seem to have four wires in what do you do with the other 3 and the original blue wire to red of the switch?
-
On 12/18/2021 at 4:09 PM, Chris.ac said:
Part number 84140-42080 - common to several high end toyotas, the standard part is 84140-42070 - the wiring loom is already set up for the rear fog, even the fuse was present - I had to add the relay in the passenger side footwell.
I bought part from here:
https://www.amayama.com/en/part/toyota/8414042080
next step is to drop bumper and connect the fogs to the existing plug that is attached to the driver side rear sonar sensor
Is there just a plug under the bumper waiting to be connected or do we need to join some wires, I did have a look at the wiring schematic although found it a little confusing is it easy enough to find a connector at the string wheel end to simply extend to the switch?


SHIFTER ILLUMINATION
in Toyota Alphard & Vellfire Club Forum (2008 - 2015)
Posted
From what I'm reading this is just a T5 bulb can anyone confirm that?