


dave murrell
-
Posts
85 -
Joined
-
Last visited
-
Days Won
2
Content Type
Profiles
Forums
Store
Gallery
Events
Alphard Videos
Guides
Posts posted by dave murrell
-
-
The manuals that I have are stored on a flash white drive.
-
I am unable to post the manual on here do to copyright, maybe they dont trade anymore?
-
 1
1
-
-
Forgot to mention the wifes car is the 2011 vellfire.
-
The taped up bulb could possibly be the gear selector illumination bulb (the one replaced with an led) normally the bulb should have a little green plastic wrapper on it I think this may have been to dim the intensity...
-
Why are android head unit buttons (down the left side) hidden by the plastic trim so you cant use them?
-
I managed to to find this one which as in an obvious place lol.
-
roof monitor now fitted and working. Connects to free wifi at work so has also become a luxury canteen/cinema at dinnertine.
-
4 hours ago, big_boz said:
@dave murrell you have inspired me to start looking at replacement TVs for the roof. I have had a bit more of a look, I have twin sunroofs, so cable will go straight to the passenger side just behind the front door, then tuck in along the joint between the plastic and the fabric roof liner. I used the same route for my rear dash cam, trim tool is enough to get the cable completely hidden, then down the pillar in front of the quarter light to avoid the airbag. Simples.
That route means you only need to get the cables under about 2ft of headliner
Me an inspiration? try telling my wife that 🤣
-
 1
1
-
-
23 hours ago, big_boz said:
I am not a professional but I have installed lots of ice in cars. I would run 2 cables down the left A pillar by removing the existing TV, and using my trusty poky stick to feed it along the headline to the corner, would probably remove the grab handles to give a bit of flex In the headline.
One cable would go to switched live on the fusebox under the dash (the one I used for my dashcam) and would include an inline fuse the other to the same earth bolt I used.
I would guess 2hrs would be more than enough, the wire itself perhaps 10 mins if it's easy to get across the roof.
Thanks for that big_boz, very reassuring 👍😎
-
It will be interesting to see ho Lee Evans sorts this one out in the £100 and 2 hour timescale he gave us.
-
I got very deeply immersed in solving this and drew a blank then just gave Lee Evans a bell and he said he would fit it correctly for £100 so thats where it goes this Saturday.
Its the wifes pride n joy so I am reluctant to poke holes in it...
The sunroof motor + is probably the best bet but I was stumped on the trigger wire for the roof unit entry light.
-
1 hour ago, big_boz said:
Rear light clusters pull off. So undo the plastic bolts and pull/slide the unit in the direct of the rear of the vehical. They have a few push in lugs that should just pop out.
Just realised your on about the rear outside lights, I am on about the side loading door light, with the vent.
-
those are the ones I mentioned earlier I take it (combined with air vent). But where are the bolts?
-
Bought a 17" Xtron monitor and took down the original, connected by single plug.
I have a found a permanent live but There is no other live wires that breaks when ignition is turned off!
Also I need a feed from the lights for the B+ but not sure how to remove the side rear curtesy light as no amount of tugging will budge it.
Any sugestions would be helpful.
The car is 2011 Vellfire with 2 sunroofs.
-
Looking recently for a towbar to fit the wifes 2011 3.5 Vellfire and found 3-4 different fitting styles, sure this isnt right, or could someone point me in the right direction.
-
Long time see... it turns out the the vellfire we paid 11k for has a 50 quid wind up radio. No DAB so will be looking for something we can sing along to 😁
-
Okey dokey pipsyp, when the other half gets back with ''her'' Vellfire I will take a gander., thanks for that.
-
i bought a digital aerial only to find there is no usb socket in the back of the android radio (just the remote aux usb for a music flash drive), so if anyone has the type that i assume is a plug-in type that may not be suitable for your radio then e could swap?

-
1 hour ago, smurf said:
So long as the 5w30 oil for the Merc meets one of the specifications show in the manual above then it would be fine.
Oils, and engine design and emission control, have moved on quite a bit in the last 35 years. The weight of the oil is only one measure of the properties of that oil so I'm afraid that one 5w30 oil could be very different to another because of the additive mix, and whether it is mineral, semi-synthetic or fully synthetic. There is a specified standard that the oil needs to meet and this is what should compared in addition to the weight of the oil.
The days of garages having a drum of oil that can be used to service every car that crosses the threshold ended a long time ago for very good reasons, and those reasons apply at home as well.
My only real gripe is that diesel oil has a "cleansing agent!" and how it affects VVT if at all.
-
While on the subject of oil grade I was wondering if I could use the oil I bought for the wifes S class merc which is 5W 30 for diesel engines.
-
They say the further north you travel the better...
-
1
-
-
I take it cant be parked in certain places then, like anywhere 🤪
-
Further to this topic, as stated above the water drains overflowed on the wifes Vellfire and dripped inside after night of rain.
Went out this morning with the intention of assessing what needs to be done based on others input, well, once I realised exactly where the drain hole was it became apparent there is another option.
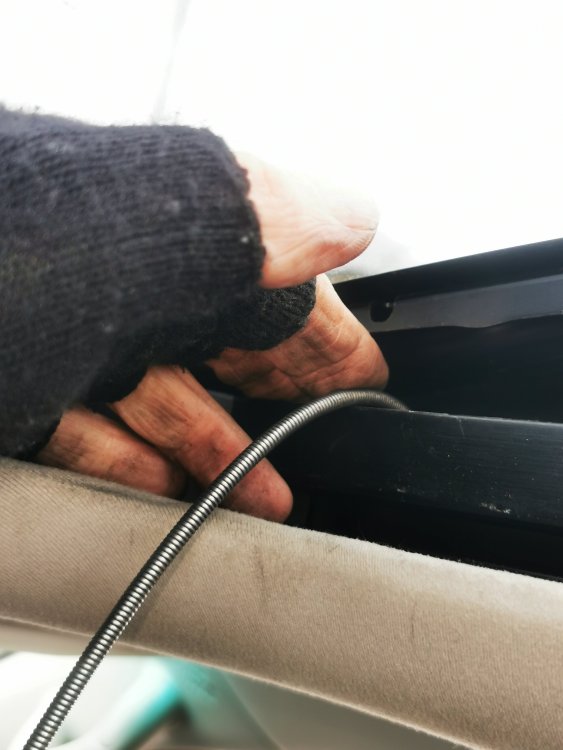
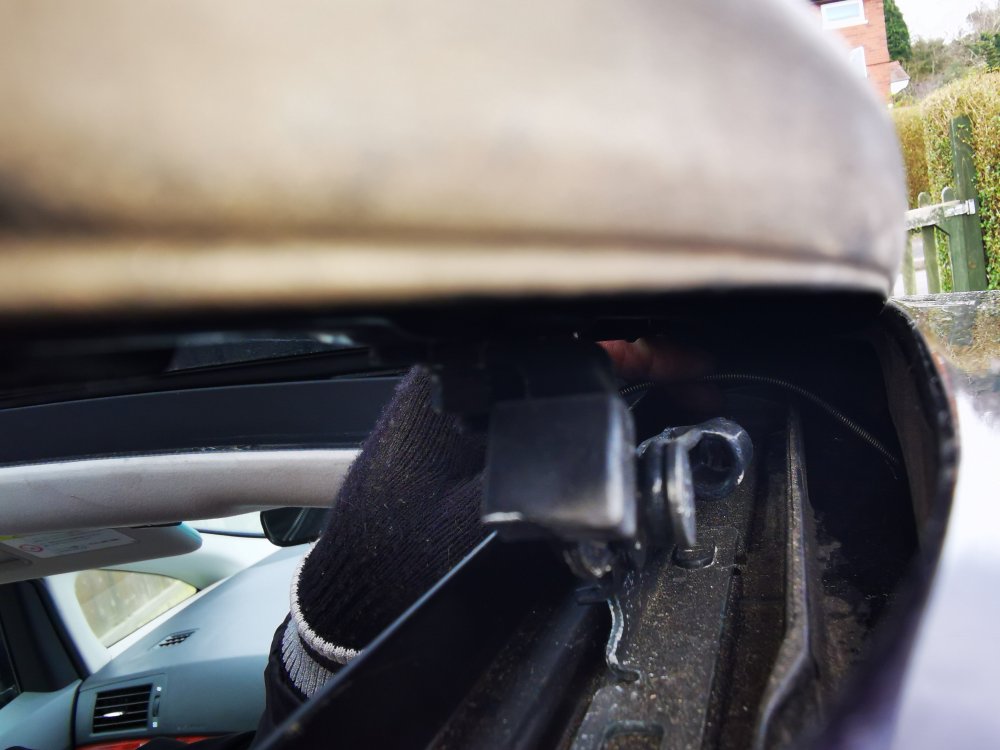
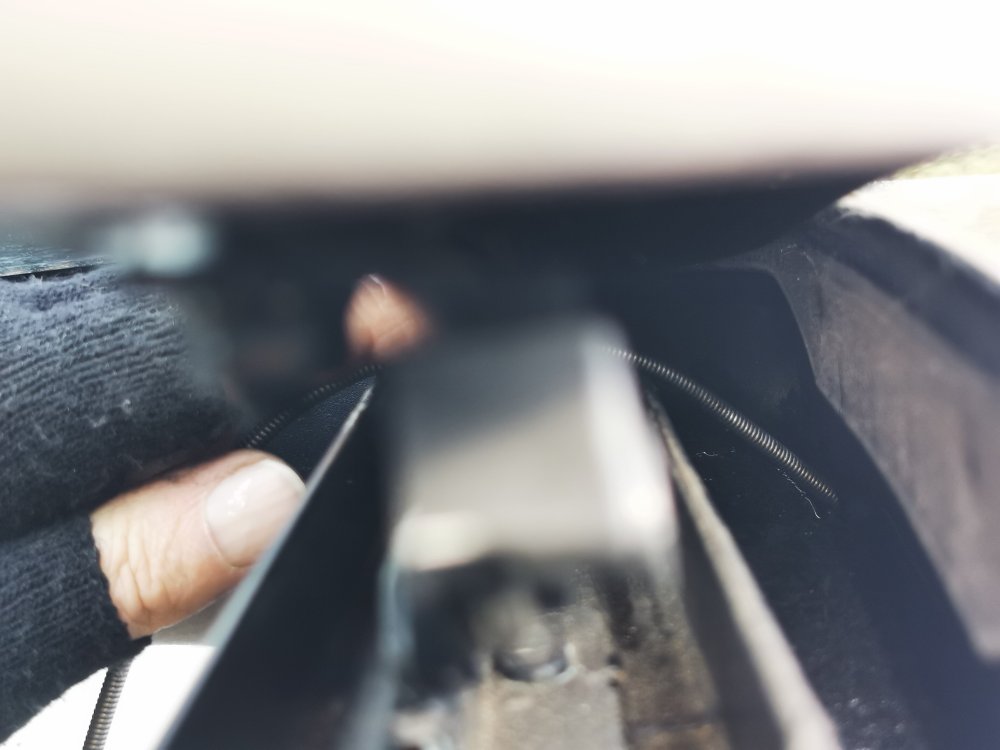
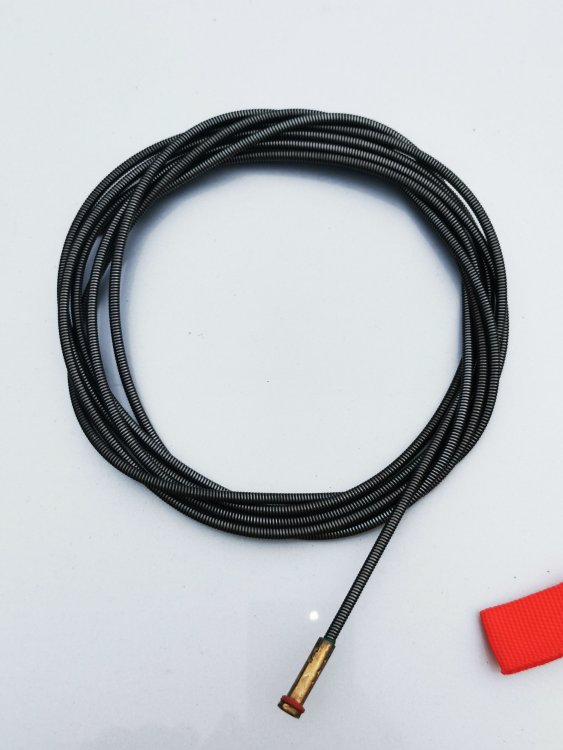
Firstly you will need a mig gun liner (the inner part that the welding wire actually runs through), I pulled one out of my old weld torch and stripped off the outer plastic coating.
These liners are are very flexible yet some force can be pushed along its length, ideal for sending down narrow pipes/tubes.
1. Open sun roof
2. remove plastic trim that is attached to the side of the glass frame hiding the mechanism by pulling it downwards.
3.from the drivers seat pass the torch liner over the metal parts as shown in 1st picture and guide into the hole (fiddly part)
4. feed in the liner in a see saw action, mine was 3mtre and took most of it, will pull out easily.
NB. protect the roof liner from dirt.
-


Vellfire twin sunroofs drain holes blocked..
in Toyota Alphard & Vellfire Club Forum (2008 - 2015)
Posted
https://yoshiparts.com/