
owsu
Members
-
Joined
-
Last visited
-
Ahh good point, yea I have the 3.5 V6 sorry
-
Does anyone know why there are no vertical towbar options for the alphard/vellfire? I have seen horizontal removable ones like mentioned here https://uk.alphardclub.com/forums/topic/7018-removable-swan-neck-and-fixed-flange-towbars-now-available/#comment-20070 Is it a clearance issue? Or the height of the ball joint when fitted?
-
Any chance I can get in on this too?
-
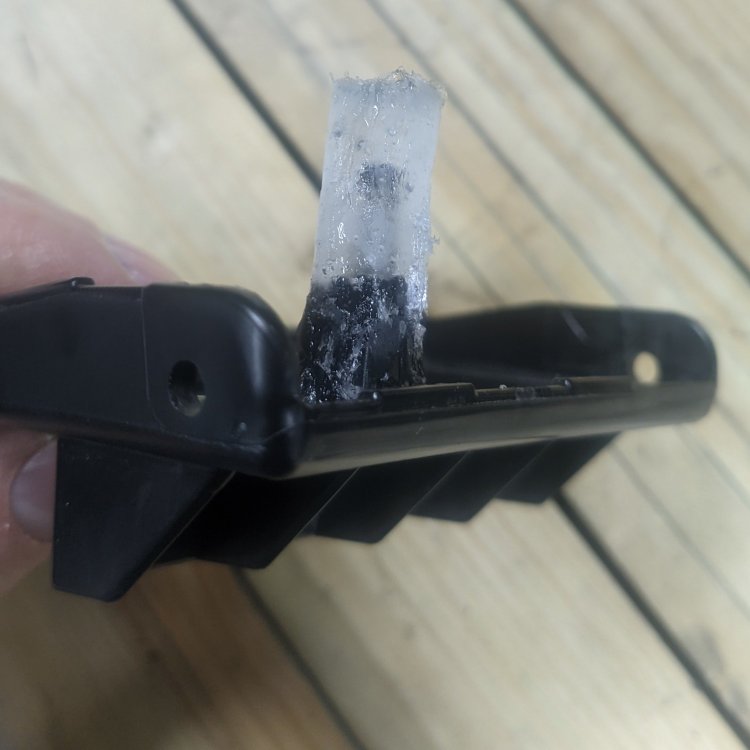
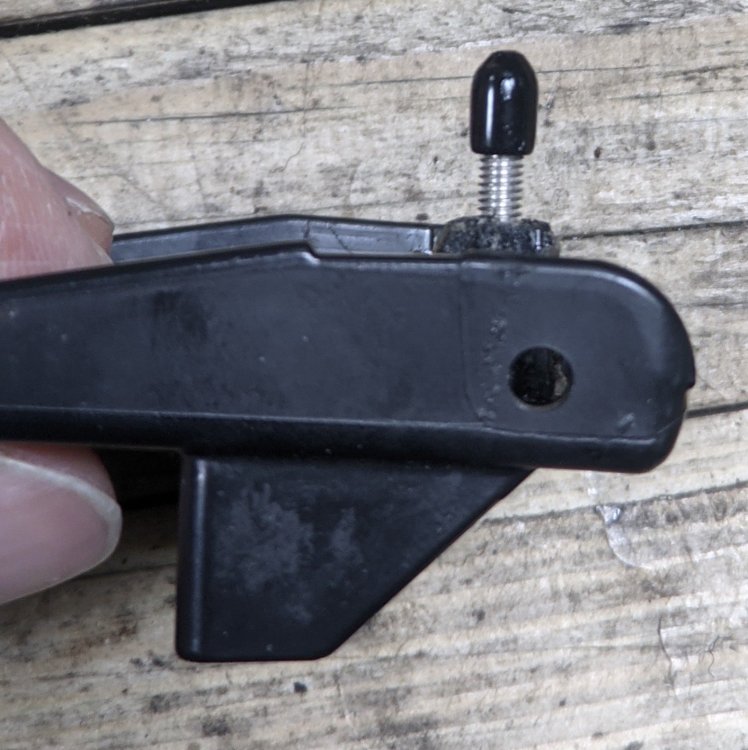
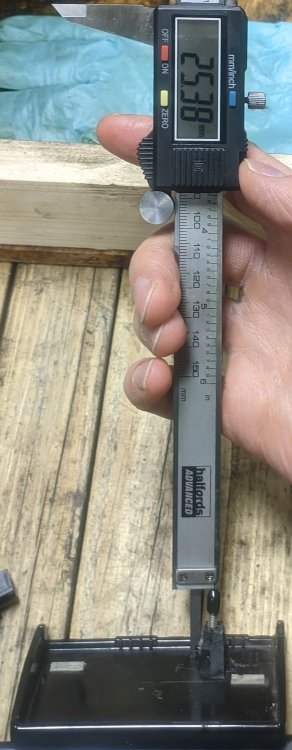
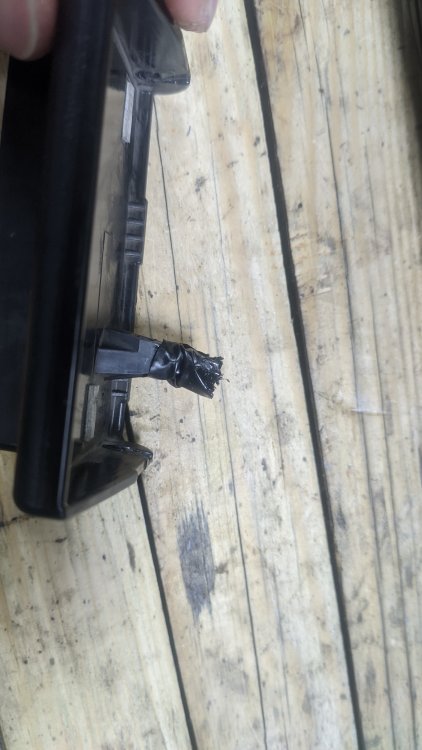
So judging by what broke I think the fragile point is not sliding the tray hard but maybe putting too much force to actuate the handle. I tried to fix it a few times, the first I used some epoxy to make a bit of a bulky "arm" and then file it down to size. This is too tall and too wide in this picture. In the end the epoxy didn't set and it broke - it looks like pulling too hard on the handle puts a lot of stress into the mechanism and might be what causes it to fail. In the end I replaced the previous "fix" bolt with a slightly thicker one that I screwed all the way in - so that it would fit this little silicone cap (to avoid damaging the inner handle mechanism where it slides. I then greased it up with multipurpose grease. So far it seems to work - I put just the handle back on the tray to test. In the future if I find the handle actuation starting to feel a bit vague I will open this up again before it breaks. This is the height I had it working at I think this can be improved by using an end cap with a bit of a wider profile, but this is what I had on hand.
-
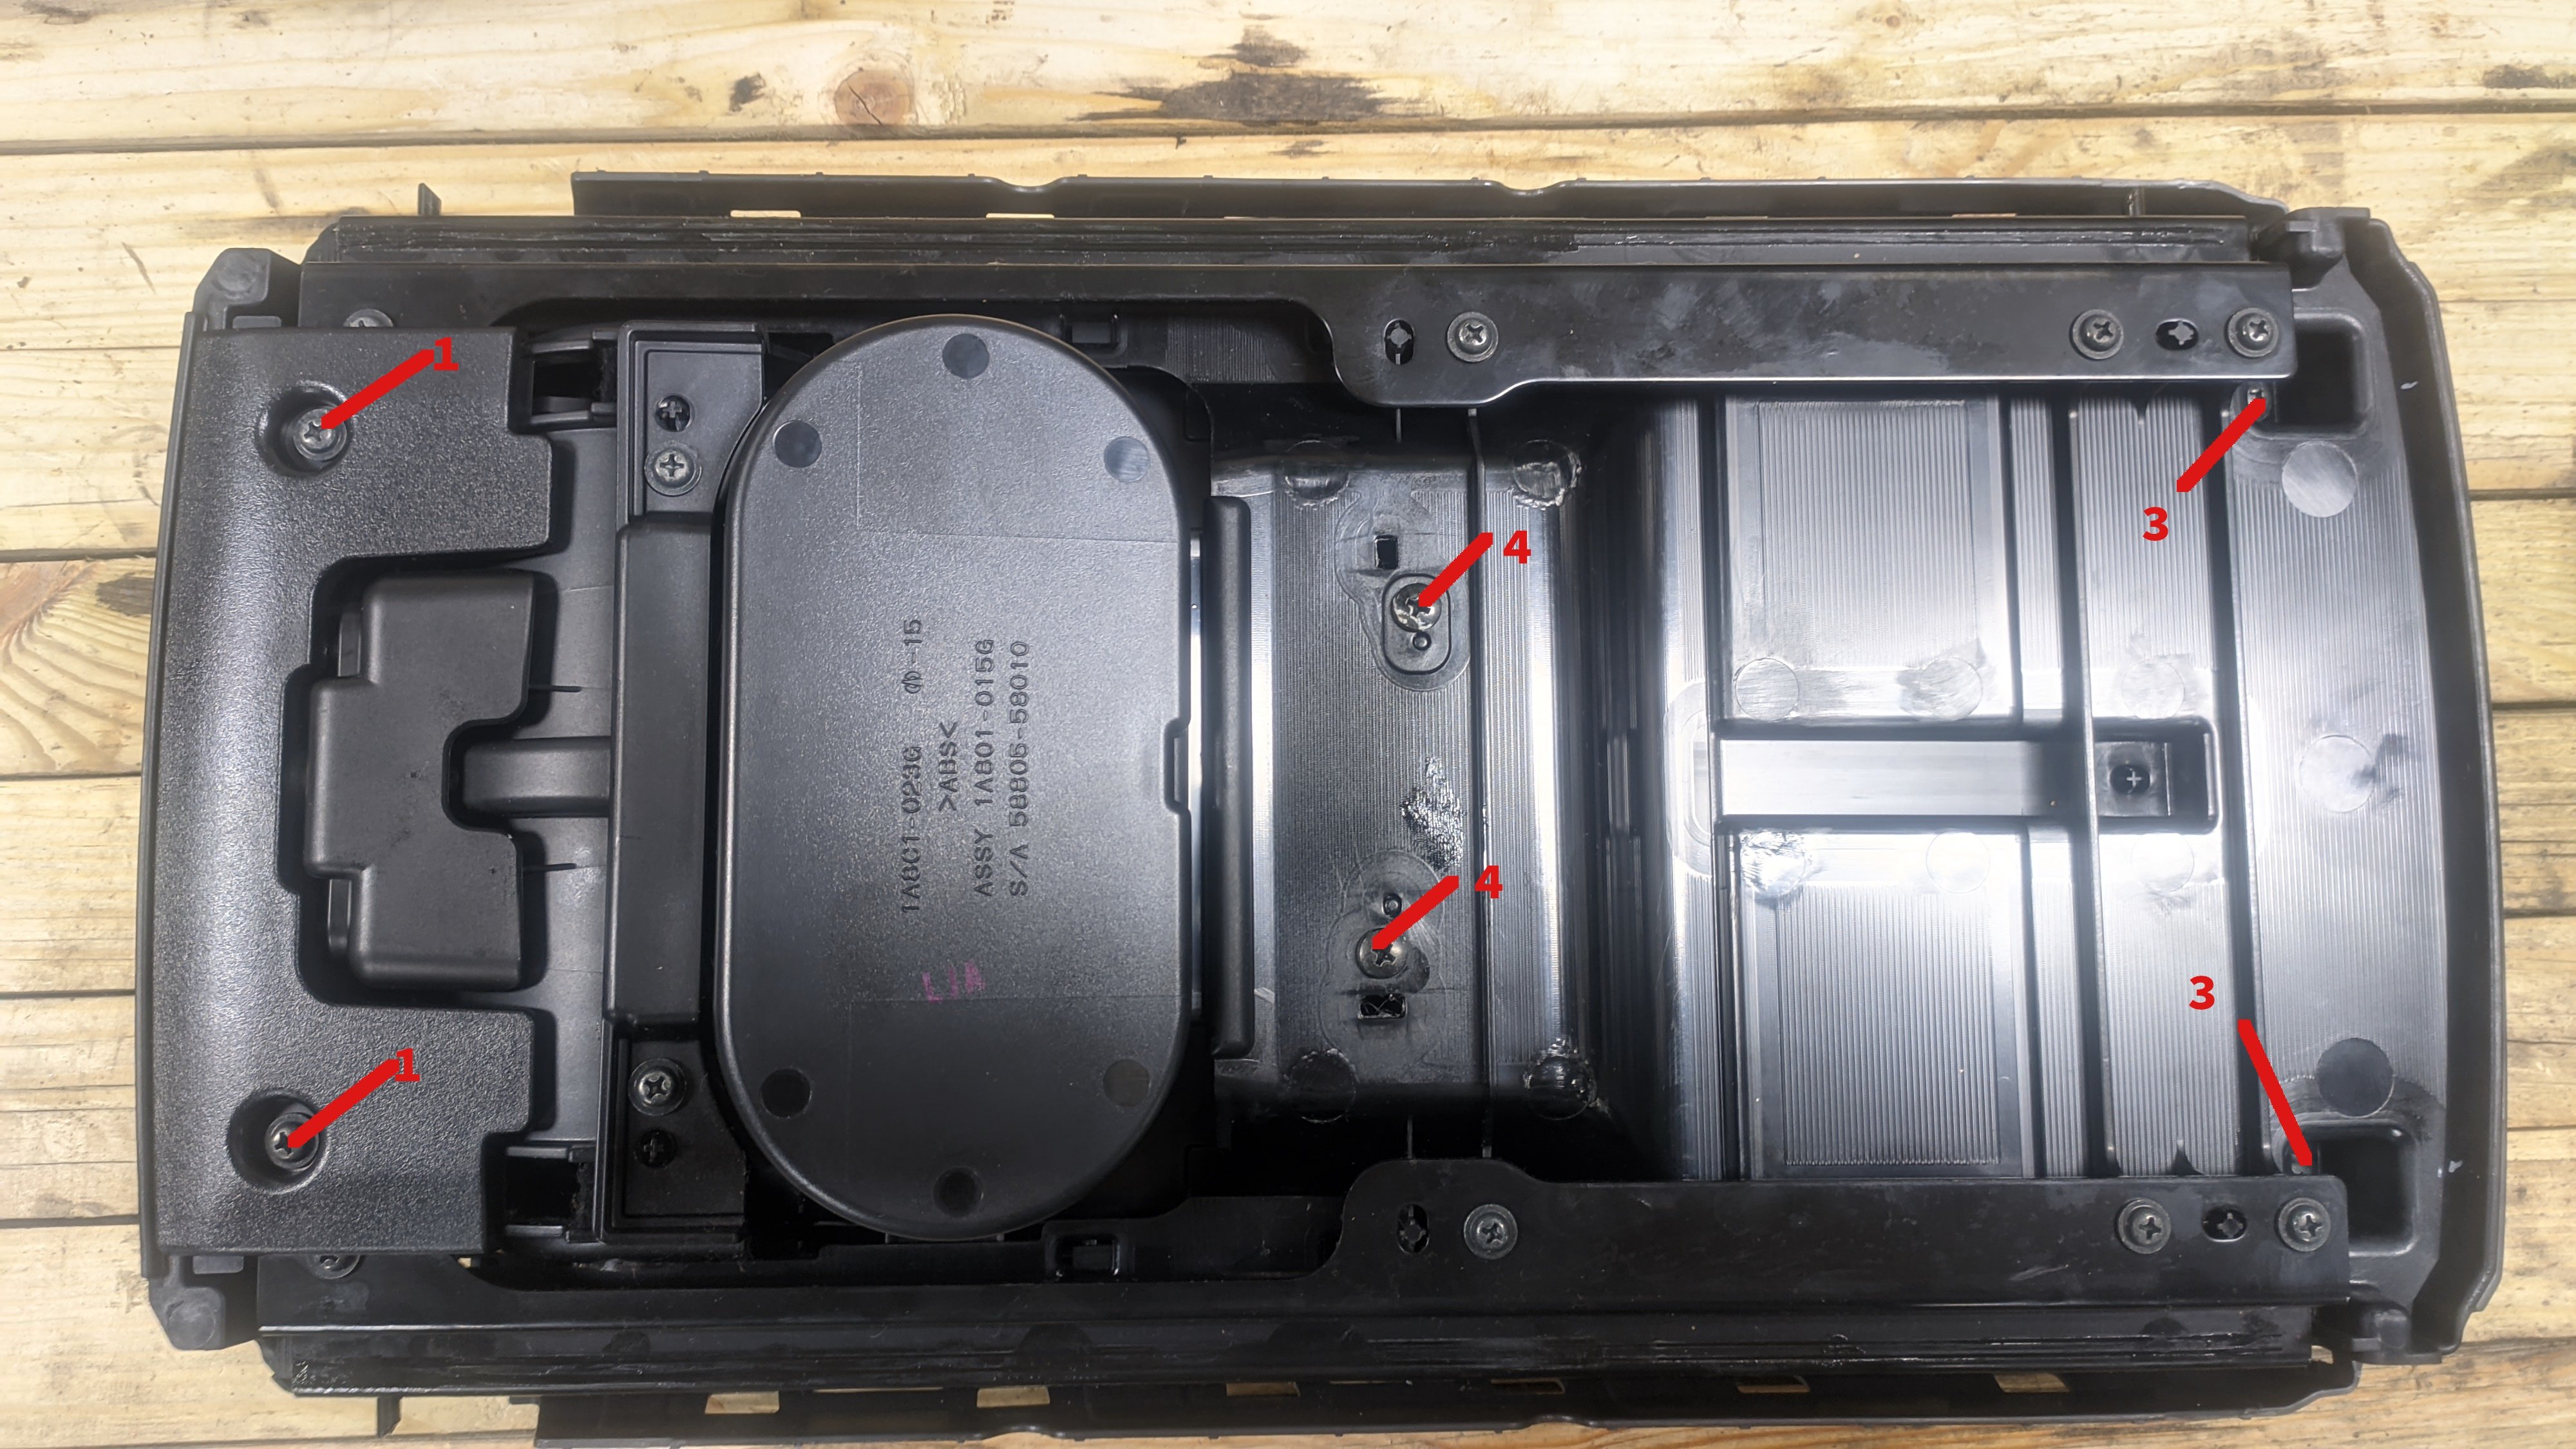
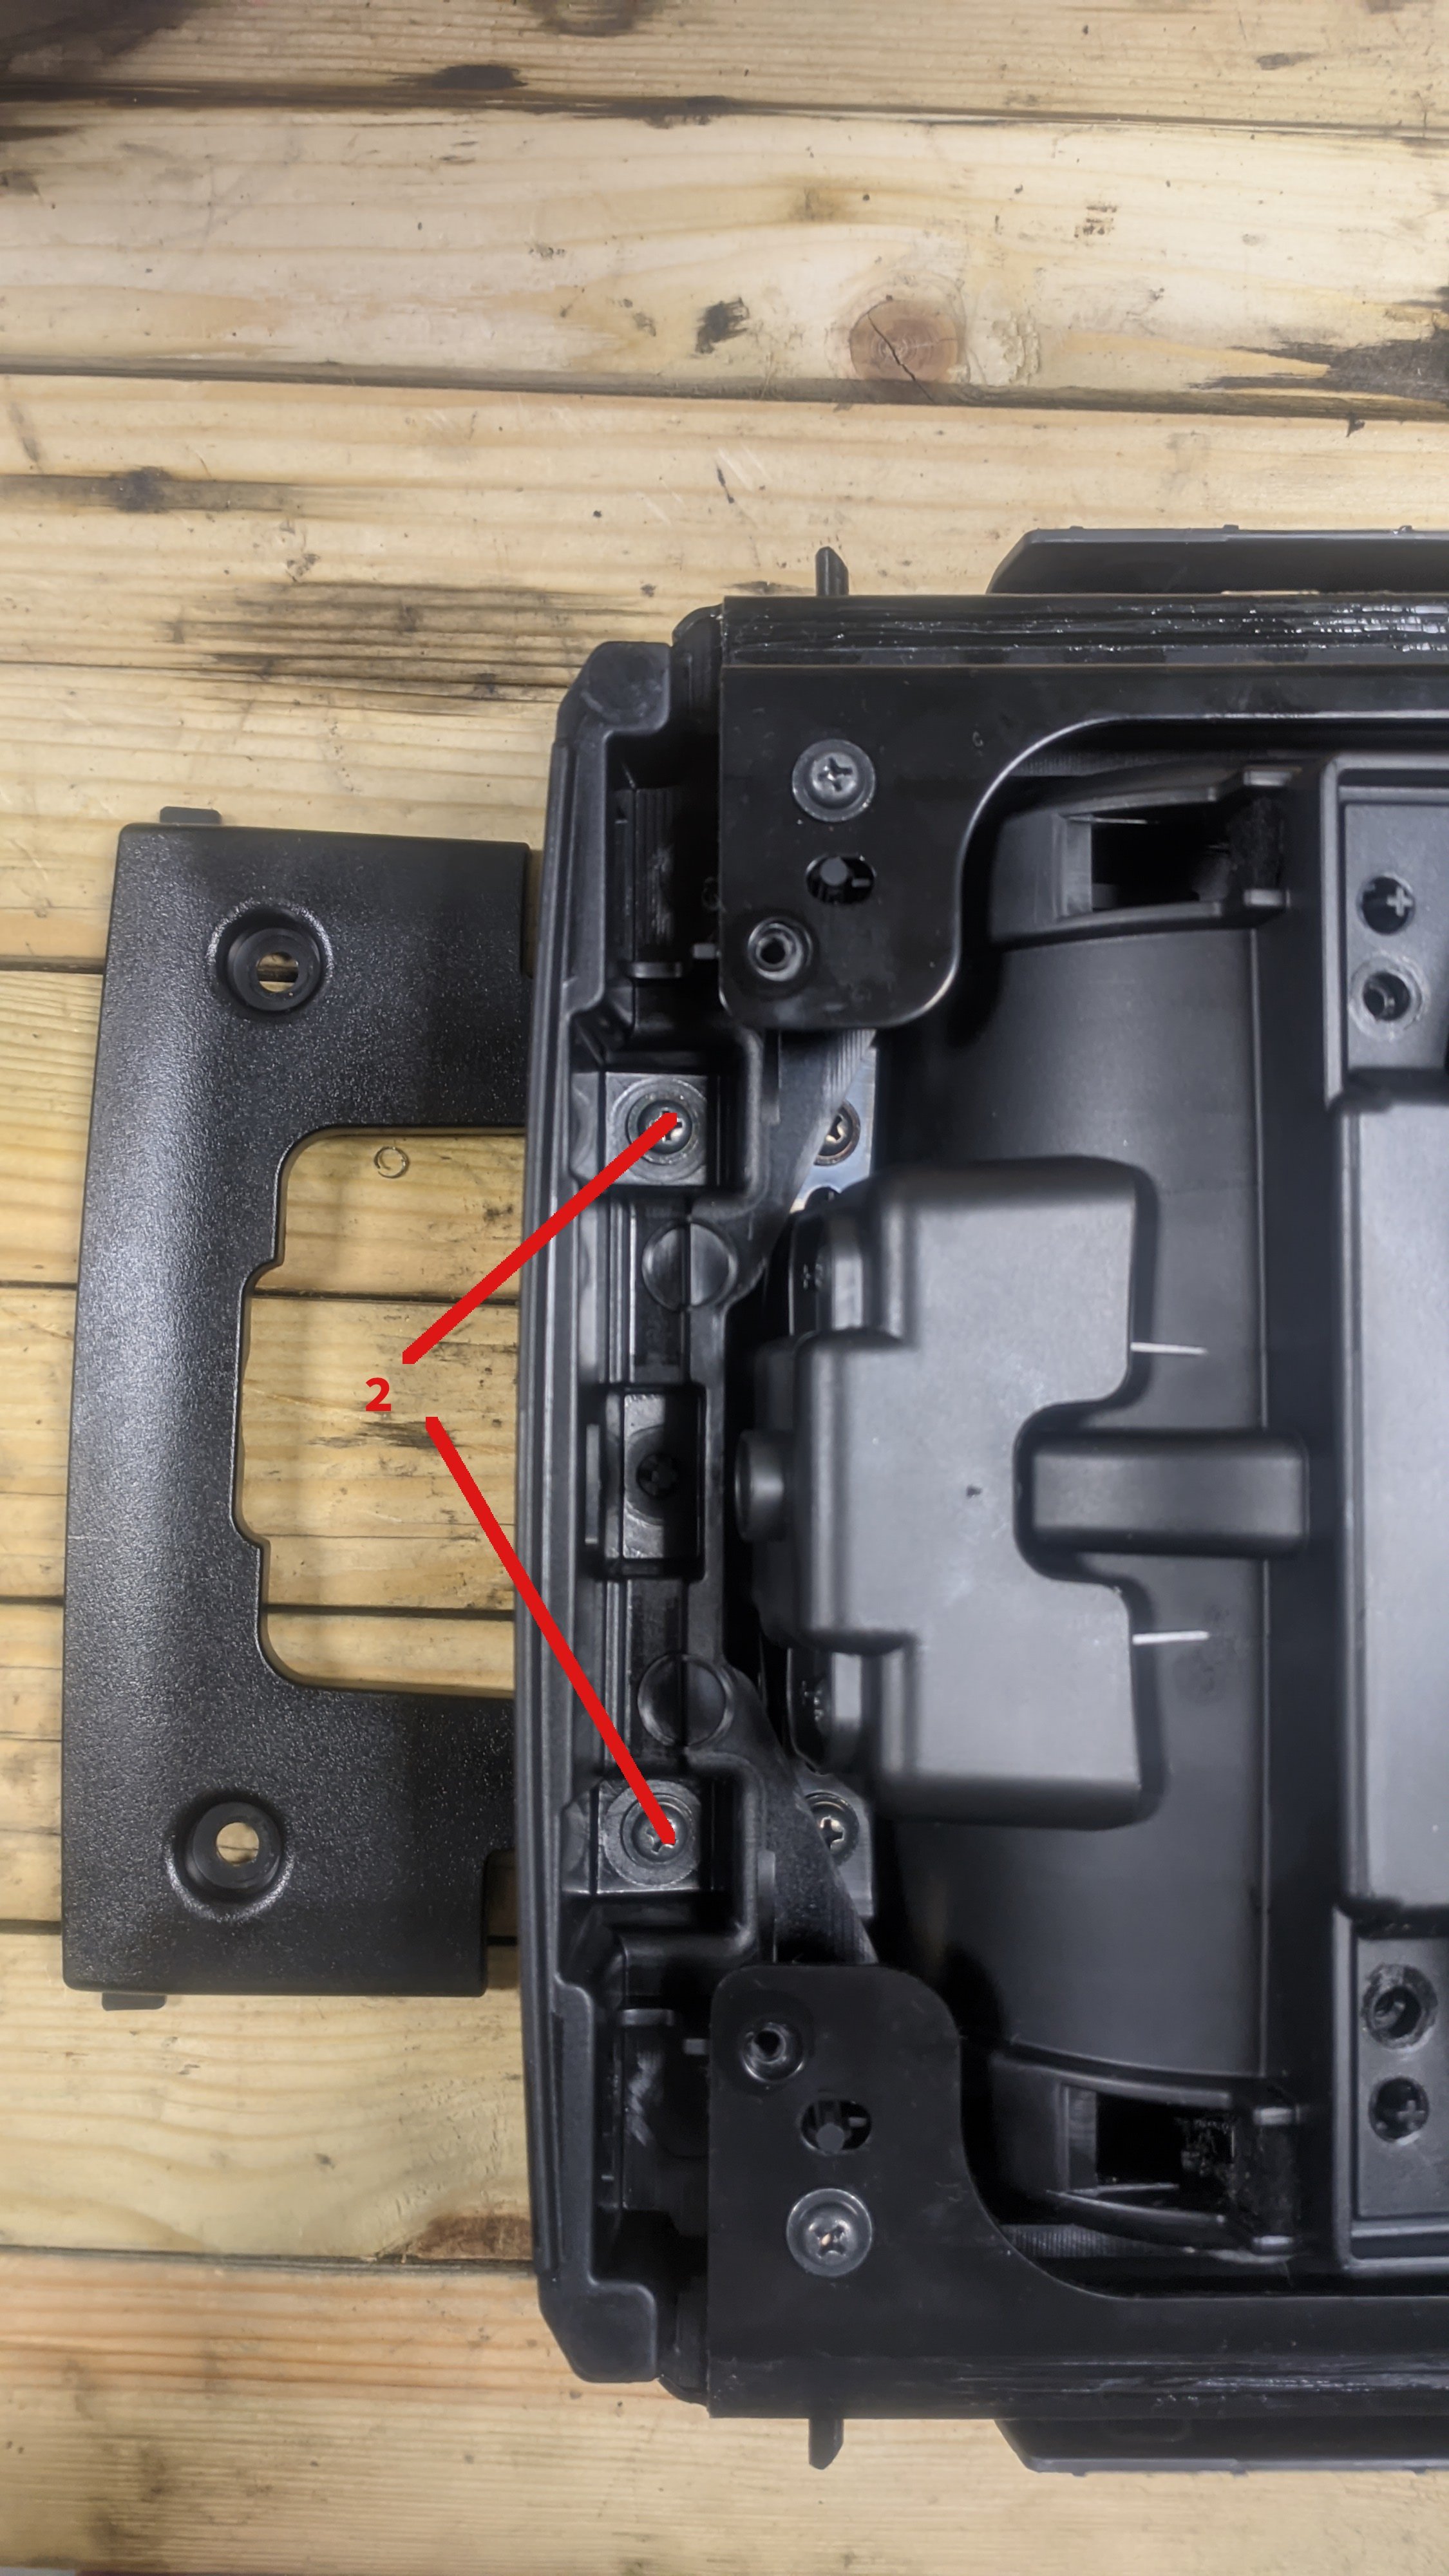
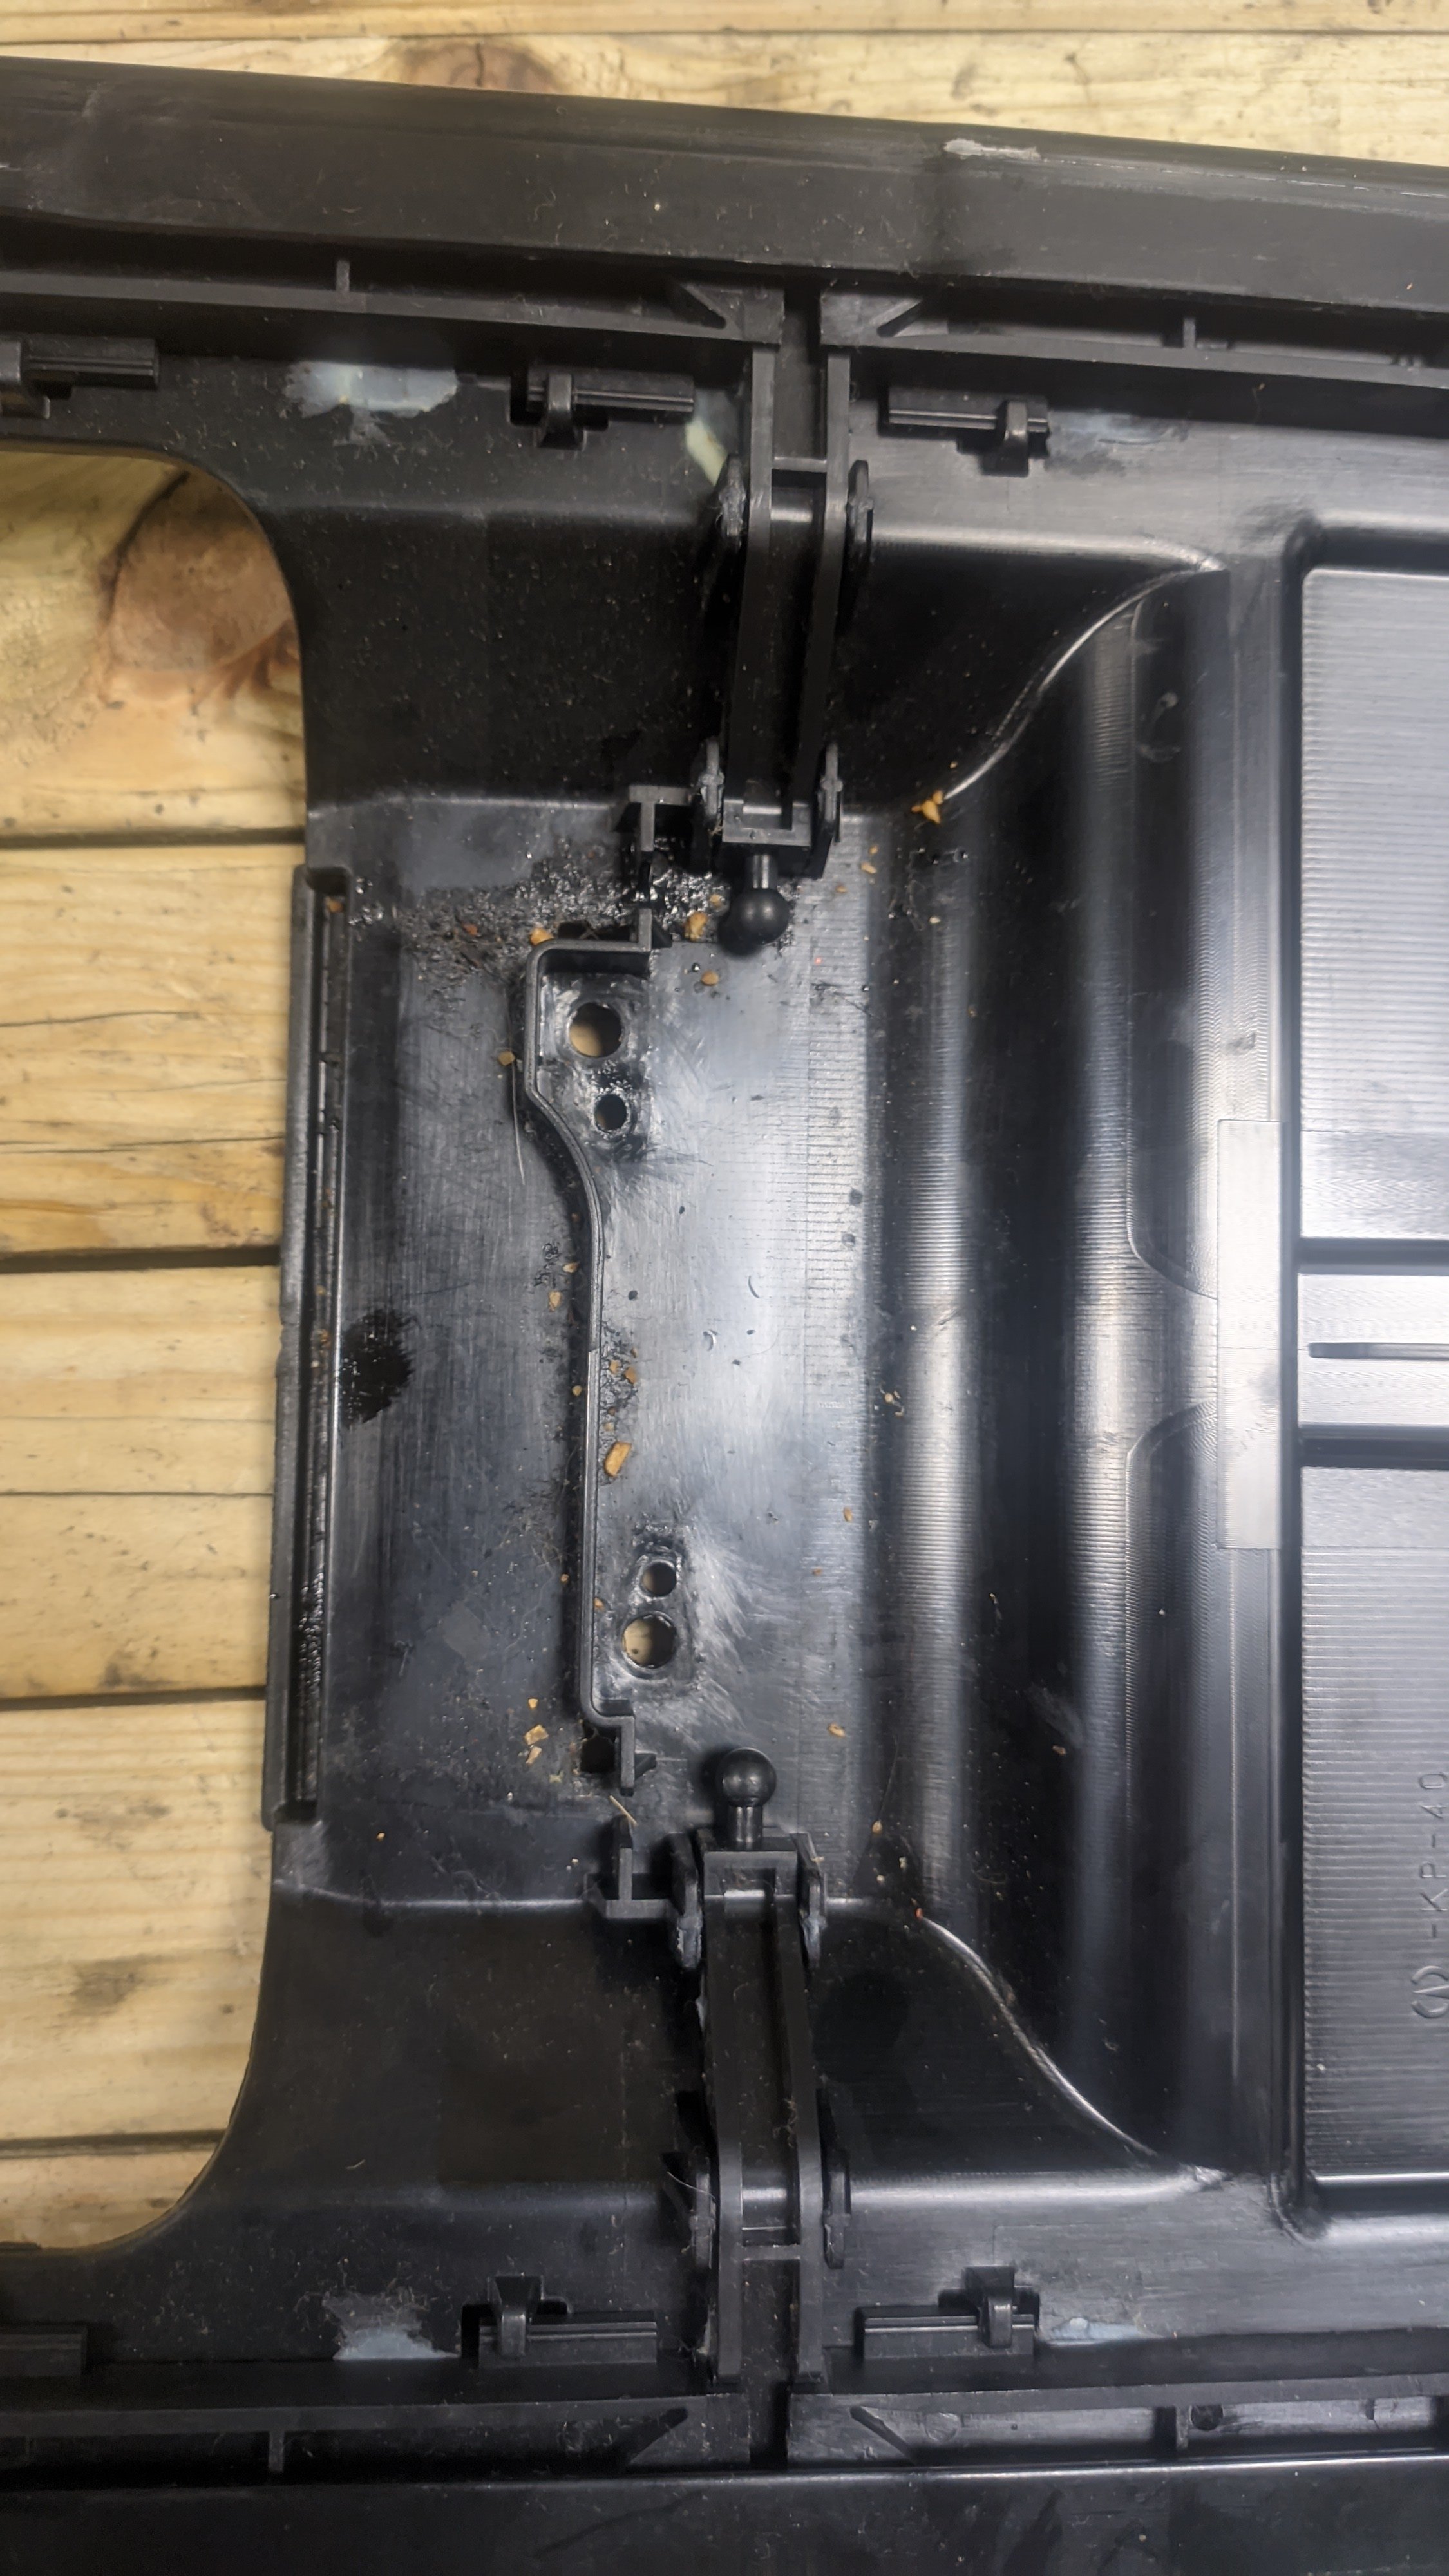
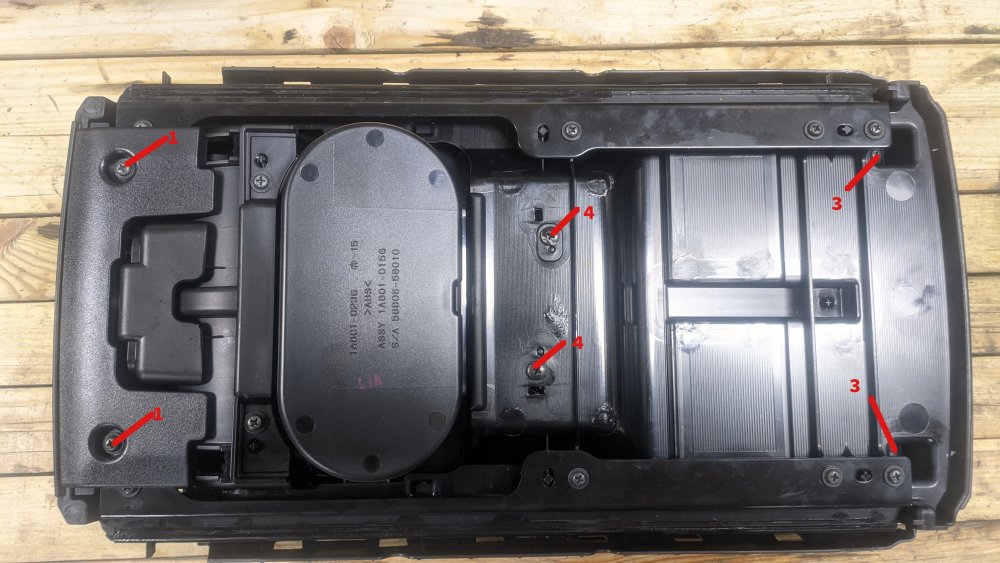
So, I have finally managed to defeat my laziness long enough to post a follow up. # Disassembly 1. These screws hold a plate that cover the front tray screws. I would probably remove them first. 2. Front tray screws. 3. Rear tray screws - its not obvious in my photo but you should already have access to them. 4. These hold the handle in place; depending on what's broken you may not need to remove these. I did. Interestingly these are normal Phillips screws not JIS. # Handle Mechanism 1. You'll need to remove screws (4) to be able to remove the handle. It pulls on two arms that clip in via ball joints - so hold these one at a time as you pull the handle mechanism off. It looks like life's filth likes to gather here. I cleaned this up reassembling and applied some general purpose grease to all sliding parts. 2. Take the handle mechanism apart from the bottom. As you can see, my one has previously broken before and someone tried to fix it. The arm with electrical tape fits into the bottom part of the mechanism and moves to pull the ball-joint arms _in_ to open the tray locks.


-
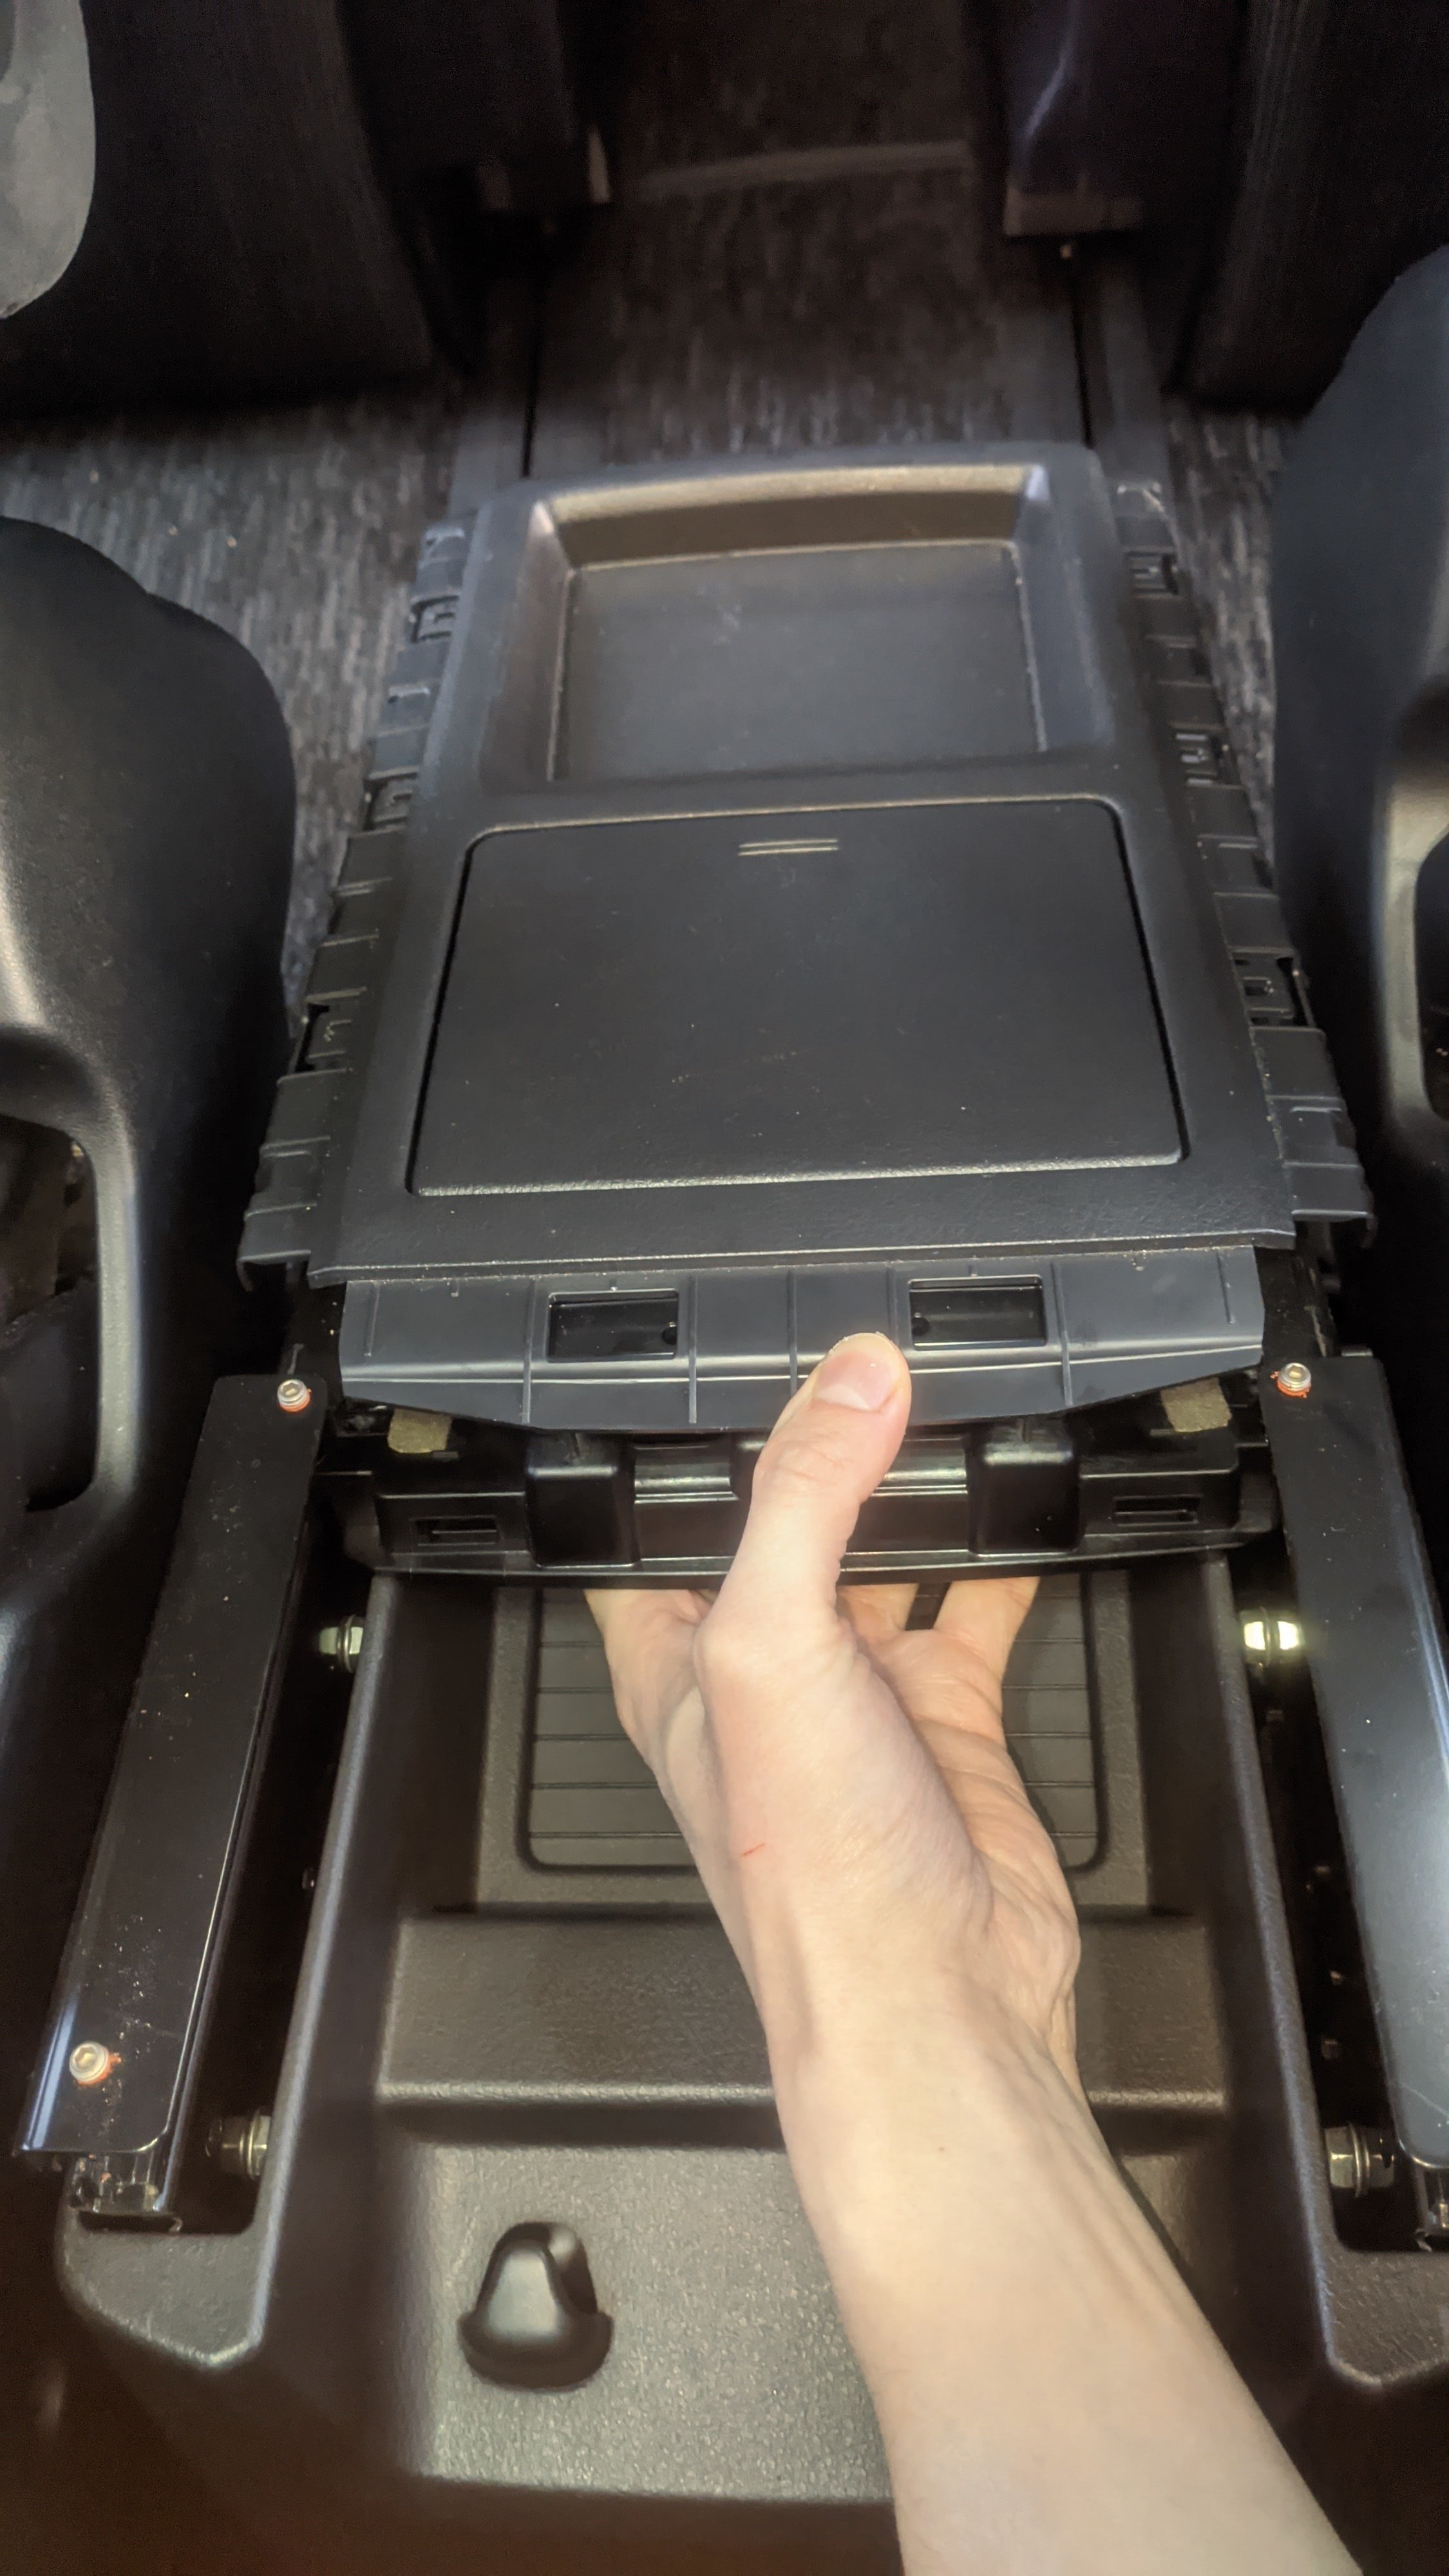
Hey @Kona Hyun I'm in the same situation as you, basically the mechanism inside is broken (apparently this can happen if it slid close with too much force); here's how to take the top part of the box off (I'll try and take some pictures as I attempt to fix the mechanism tonight): 1/ You will need to take the sides and the front plastic covers off. They are held on with double sided sticky take *and* plastic tabs; be careful not to break them off like I did. 2/ When the top lid is in the closed position, it's held on to the rails with two pins at the front. These have little tabs that you can push in on both sides with your fingers to open. *SLIDE BACKWARDS* 3/ Keep pushing the tabs in to open the latch and *slide backwards* the top tray, it will come free off the rails this way. If you slide forwards the mechanism will lock on similar pins but at the back of the enclosure with aren't accessible. The top tray is held together by screws from the bottom, you will need to disassemble this way to get access to the mechanism to fix it.