
Coog
Members
-
Joined
-
Last visited
-
On the 3.5 you need to remove the sump bung at a certain temperature. There's a built in level which is like a straw. You top up until it pours out of the sump. Not exactly straight forward as temperature needs to be within a certain range. Might as well just go ahead and change the fluid while you're doing it.
-
Few things to think about with them. Access to buckle with child seats is difficult. They don't / can't fold completely flat with the arm rests sticking out and the capitains seats dont really fold up. In saying that I don't find them too difficult to use with a couple of youngish kids and any adults I've taken have thought they were brilliant.
-
It's only once to confirm the gauge is faulty. The pick up is at the bottom of the tank anyway. If there's dirt in there, it'll be getting sucked up regardless.
-
I would suggest a faulty gauge, a stuck or leaking float or damaged mechanism in tank. You could throw a jerry can of fuel in the boot and run it on the red light to know for certain.
-
-
I fitted these mats to my AH20. https://www.amazon.co.uk/gp/product/B07YR6Y4BM/ref=ppx_yo_dt_b_search_asin_title?ie=UTF8&th=1 They're not tailored (I couldn't find any reasonably priced tailored mats) but with 5 minutes of trimming and tucking, they fit very well. The front's haven't moved. I am pretty fussy and crap mats that roll up or move about are a bugbear of mine but these are OK to be honest. The rear ones don't really work, unfortunately. Hope this helps.
-
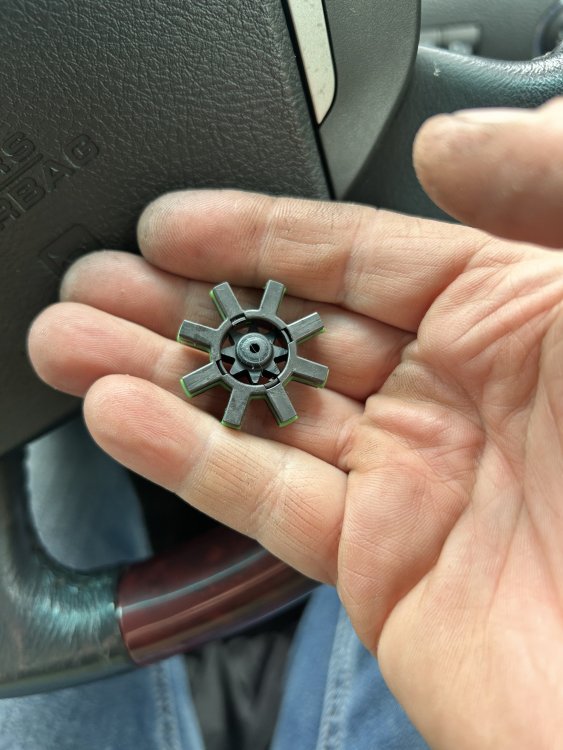
Quite an amazing difference for such a small / cheap part. Glad to see you got it sorted
-
Sorry, no Haynes that I know of.
-
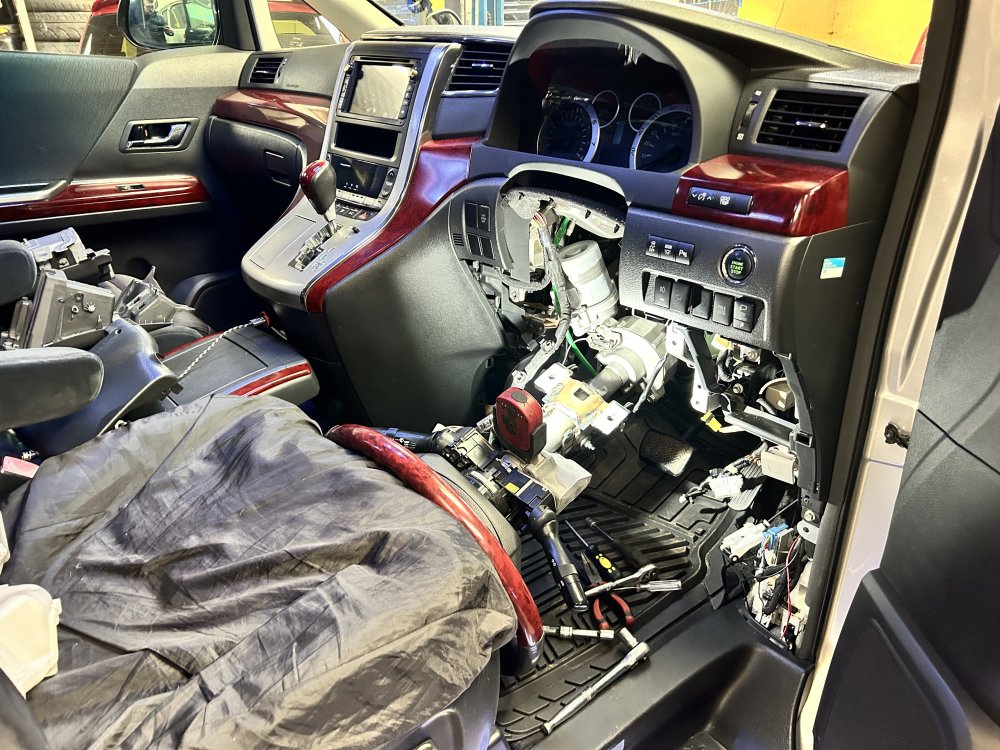
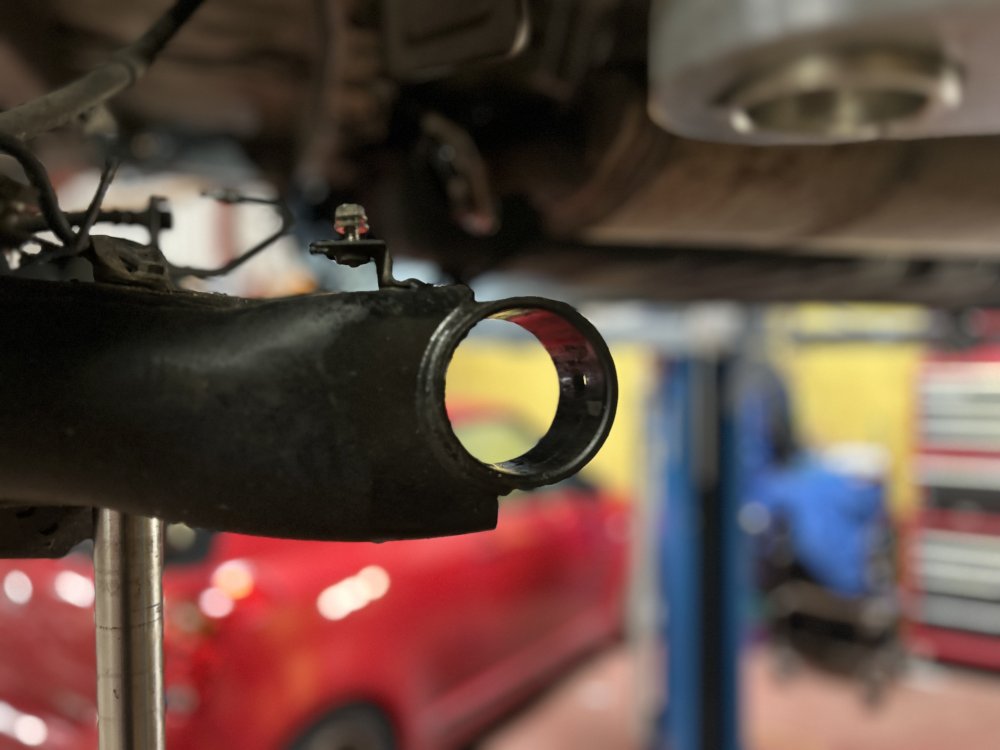
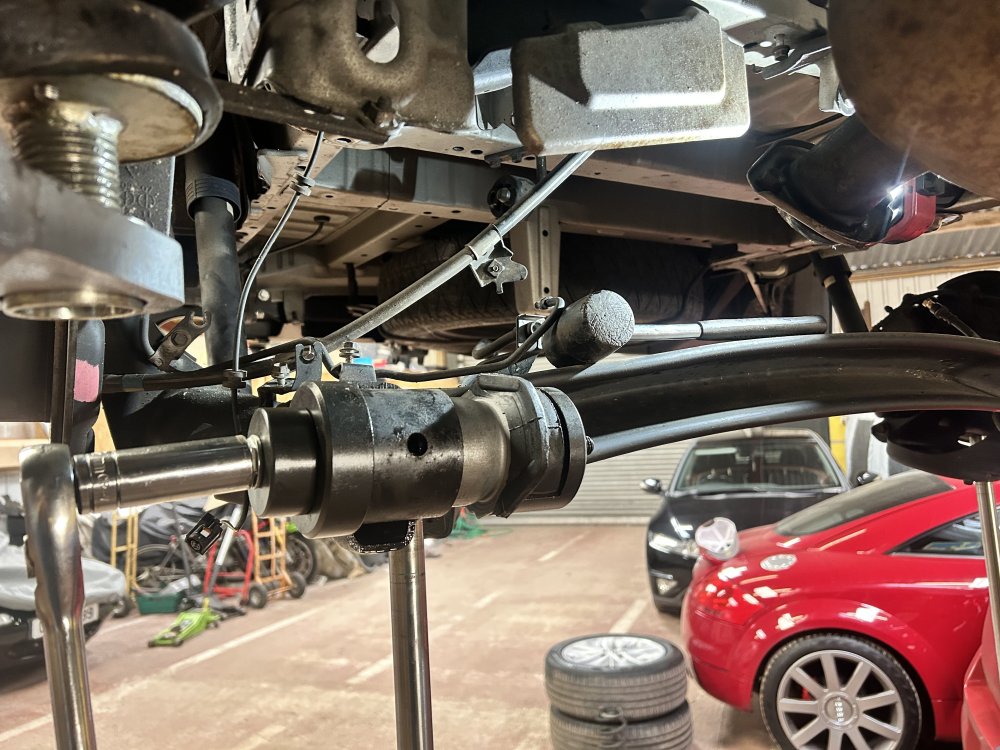
Yes start to finish. It's not a very complicated job despite the photo. I believe only three bolts hold the column up, two for the PAS motor and around half dozen to get panels and airbag off. A 2/5 on the Haynes difficulty scale 😀
-
Yes or thereabouts, possibly less. It's a very straightforward job.
-
Took me around an hour yesterday. Replaced the anti roll bar bushes and droplinks at the same time and all the rattling is now gone. I also had a slight wobble through the steering at low speeds which is also gone. The old bush didn’t look too bad to me but while I was in there I replaced it anyway. It’s an easy enough job. Hardest part is lining everything up for reassembly.
-
-
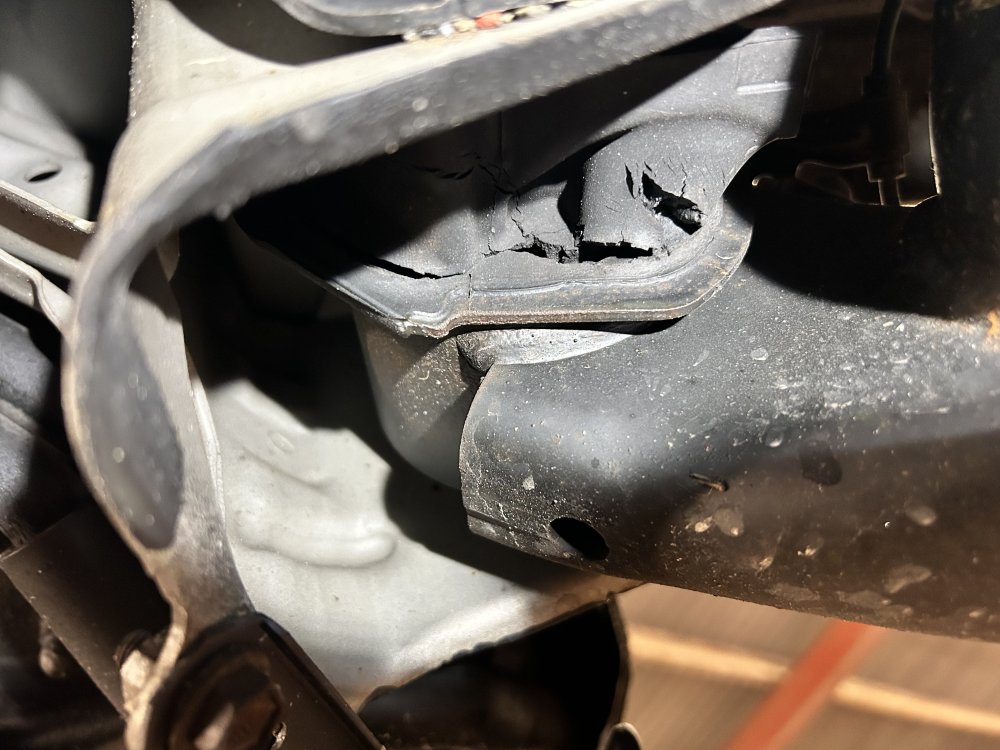
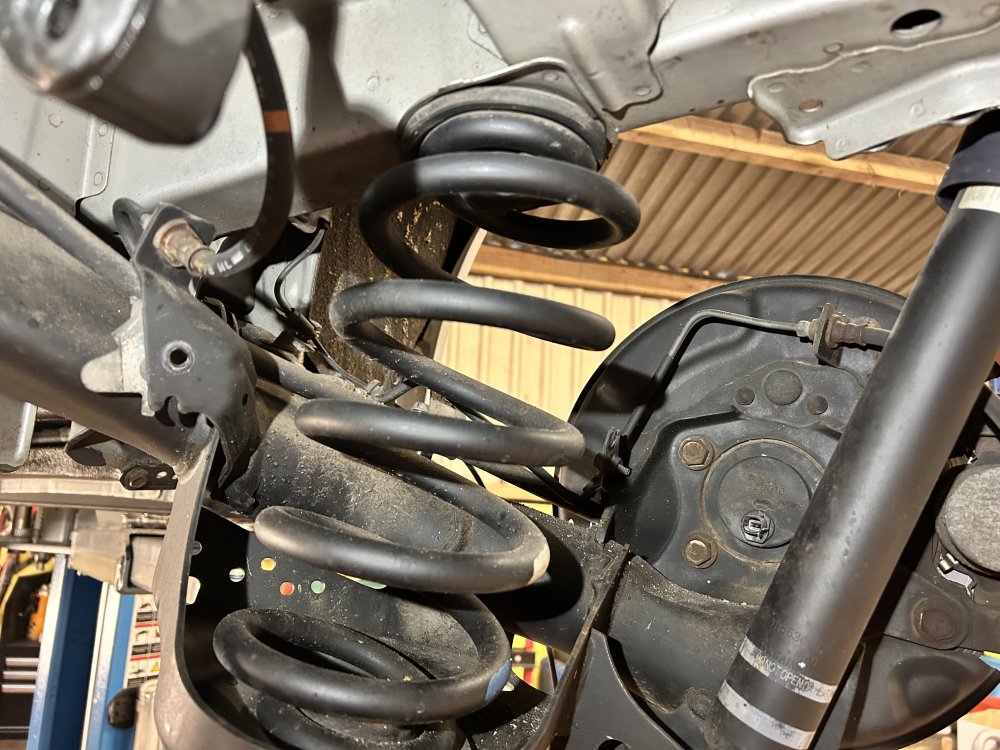
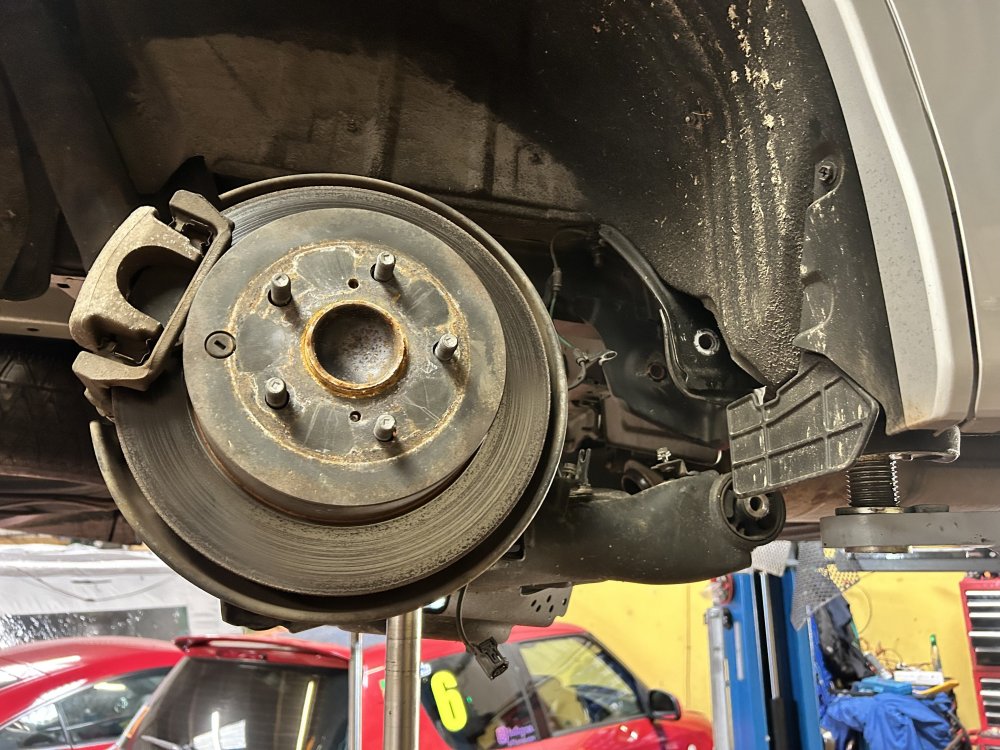
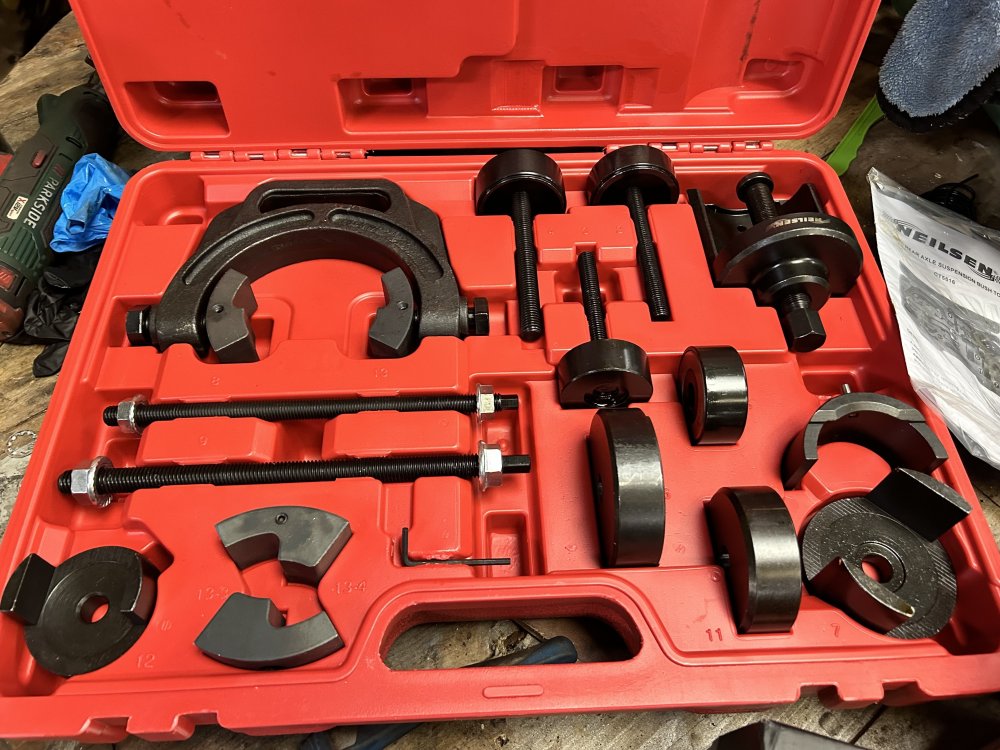
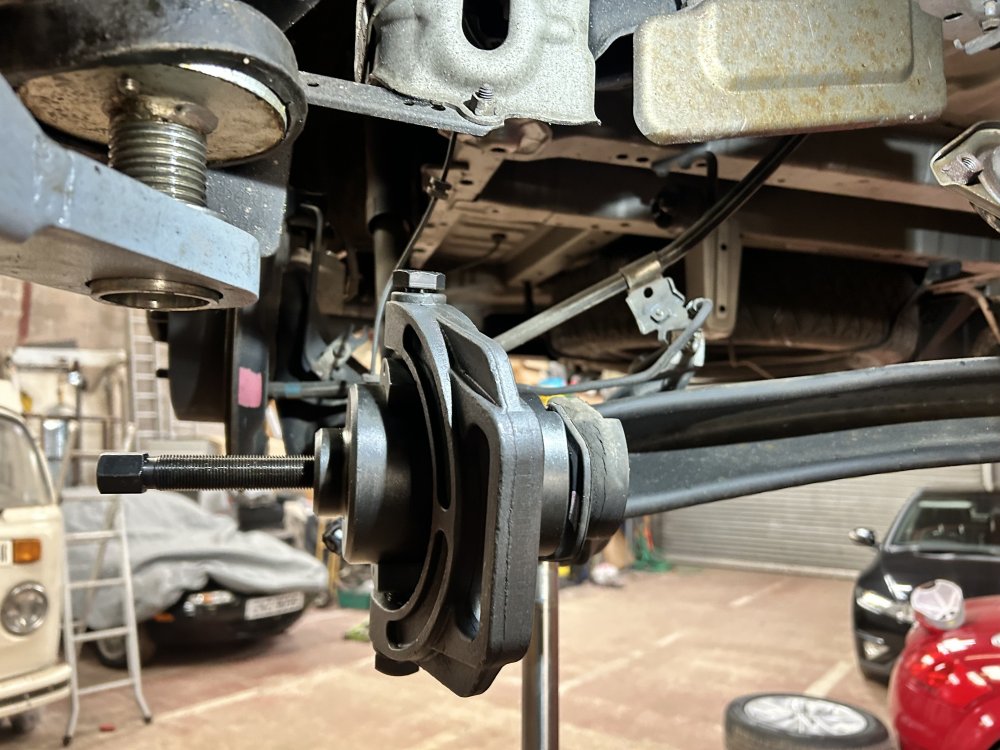
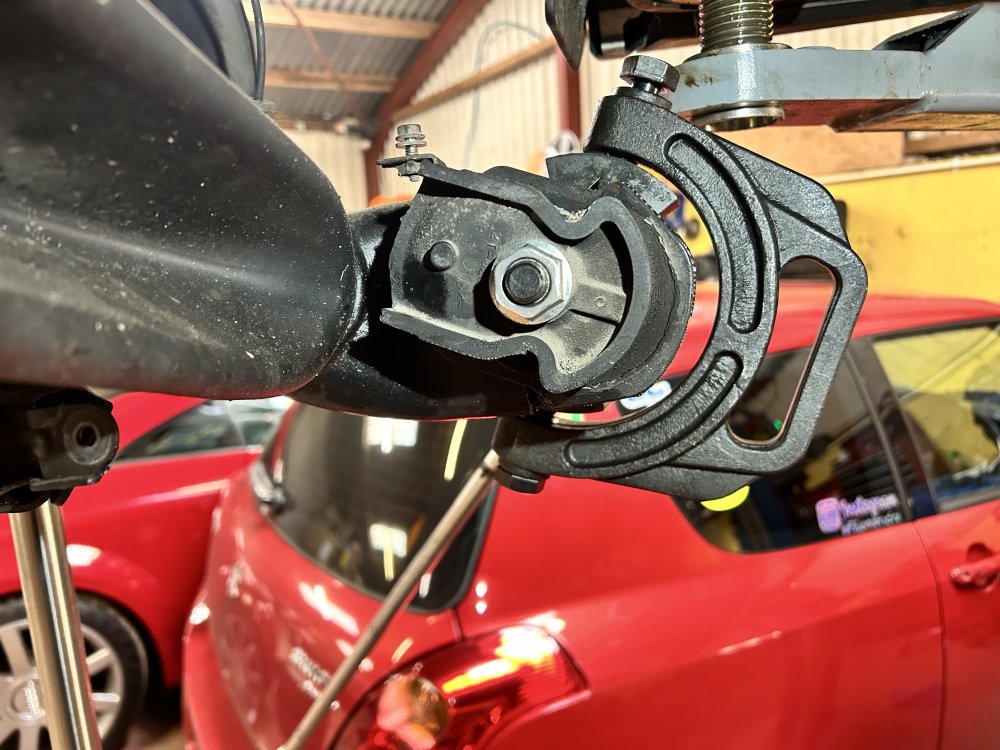
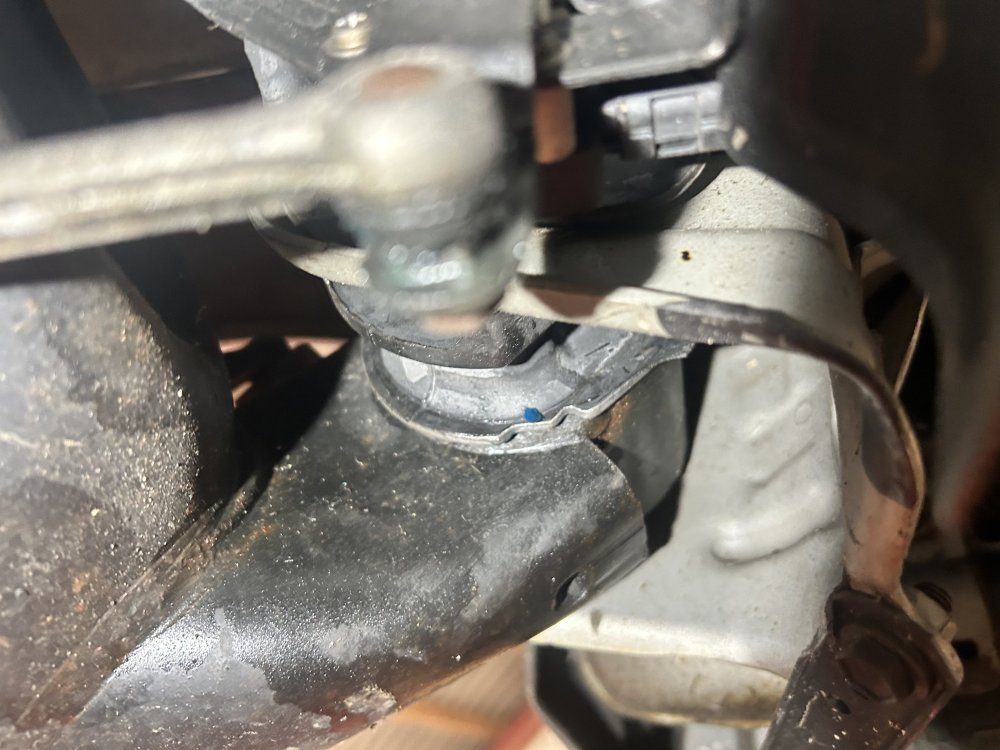
I'll start this by saying I'm not a mechanic (I'm actually an accountant). I do have my own lift but would be more of a tinkerer than anything, so my techniques may not be best practice, but it got the job done. One other word of advice is that even though these were not clunking, nor even mentioned on a recent MOT I decided to go ahead and replace now BEFORE corrosion had a chance to take hold. As a result, using the right tools, this job took me, a novice, just over 3 hours. The offending bush: First job after removing wheels and getting the vehicle in the air is to unplug wheel speed sensor in the rear hubs. Loosen & remove 10mm brake unions both sides. There are four in total, however I only needed to remove three. The drivers side handbrake cable routes under a hardline which is bolted to the axle. When you swing the axle down the axle will effectively hang on the brake cable held up by the hardline, so undo this now to stop this from happening. I plugged all lines to stop fluid running everywhere. Unbolt handbrake cables and wheel speed bracketry on rear axle. Remove level sensor on rear axle, passenger side Double check you've nothing else bolted to the axle that would prevent it from swinging down. Next job is to unbolt the bottom bolt of the rear shock. Take the weight off the axle, remove bottom bolts both sides and this will allow the full assembly to rotate down. Caution: It's heavy!! Rotate enough to allow you to remove rear springs. Remove springs and set aside and then raise the axle back up and loosely bolt the shocks back in. At this stage you could, if you wanted, take the handbrake cables off altogether and remove the entire axle. It's unnecessary in my opinion but bushes might be easier removed that way. Next is to remove the bolts for the rear bushes. Once loose both sides the axle will want to fall down so ensure it is supported and lower it gently taking care that you haven't missed any connected pipes / wires / hoses, etc Once it's lowered enough you have access to the bush. I used a Nielsen tool for this job. It wasn't explicitly advertised as fitting an Alphard but turns out the leaflet in the box confirms it'll work. Neilsen CT5516 is the kit you want. Attach tool to bush, clamp and turn the bush out. It's hard work but the tool did the job. Remember to note orientation of original bush! And with some effort the old bush is removed At this point I cleaned the inner surface of the axle with a little steel wool and then applied a smear of corrosion resistant marine grease. Then, using the same tool, press the new bush in And in. Building back up, is, as they say the reversal of disassembly bar the exception of bleeding the brakes. A good chance to renew the fluid. I also ended up replacing discs and pads. I hope this helps someone. It's not a particularly difficult job with the right tools (and a lift). I would feel confident tackling this on the driveway provided I was able to get the vehicle high enough in the air. My axle bush tool will be for sale soon if anyone's looking one. Ideally we could have a group rental set-up but I don't know how to organise that. Craig


-
Hi Pete, Looks straightforward to me. I've just ordered the parts as I have a rattle as well and I think it's the damper. Apparently if you don't sort it timely it can cause a more significant failure with the column. TC's anything goes has a tutorial on Youtube. I plan to follow it and replace mine in a week or so. Will report back when I do.
-
Thanks Rojie - I've put a deposit down on a 3.5 V6 a few days ago and hope to collect it next week. I am fortunate enough to have my own workshop with a lift so can install the towbar myself and can service the U660E gearbox at the same time in order to keep things reliable.


