


Alphard Club
-
Posts
530 -
Joined
-
Last visited
-
Days Won
106
Content Type
Profiles
Forums
Store
Gallery
Events
Alphard Videos
Guides
Posts posted by Alphard Club
-
-
Before the winter comes I would recommend it. During summer is not an issue.
Either Waxoyl or Dinitrol are good.
What i did with mine was give it a good power wash underneath to make sure it was all clean and bone dry.Should be around £300-400
-
On 5/30/2018 at 6:06 PM, alextovey said:
Direct Line
Not bad pricing either.
I have heard good things about Direct Line, The only issue is not all phone operators can find the car in their lists for some reason. But they definitely deal with Alphards
-
 2
2
-
-
I believe there are 2. As its a v6 there will be 2 x outlet manifolds.
Trevor will be along soon to confirm.
-
HI Mate.. It's very new forum. Please bear with us.
-
Not cheap though.
-
Xtrons are a popular kit with Alphards. Also Pioneer. You can get looms from Halfords. If you have a theatre system then a Beat-Sonic kit
Beat-Sonic full kit is the following
SLX-130 - Main adapter
CS3EP - Front and Rear camera adapter
BC12 - Reverse camera loom
BC1 - Reverse camera adapter
AVC-1 - Rear screen adapter/connectorNot the cheapest, but will restore cameras too.
-
1
-
-
-
better to be safe than sorry when it comes to belts etc. First thing i did when i got mine.
Undersealing the Alphard is also a good idea.
-
1
-
-
Paul MCKeown is highly recommended, I have seen many happy owners buy from Paul and I think he is probably the best in the business. He strives for the best and ensures the car is legit and provides full documentation with every car sale.
Also, you can see selection he has recently purchased online and purchase to order.
You can also order LPG conversions too. Nice chap to deal with.
-
Here are a list of Insurance companies known to provide insurance for the Toyota Alphard. These are in no particular order and may vary from car to car.
There may also be a chance that the advisor you talk to does not know anything about the Alphard, and you will need to ask them to talk to someone who knows. The list below has Alphards have insured Alphard's before.
Adrian Flux Insurance (also specialise in Imports and cherished cars)
0800 5876 331--------------------------------------
Advance Insurance
01249461665--------------------------------------
Liverpool Victoria
0800 202 8460--------------------------------------
Admiral Insurance
0333 220 2085--------------------------------------
A-Plan Insurance (Thatcham)
01635 874 646
This is a local branch, possibly will deal with anyone over the phone. Have been know to insure Alphard's. Probably find your local A-Plan can also assist.--------------------------------------
Mark Richard (Jap Cover)
Japanese Imported Cars
01275 792 270
Japcover.co.uk--------------------------------------
Crowthorne Insurance Services Ltd
Import Car Insurance 08707 702933
www.crowthorne.co.uk/imported-car-insurance
--------------------------------------
Japanese Car Import Specialists
http://www.japcover.co.uk/home
01275 792270--------------------------------------
Lifesure Group
Japanese Import Car Insurance Specialists
01480 402460--------------------------------------
Sky Insurance
Japanese Car Insurance
03303 331250
(Could not quote Alphard)---------------------------------------
Keith Michaels PLC
Japanese Import Car Insurance
0800 542 2141---------------------------------------
AJ Insurance Service
Import Insurance
0844 880 6708If you have been insurance by another insurance company no listed above, (including campers) then comment below the company and phone number.
Spammy Insurance co's beware, we remove spam.-
1
-
 1
1
-
-
I spotted this video from Eco Campers on Youtube. Looks a nice design for a side kitchen and love the way they utilise the second side door so you can cook outside instead of smelling up the inside.
-
1
-
-
Update
I Contacted Toyota GB with an email explaining my car was due for a recall in Japan, showing them the recall page and also providing screenshots of the page that had been translated.
Next day I received a call from Toyota customer services who took more details from me and then passed in on the legal and compliance dept. He did say it can take up to 12 weeks, but could be sooner.
It is best to be patient. I will keep an update on how it goes.
-
1
-
-
Over the years their were a few recalls to the Alphard. If you alphard has been in the country for a while or maybe even recently imported, it could be due for a recall.
The few recalls are as follows
1. 2010 - Problem status 2010 (Fuel Pump and Brake Fluid/Servo)
- Because the fuel pump electric wire in the fuel tank is hard to bend, the connection terminal part may slide when the pump mounting surface is greatly displaced by tank internal pressure change when opening the filler opening. Therefore, if you continue to use it as it is, the connection terminal part wears and heat is generated by energization, the terminal fitting force decreases and conduction failure occurs, the fuel pump stops, there is a possibility of engine being unable to start or to be stalled while running.
- In the brake master cylinder, lubrication evaluation with the brake fluid used in the market was insufficient, so even if the brake fluid conforms to the standards, if a brake fluid with a low polymer content is used, the rubber at the rear end of the cylinder There is a possibility that the seal part of the product will be lubricated and turned up. Therefore, if the brake fluid leaks from the seal part and the warning lamp lights up, if continuing to use as it is, in the worst case, the braking force may decrease.
2. Problem status 2014 ( Passenger Airbag)
In the inflator (inflator) for the passenger airbag, damage to the inflator container occurred during vehicle dismantling work. For this reason, although the cause is not known, in the same type inflator of the same year, the inflator container is broken when the airbag is deployed and it scatters, it may fire and the passenger may be injured, so all vehicles, preventive As a measure, we will exchange the inflator for good products.
3. Problem status 2015 (Passenger Airbag)
In the inflator (inflator) for the passenger airbag, as a result of investigating the items collected in the market, it was confirmed that the inflator container was defective in airtightness. Therefore, in the course of long-term use, moisture in the atmosphere may penetrate into the inflator, the gas generating agent may absorb moisture and may not develop properly when operating the airbag.You will need your VIN in the box, the parts in red are what you need to input from your own VIN
http://www.toyota.co.jp/recall-search/dc/result?FRAME_DIV=MNH10&FRAME_NO=0088734
Frame types are something like
MNH10
MNH 15
ANH10
ANH15
ATH10Frame numbers are 7 digits
The vehicle linked above is a vehicle that has had all the recalls done. Screenshot in english below
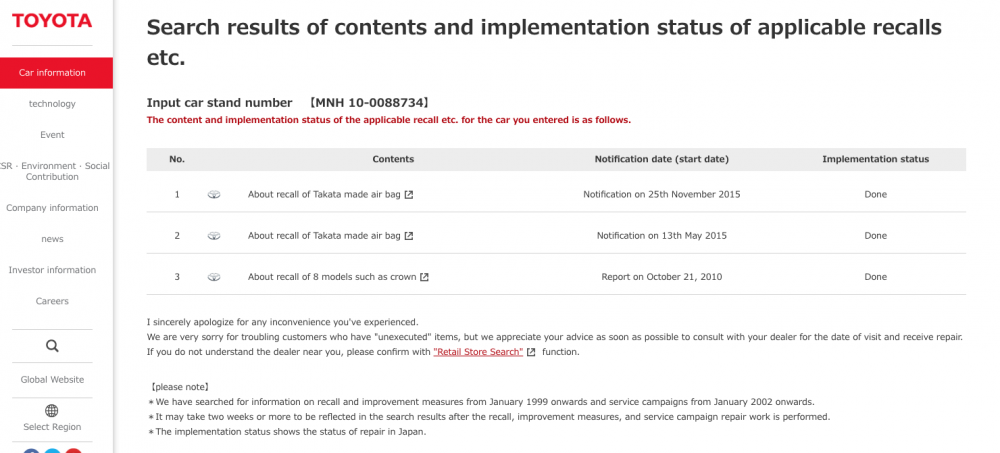
If you are using chrome you will be able to use translate button near the top of the browser window.
What if your Alphard is due a recall?
If your Alphard has something similar to the screenshot below then your car is due for a recall
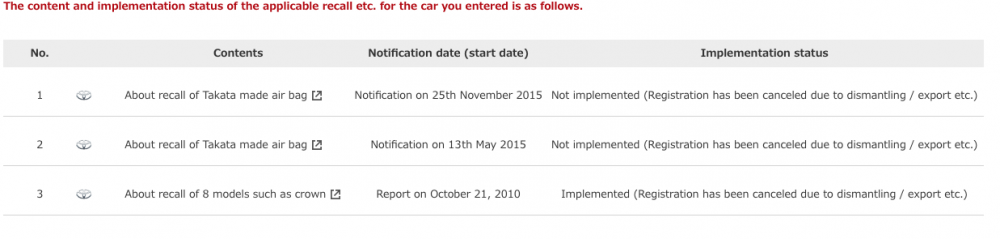
Because the car was exported then in Japan their notification to the Japanese owner ends as they do not know the new oversees owner.
What to do?At the moment there are no official recalls due to this car in the UK, it only applies to the car in Japan. Your local Toyota dealer will have no record of this recall. Basically your dealer will need to get permission from Toyota Japan in order for Toyota Japan to pay for the recall.
However, your local dealer may not want to do the recall or even research. It does solely depend on the dealer. If you do your homework and contact Toyota Japan to get authorisation sent to Toyota GB, then Toyota GB will contact you so you can get the recall done at your local dealership.Of course if you are due the airbag recall then it's worth the time and effort.
I will update this thread once i find out more information.
-
2
-
I managed to replace the basic 501 side light bulbs in my Alphard and add some PHILIPS XTREME ULTINON VISION 360 LED's
Makes quite a bit of difference. Available on ebay for around £13
.thumb.jpg.54232959611343e95b3c7a52be911001.jpg)

-
1
-
-
Having had LPG fitted to my V6 it is always important that you check your flashlube levels regularly.
Flashlube Valve-Saver is a combination of high-tech lead substitute additives designed to provide proven protection to the upper cylinder area and increases fuel economy. It has been developed in Australia and was a prize winner at the ‘Great Australian Science Show’. We recommend the installation of Flashlube kits on most Autogas Conversions.
It is recommended that the flashlube drips at around 6 per minute which can be adjusted using the valve screw (located above the glass vial) This can be temperamental, so it is best to check every now and again that the correct amount of flashlube is being applied.
Video below on how flashlube works. -
I must admit, without the sunroof It would be really dark in the back of mine as mine has been double tinted.
-
Anyone looking for a Owners Handbook for the Alphard in English then you can purcahse one from JPNZ International on Amazon
https://www.amazon.co.uk/Toyota-Alphard-Owners-Handbook-Operation/dp/B00F0UCM5Q
-
3
-
-
Hiya Trev. Welcome Aboard
-
Welcome along mike
-
welcome along matthew
-
Welcome Mike
When you get LPG, dont forget to tell them that you are looking to have a tow bar. Important both fit.
-
HI Lee
Welcome along
Tax for the 2.4 is around £240 a year. It wont be in the high band.
Miles per gallon you are looking around 26 combined. Motorways you will be in the low 30's.
Insurance will vary quite a bit depending on your postcode. There are a few companies like Adrian Flux and jap cover. You will be looking at prices from 250 to 600.. sometimes more. but you need to shop about.
You should consider the 3ltr as its not much more than the 2.4 with more punch. Then consider LPG conversion from somewhere like profess Autogas. I myself enjoy low cost motoring and is worth the investment.
-
I purchased my Alphard from Charlie at Prodrift UK
I spent many months searching and came across charlie as he had a nice 2005 Alphard up for grabs. The condition of the car was immaculate and almost purchased this car when i mentioned that shame the grey colour was not to my taste, he told me he had a cream interior MZ in and was in preparation.
Turned out to be my dream Alphard, which was also a 4.5 B grade import. Probably the best grade you can get with a car that age.
Charlie was pleasant to deal with. no BS.
There are a few i have come across that are highly recommended so best make sure you do your homework before buying from any dealer.
-
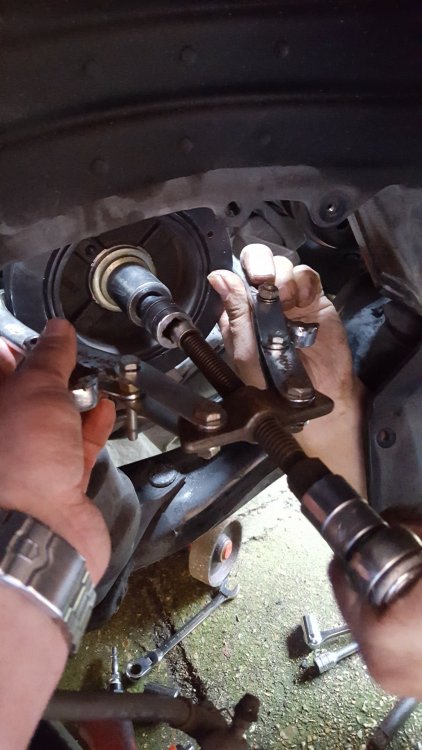
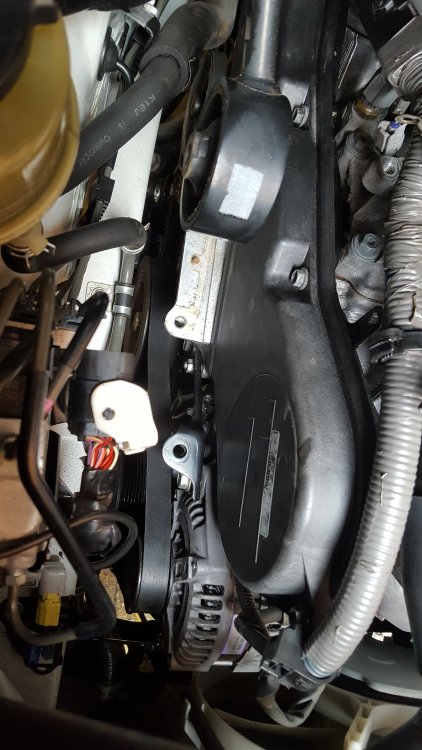
Note: No special tools are required to carry out the task except for general workshop and hand tools.
Note: Disconnect the battery negative terminal before commencing work on the engine
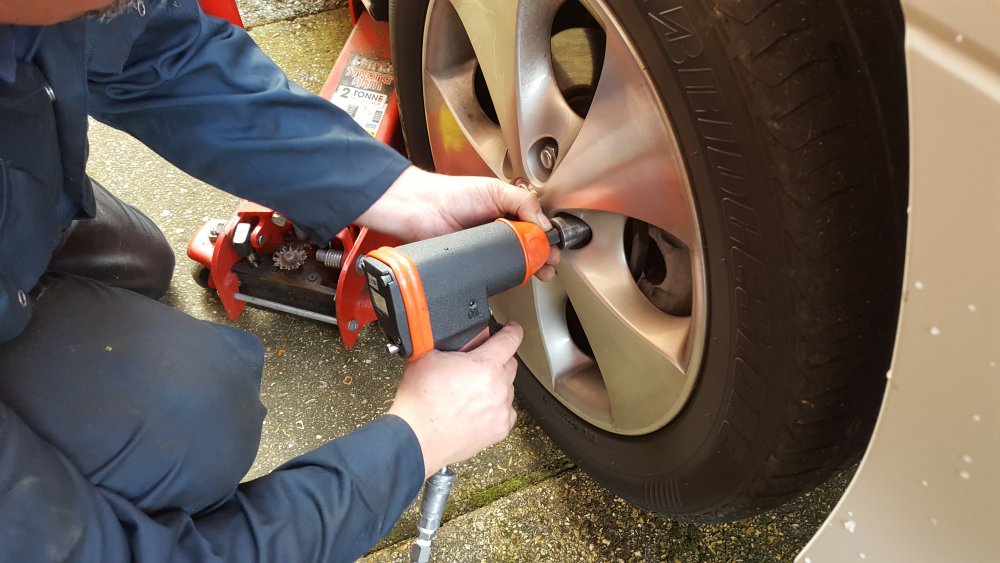
First step is to loosen the Right-hand Front wheel nuts, raise the vehicle on that side and support on an axle stand. Undo the wheel nuts and remove the wheel.
Remove the plastic undertray at the lower part of the front bumper and also the one covering the auxiliary drivebelts under the wheel arch.
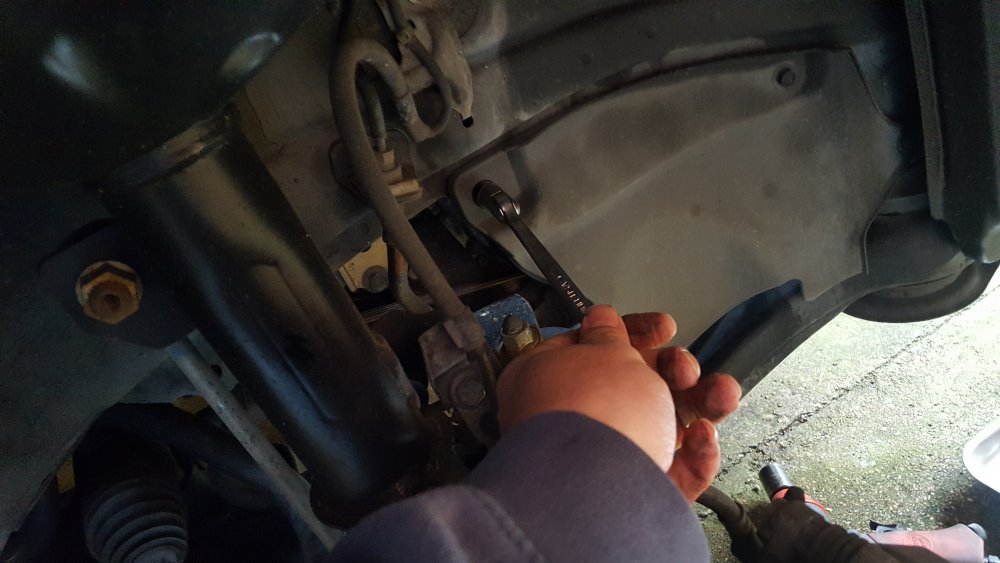
Remove the auxiliary drivebelts and place aside if reusing, although if worn, then replacement at this stage would be the sensible option and cost effective in the long run. Tip: keep the old belts (if still serviceable) in the boot as a spare if needed in a road-side breakdown situation.
Remove any electrical connections that are in the way and pull the loom in towards the engine and secure with a Bungy strap.
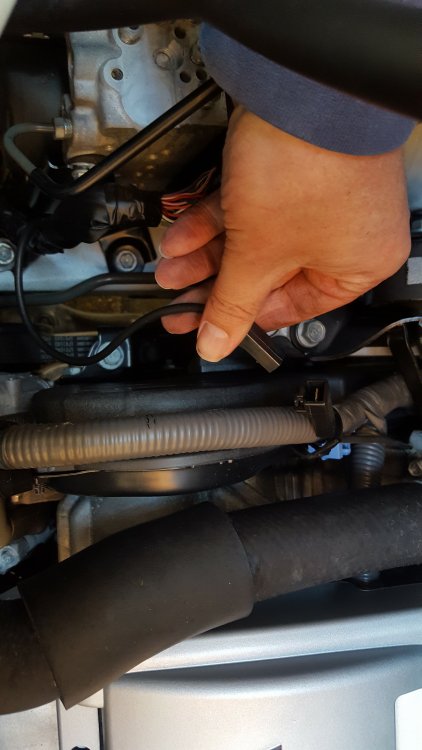
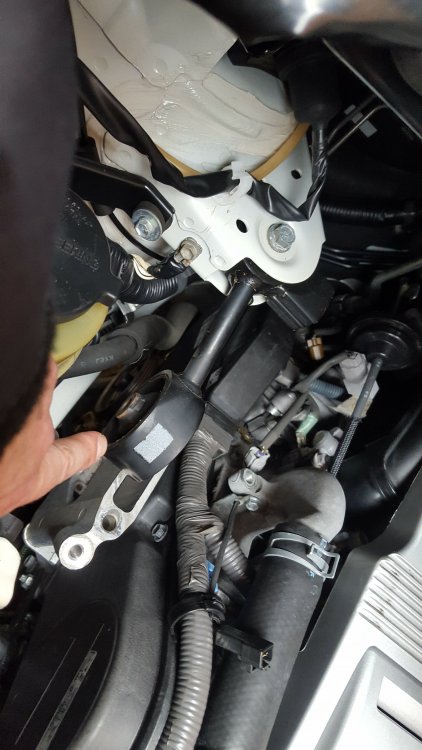
Next, you are ready to remove the top engine mount. Before proceeding, it will be necessary to support the engine by placing some wood between the trolley jack and the sump and gently raise the jack until the wood is just contacting but no more.
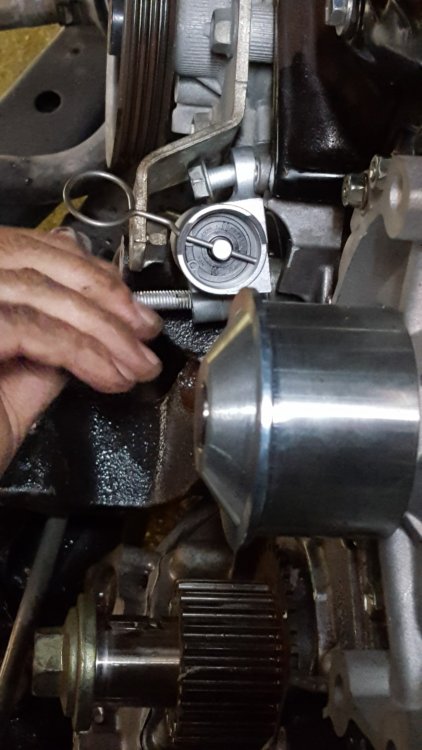
Remove any bracketry to gain access to the timing belt covers. The engine stabiliser bar is okay to be left in position or pushed over towards to the rear of the engine.
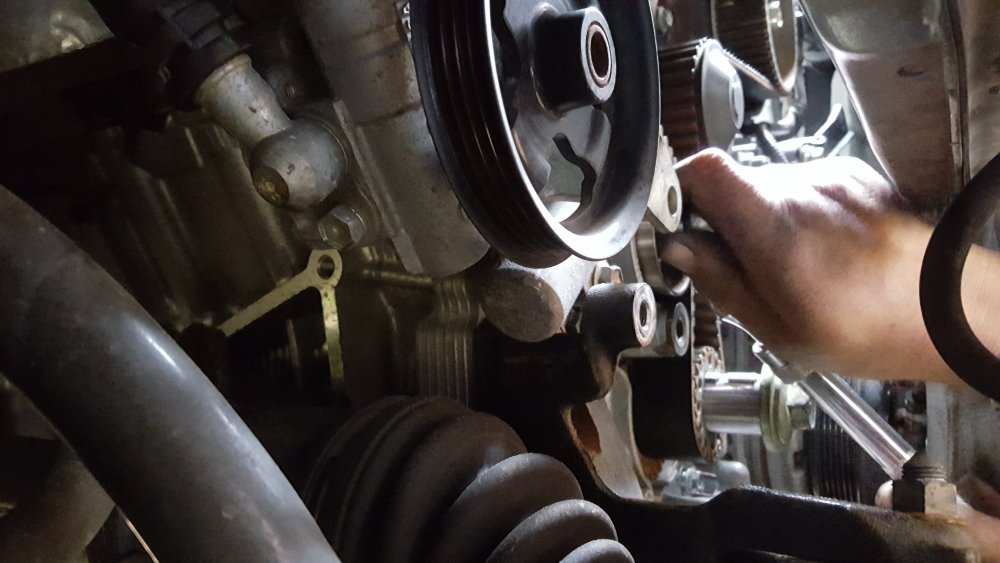
Loosen the crankshaft pulley bolt and undo a couple of turns. Using a suitable puller, slightly withdraw the pulley from the crankshaft, remove the bolt and then fully remove the pulley.
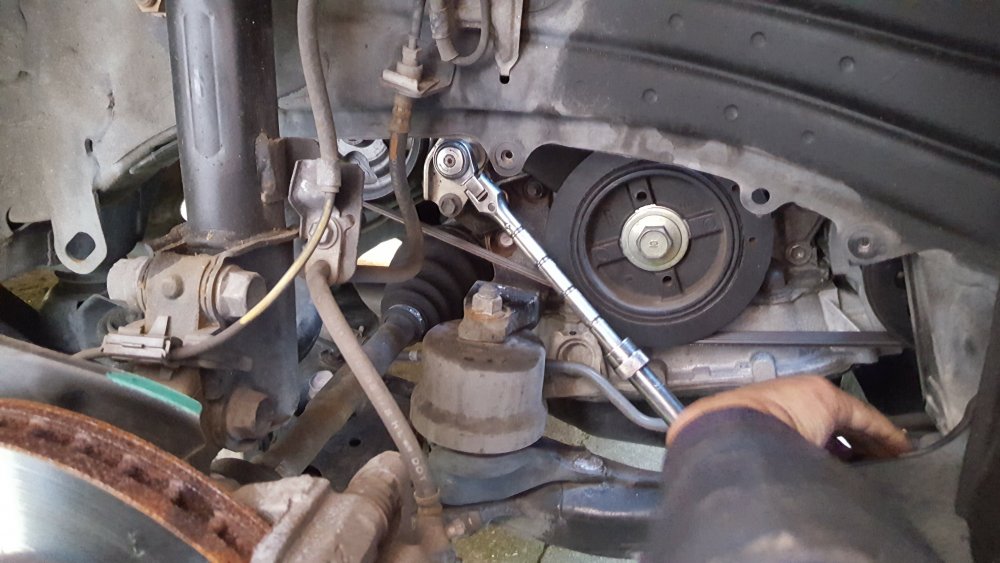
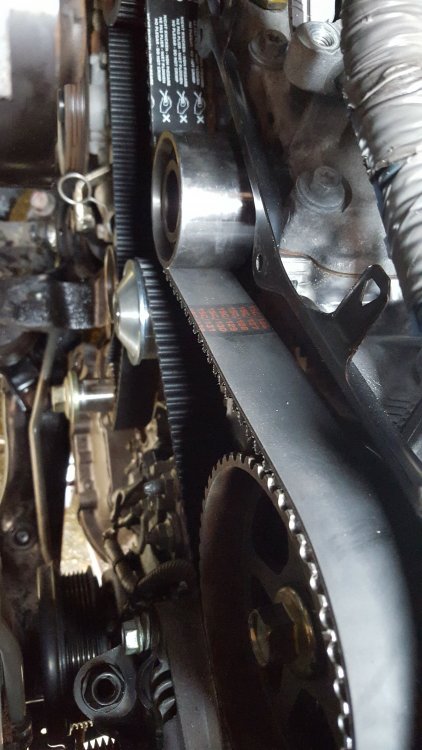
Once the upper and lower covers are removed you have then revealed the timing belt.
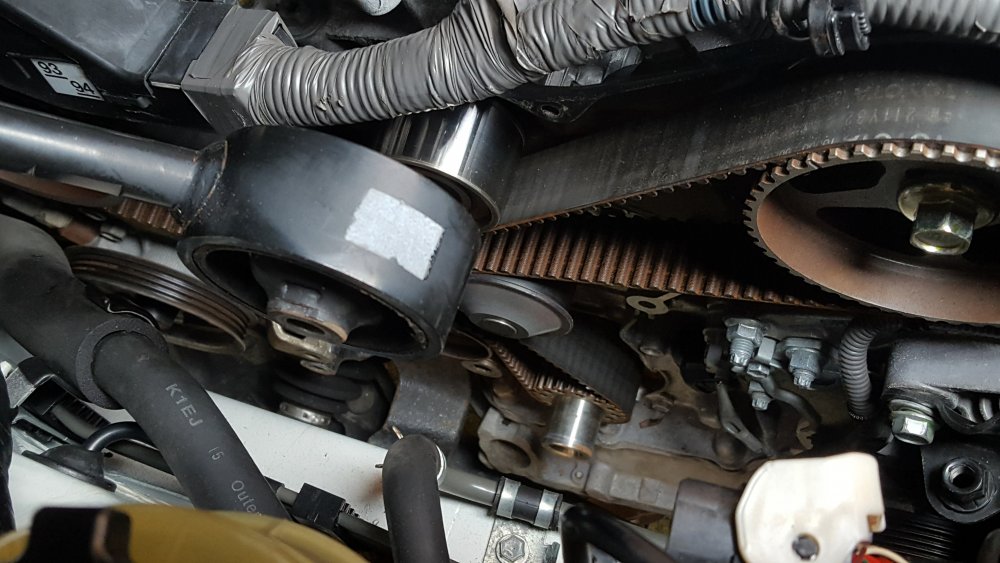
It can be a fiddle to remove the alloy engine bracket (use a female torx socket to remove the studs)
Replace the crankshaft pulley retaining bolt and tighten.
Now you are at the tricky stage of timing up the engine prior to removing the belt. This is a good time to have a short comfort break because the next stage will require some concentration.
Rotate the crankshaft pulley in a clockwise direction until all of the notches in the pulleys and castings are in alignment (see diagram).

The camshaft pulleys should now also align with their respective timing marks.
See diagram (below) for more information on the alignment marks.
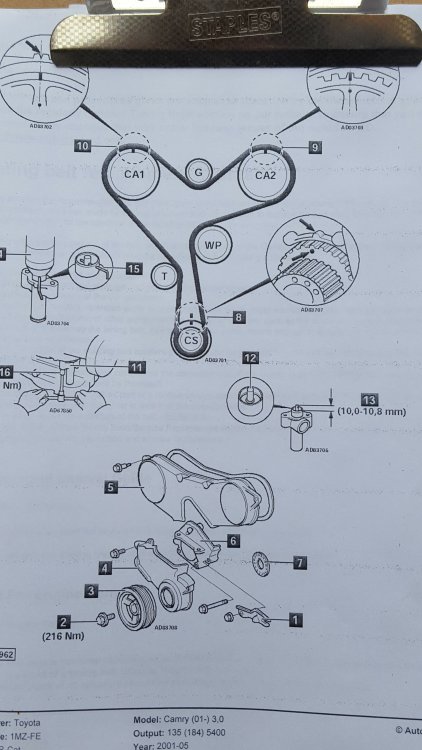
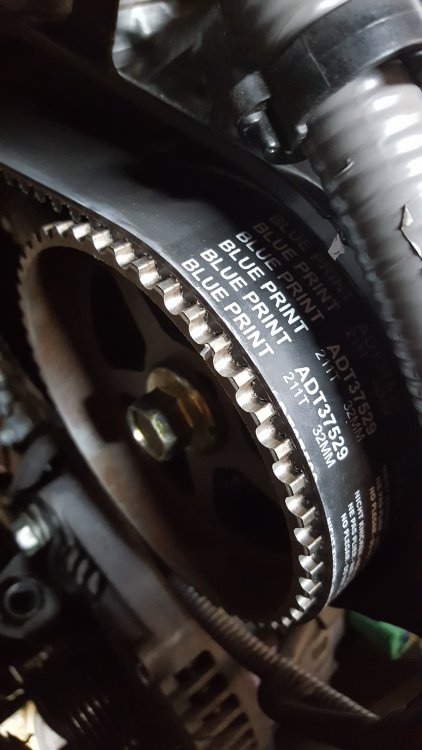
Slacken off the tensioner and remove the timing belt.
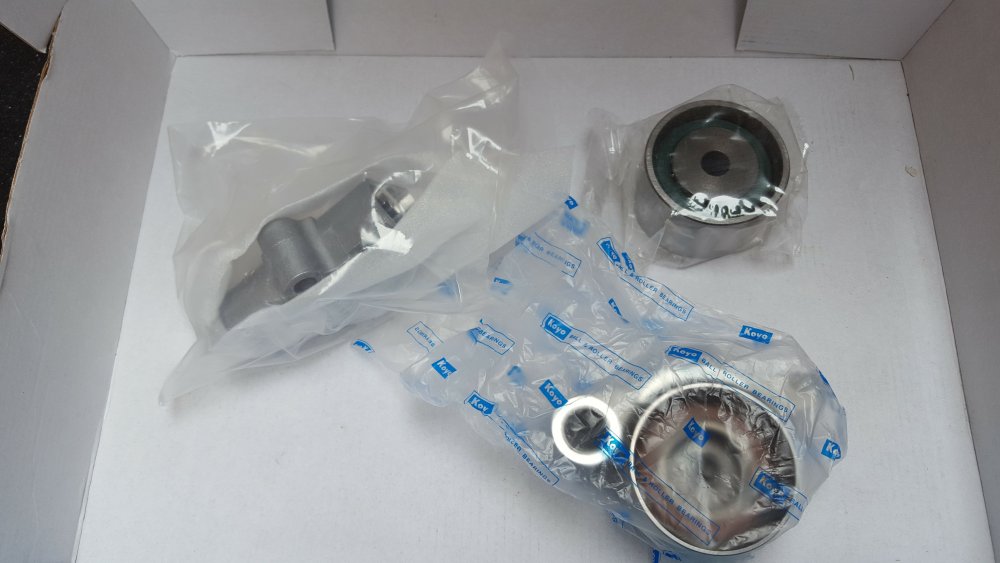
Remove the tensioner, guide pulley and idler pulley.

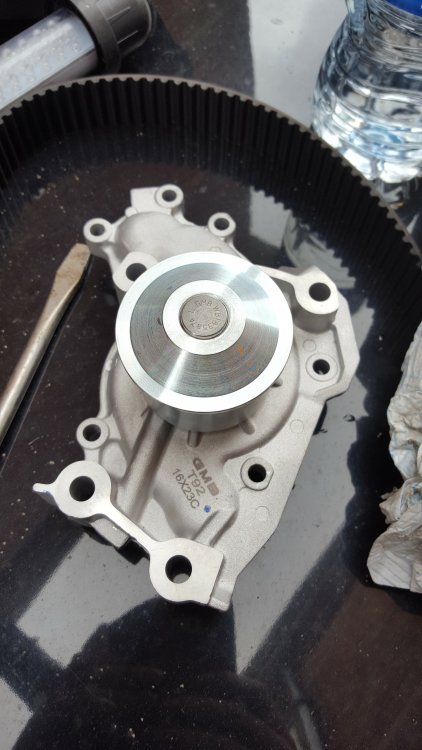
At this stage, it would be prudent to replace the water pump as well as this is also part of the timing belt setup and if it starts to wear on the bearing or leak then it can compromise the engine durability and it is the additional time to replace it at a later date. Bear in mind, the bearing in the pump has also done the same amount of work as the other bearings!
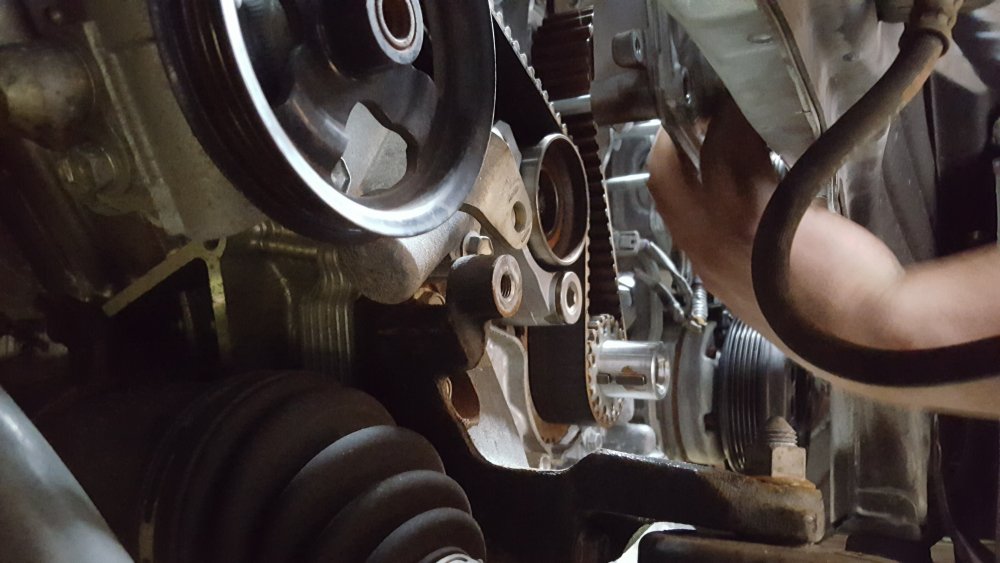
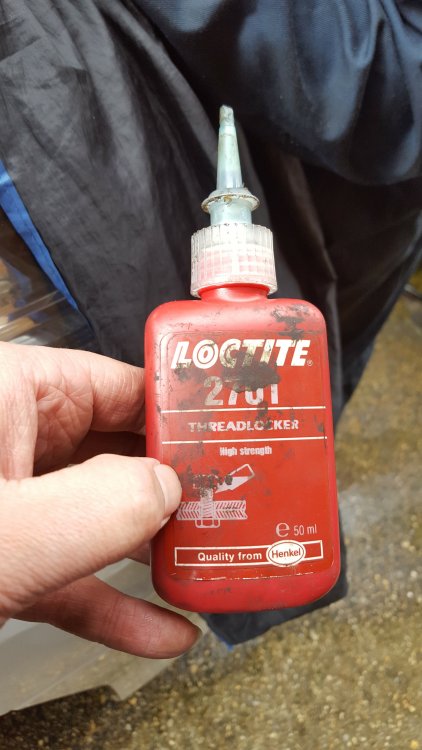
On reassembly, it would be wise to use a thread locking adhesive to ensure that none of the fasteners loosen of with vibration from the engine. This should be applied sparingly to all crucial nuts and bolts within the engine.
When fitting the new tensioner, ensure that the retaining pin is still in situ. This must only be removed once the timing belt is in position and the tensioner can then apply pressure to the belt.
The belt should be positioned so that the timing points are still aligned and when you are happy, release the pin.
Check camshaft and crankshaft pulleys are positioned correctly then turn the crankshaft two complete turns (760 degrees) in a clockwise direction.
The timing marks should still be aligned correctly.
A final tighten and check on all components within the timing belt area and you are ready to replace the plastic covers and rebuild the engine in reverse of removal. Remember to apply thread lock to all vital fasteners.
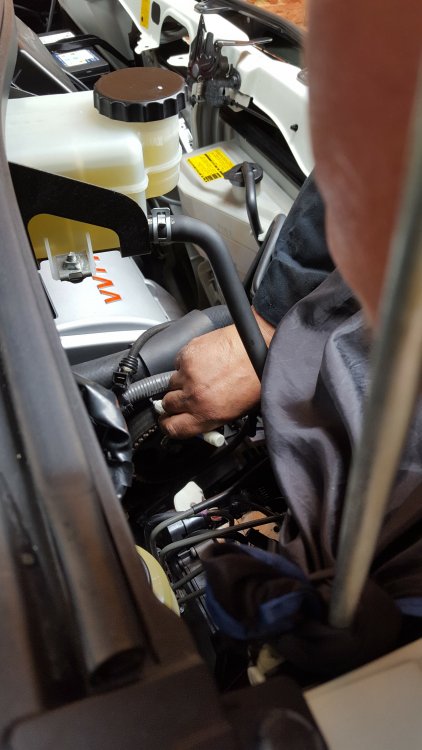
Ensure all fasteners are torqued to the correct setting and refill cooling system (if drained)
When starting the engine for the first time, it should be allowed to idle for a period to check for noises and leaks.
Always a good idea at this stage to recap all of the work carried out and ensure that everything has been fitted and tightened correctly, including wheel nuts!
-
2
-
2
-


.jpg.1c77c1139adf64b28b22cf8a27da27d1.jpg)


To Underseal or Not?
in Toyota Alphard Club Forum (2002 - 2008)
Posted
Please let us know how you got on