
Gamith
Members
-
Joined
-
Last visited
Everything posted by Gamith
-
Ok, so I cheated and detached the cup support on the replacement and it was a simple click into place job. I didn't fancy having to take the lower dashboard / console apart, at least not today.
-
So my one had a 'previous owner supplied' unit which was ugly and impractical. I have now got a similar unit which attaches in the same location, but it's equally not pretty or uses the original wiring loom - it has it's own 12v feed and video feed. None the less here is my solution. A good point is that I can tilt the camera up and down to get a better view, currently it has the bumper in view and a few feet beyond that, but also I get a much wider view - I can see both sides of a parking bay, where before I was only seeing a zoomed in view of the very back of the bay. This camera does a much better job.

-
For the side door opening I find I have to hold the button down for a few seconds to get it to do anything.
-
I would assume its a 43474E Damper, Front Drive Shaft, LH but you will want to check amayama.com to make sure. For 18UKP (plus postage) I would be tempted to get one anyway - the issue will be disassembling the driveshaft to get the old one off and the new one on - put a day or two aside for that, or take it to a friendly garage of course. As to whether you actually need it I can't say but I would assume that if you did need one you would know when driving it.

-
Mine is definitely missing - I don't suppose there is a part number on it? Never mind - sourced a complete unit from ebay.
-
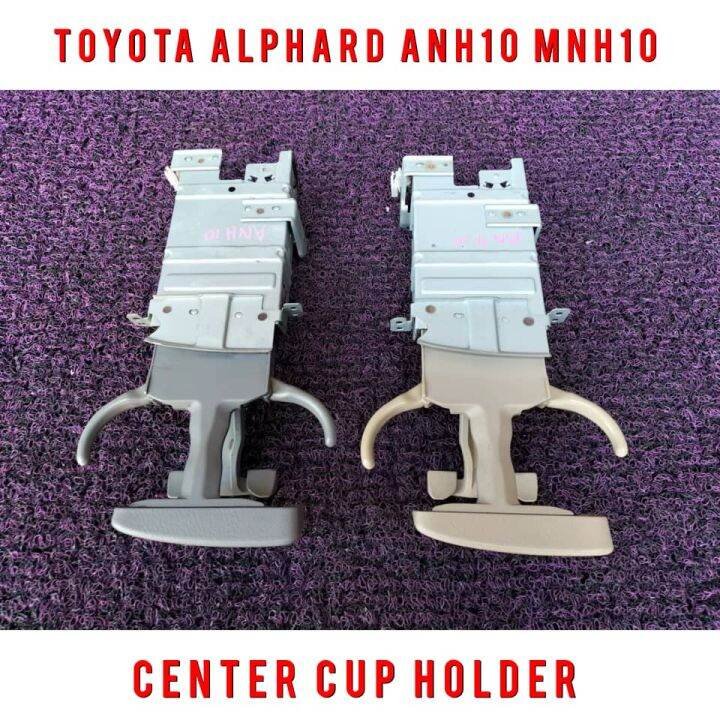
I need to look at mine also as I'm not sure I even have that, which looks like a lever to tighten the grip on a cup.
-
I think I might have a spare reflector (not a light) as I ordered one to replace a broken one that I managed to glue back together. When I get home tonight I will (probably forget) see if I can find it, if that's of any help. Equally you could try amayama.com or aliexpress.
-
I came across this pic in Internet wandering and remembered this post, look like it's been answered but the pic might help.
-
Oh - I also found one of these very useful, together with a standard socket wrench. https://www.autodoc.co.uk/yato/13648886
-
I was getting P0171 "system too lean (bank 1)" also and cleaning the MAF didn't help - the error would come back. What fixed it for me was changing the fuel Lambda sensor which, on mine, was a struggle as the previous mechanic had forced the sensor into place and had damaged the thread. An M18 x 1.5 tap and die cleaned up both the thread on the exhaust and the new sensor which I purchased - I would warn to be on the lookout for ones with the correct plug on the end as the cheap ones come with bare wires that need to be housed in the original socket (as the supplied ones don't stand a chance of fitting) and are bound to cause issues. I ended up getting this one: https://www.autojapspares.co.uk/toyota-alphard-anh10-anh15-24-front-fuel-ratio-sensor-34437-p.asp Which is rather expensive but arrived quickly and was a straight plug in. If you haven't located the fuel lambda sensor look at the exhaust manifold cover behind the radiator. I also changed the fuel filter and the air filter - which may have helped but less so that the sensor I would say.

-
https://www.aliexpress.com/item/1005002589988337.html?spm=a2g0o.productlist.main.5.188e8ae6eTo121&algo_pvid=cd4f1753-7b48-42ff-b5d7-12c8c2e81037&algo_exp_id=cd4f1753-7b48-42ff-b5d7-12c8c2e81037-4&pdp_ext_f={"order"%3A"5"%2C"eval"%3A"1"}&pdp_npi=6%40dis!GBP!24.89!24.89!!!231.75!231.75!%402103834817545855826182360e101b!12000021293303032!sea!UK!6132551462!X!1!0!n_tag%3A-29919%3Bm03_new_user%3A-29895&curPageLogUid=VijpUrkbmIMn&utparam-url=scene%3Asearch|query_from%3A Aliexpress has these at least
-
It doesn't fit in the hole, mores the pity, but a previous owner fitted a similar one, screwing into the bodywork. I am hoping the replacement fits and gives a wider angle view.
-
Tried this but it didn't fit properly - it only points straight down: https://www.amazon.co.uk/dp/B0FJ7VZNQV?ref_=pe_109253361_1103576791_t_fed_asin_title So now have one of these on order: https://www.ebay.co.uk/itm/375925726231?_skw=toyota+alphard+2005+parking+camera&itmmeta=01K205BQ4WZ84ACYCE1CG2EG7P&hash=item5786eb5c17:g:l-8AAOSwADZnh4Ma&itmprp=enc%3AAQAKAAAA4FkggFvd1GGDu0w3yXCmi1eHRQC%2B0ruagapeb7ZwDsSheAiL3l1XpuvMerbbrk%2FbwiiqsnTgJ2lKZlwM0GypewvyVkrUyhCLflh4LDGDB7ghMnM8O6l93q6Jb2Os6mWL%2FWuQate3bWThvGyknobaclxIL7vujhhO0MSAwubyhCS9A%2FgtvTm2HVrVE6pKk3UhF%2BvJMLW%2BZ0wRs%2F2Mg8Jye%2FoxfOuWH3qJrZM%2FUGWM6rGG84QWF7qcqU5JlRwaoUadv7y15TZ%2B0387v8DfEDFGbn48J%2FJLleNu34NRUfrSSJeU|tkp%3ABk9SR-LyroWQZg Hopefully arriving in the next few days, I will update when I can.
-
Yep - this is normal behaviour after the battery gets disconnected. That and the clock will need resetting 🙂 For each window: press the 'down' button until the window drops all the way and then hold for 10 seconds, then raise it up to full and hold for 10 seconds
-
When I had a PO171 code - System too lean (bank 1) - I initially changed the MAF sensor, which didn't make a difference, and ended up replacing the O2 sensor in the exhaust, which was a pain as the previous person had broken the thread and I had to get a new tap and die (M18 x1.5) to cut the thread out again - I only did it up hand tight as I didn't want to break the new thread. Still working fine though.
-
I have used amayama several times and they are excellent - it takes a while to arrive but original parts at reasonable prices (on the whole - depends of what you are buying and what you think is reasonable) also very useful to make sure you are getting the correct part.
-
Yes, it comes out easily - I don't need to force mine much at all, so if you are struggling you probably need to change your method. I usually start on one side but I doubt it makes much difference. You could even force some hook-like thing into the slot as there is nothing of value behind - in Japan it's used to hold a toll card.
-
I am talking about this one - hopefully you are too 🙂

-
Easy if you have a trim removal kit (very, very recommended) - even if you don't you can open the storage just underneath and push it out from behind, use a blade or screwdriver to gently prise it out, or send a small squirrel or raccoon into the dashboard with instructions on what you expect - who knows it might just work (it being a million-to-one shot after all). 🙂
-
Hi Ann, Could we have some photos of what you do have left please? If wires have been cut then which ones, are bulb holders still there etc? Admittedly I don't have a Vellfire, let alone a 2013 version, but trying to help with limited information is very difficult. Cheers
-
Looks like the third from the bottom. I hope this helps.
-
I believe the 'mini-disk player' is actually for a toll card that they use in Japan a lot. As for the front fog lights there should be a fog light symbol on the light control stalk that controls them - when selected there should be a fog light symbol on the dashboard.

-
Before someone more expert than I comes along I believe that the Japanese-fitted head units will only have Japanese, there is no switching to English. You can use Google Translate (or Lens come to that) to translate and, for the buttons, you could put fresh labels over the buttons. However the only permanent solution is to change the head unit, though people have lots of fun with these as they never seem to be a straight swap and the various functions may need particular adaptors to work: reversing camera, front side-ways cameras (if fitted) steering wheel controls, audio / video out (some Alphards have a separate amplifier, many speakers, middle screens etc.) hand-free phone use other stuff ? i would start with sticker / labels, even if they are just bits of post-it notes, and see how you get on.
-
Is the alternator working? there should be approx 14v going into the battery. I have a USB-charged battery boost box that I keep in the drivers door, just in case. This reminds me to go and check it's charge.
-
Get the right numbers and look on ebay, I can see some from 10UKP. People have had mixed results from ebay with stuff that is not as advertised and / or sub par quality but I'm sure there are many other sources that are more wallet-friendly.


