
Gamith
Members
-
Joined
-
Last visited
-
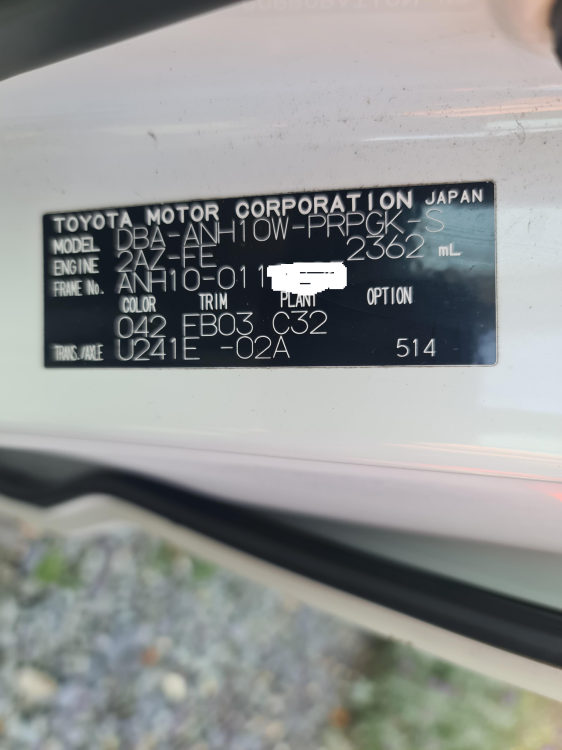
To make sure look at the 'plate' attached to the the B pillar - passenger side. With 2008, as with my 2005, the models changed halfway through the year though I think, someone will correct me I'm sure, rather than a facelift the model changed to the 20. Either way using the top line / Model information on Amayama.com will get you the right information. I found out the manufacture date from a CarVX report.
-
I am wondering whether yours is a post 04.2008 model as I can't locate anything similar to mine on Amayama. but then I'm not entirely sure where I am supposed to be looking - this is on the roof above the rear door isn't it? Wait - could it be this one?:
-
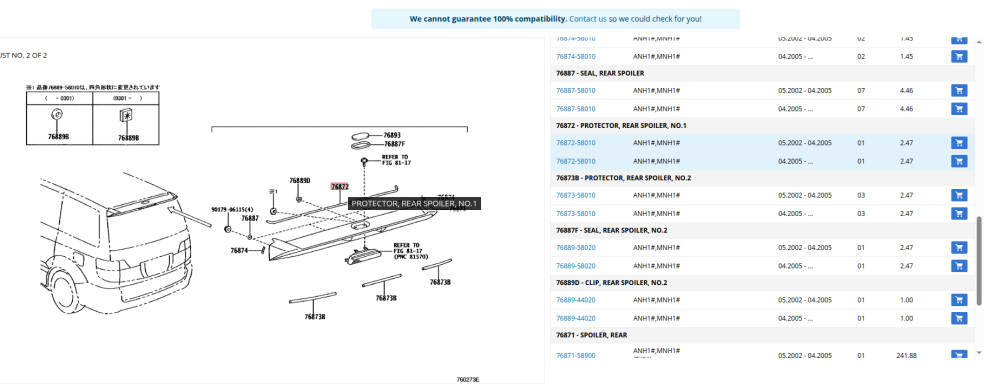
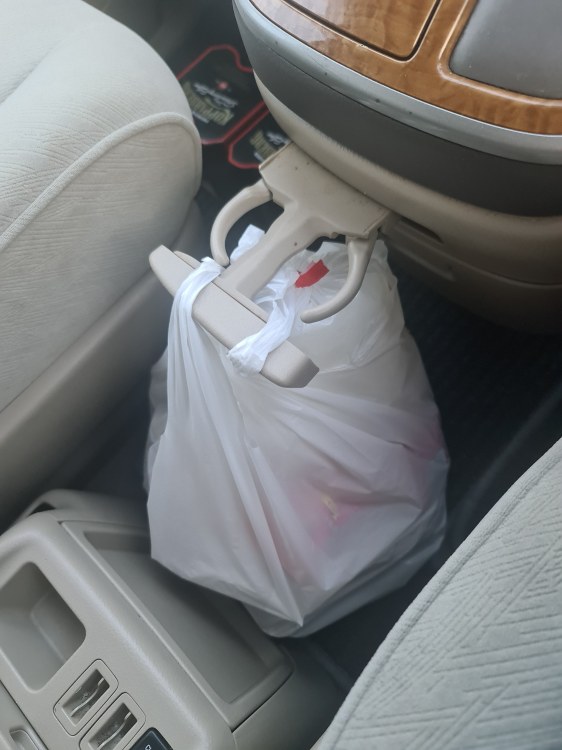
I have replaced mine as it was missing the lower arm so was only useful for holding bags. I can't find any pictures of the replacement though this is the ebay listing. I don't recall it being particularly difficult, I suspect it was a couple of screws or bolts accessed from above by removing the 'wood' trim.
-
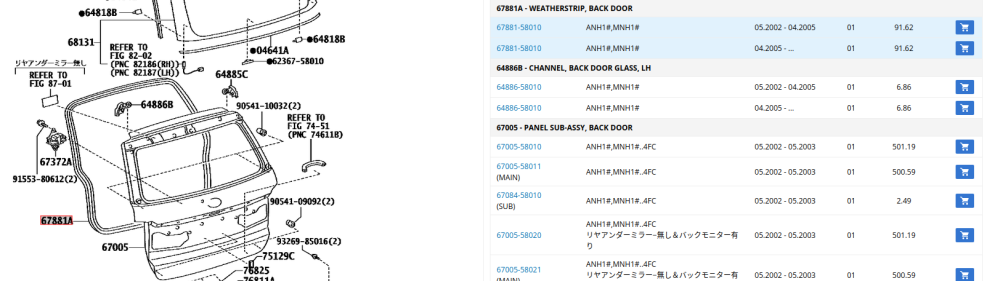
Is this the part, the 'weatherstrip, back door'? This is from amayama.com for my 2005 facelift model. If so the part number is 67881-58010. A quick look on ebay would suggest that it's cheaper to get it from Japan, but I only spent 5mins looking. Make sure you put the correct model number into sites like amayama.com.
-
-
-
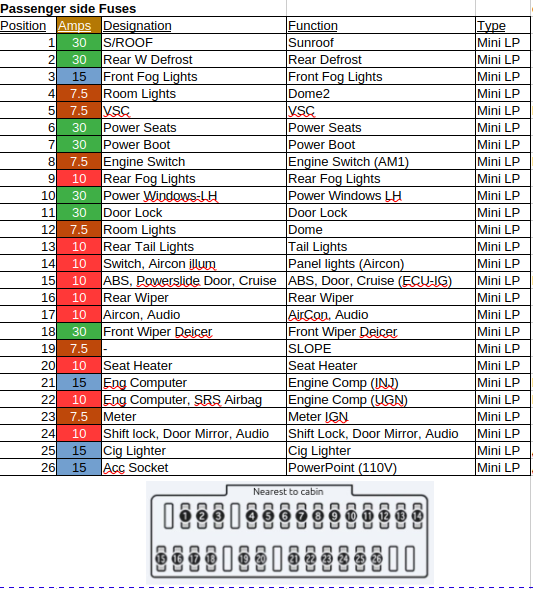
If it were my 2005 model I would go through each fuse with a circuit tester to find any non-functional fuses - bit of a pain I know but this sounds like more than one fuse gone. Looking at my fuse boards I have one mention of VSC in the main engine board: And one in the passenger-side fuse board: Hopefully you have a JOBD reader - does it give any error codes? I hope this helps.

-
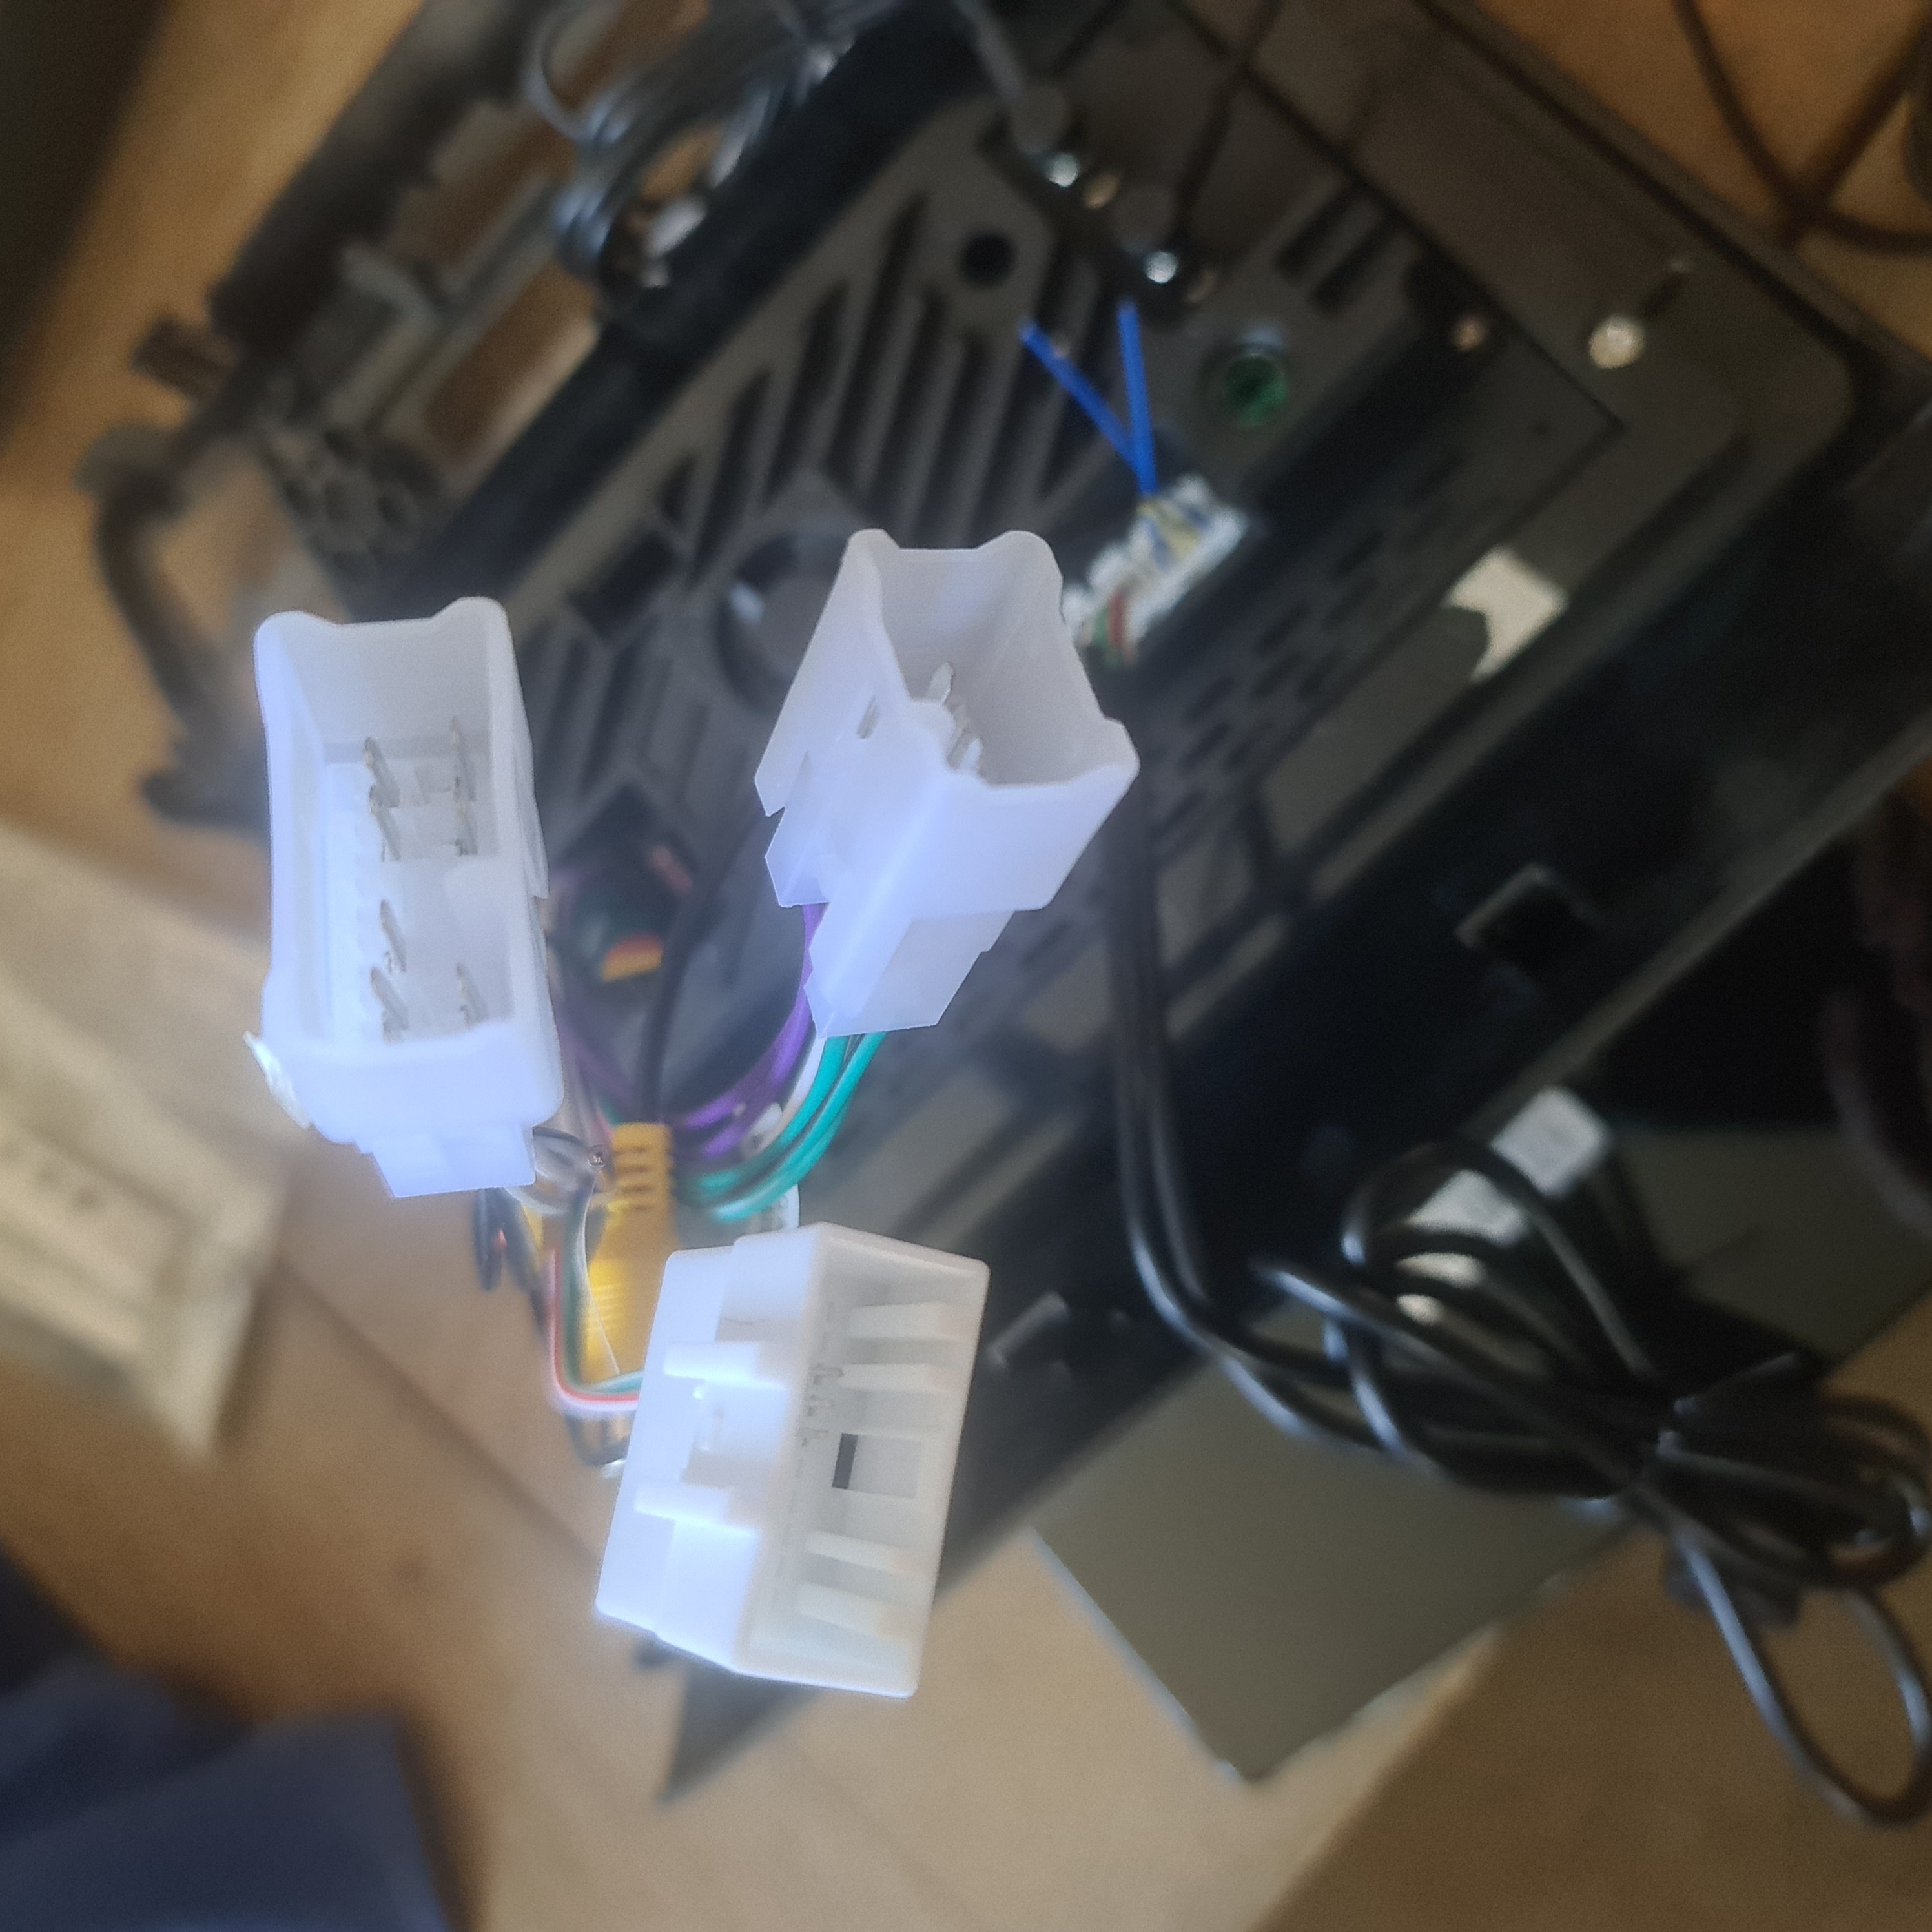
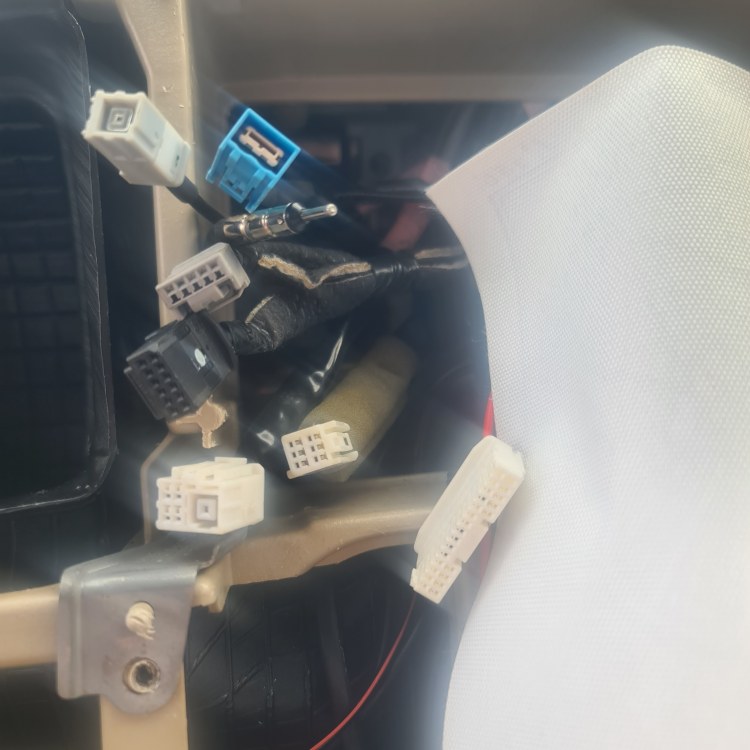
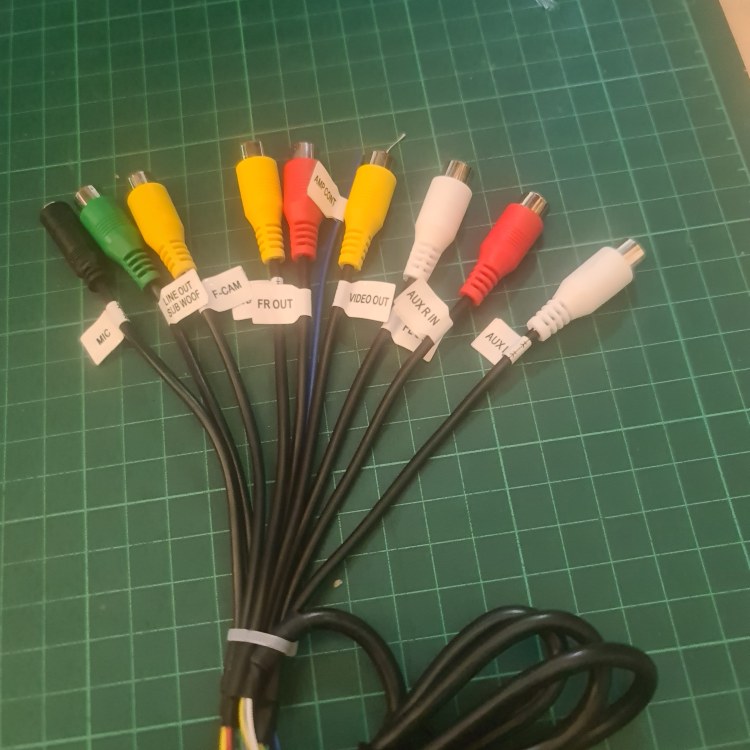
These are the connectors that my previous head unit was using and I can't help but feel it could do better. The new head unit works well, I have set up the steering wheel controls and a USB microSD card reader is on it's way so I can add a load of music to it (and not have it playing off my phone all the time). With the replacement head unit I also got this additional connector set: The car (2005 facelift) has these additional connectors (sorry it's not the clearest): So my question is whether there is some way to connect the extra connectors to the unused connectors in the car - I am assuming that some must be connected to speakers that aren't currently being used. Am I chasing a dream or are any of these connectors actually going to be of some use? Hopefully someone can let me know.

-
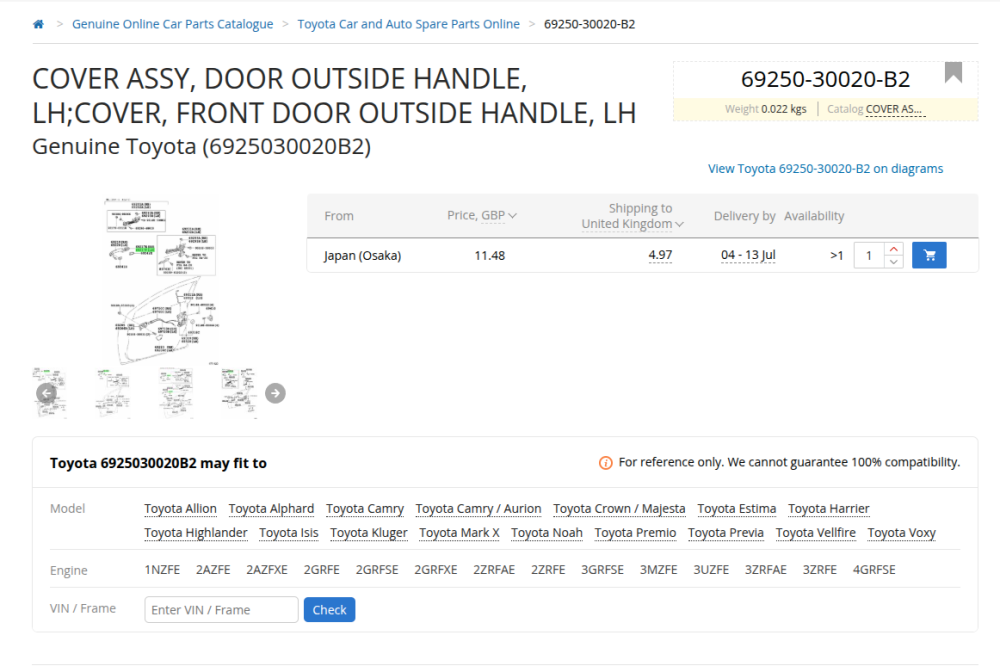
That part is considerably cheaper if I just do a search for it.https://www.amayama.com/en/part/toyota/6925030020b2 maybe try again?
-
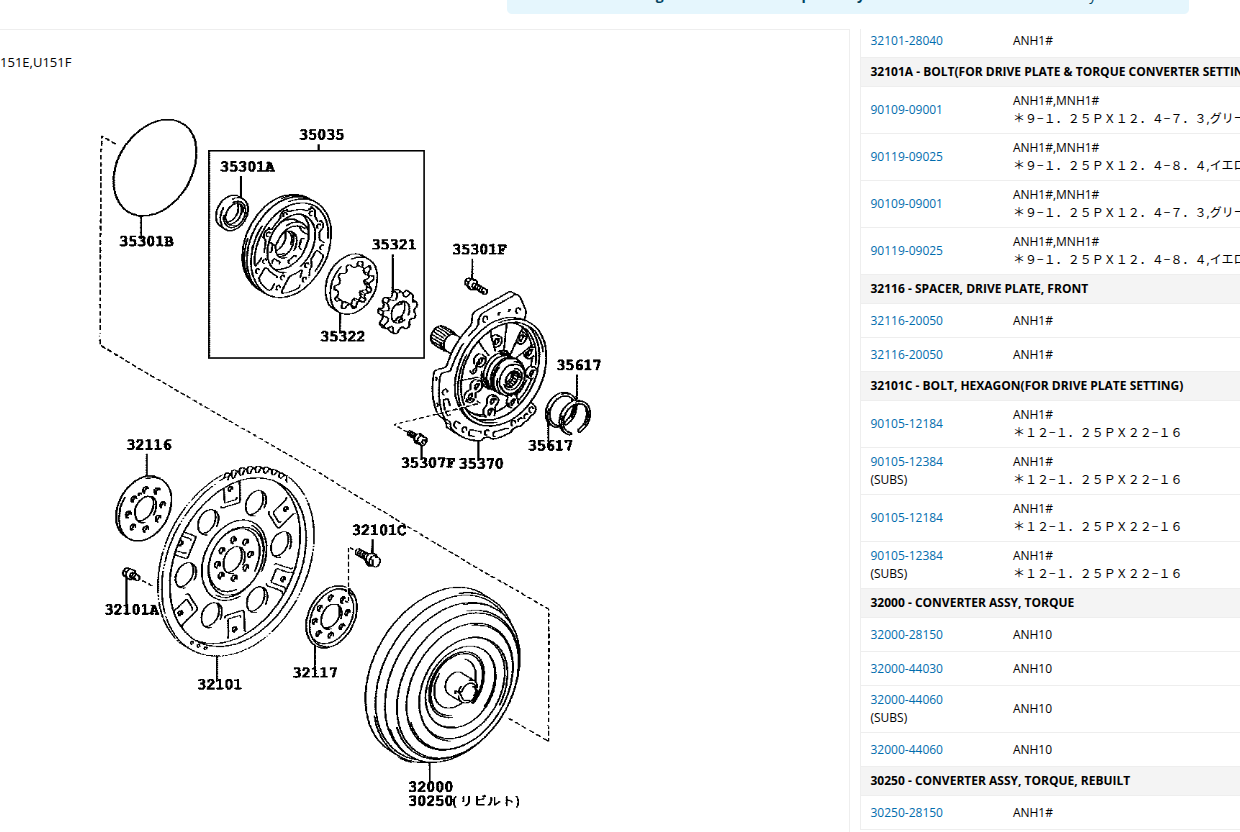
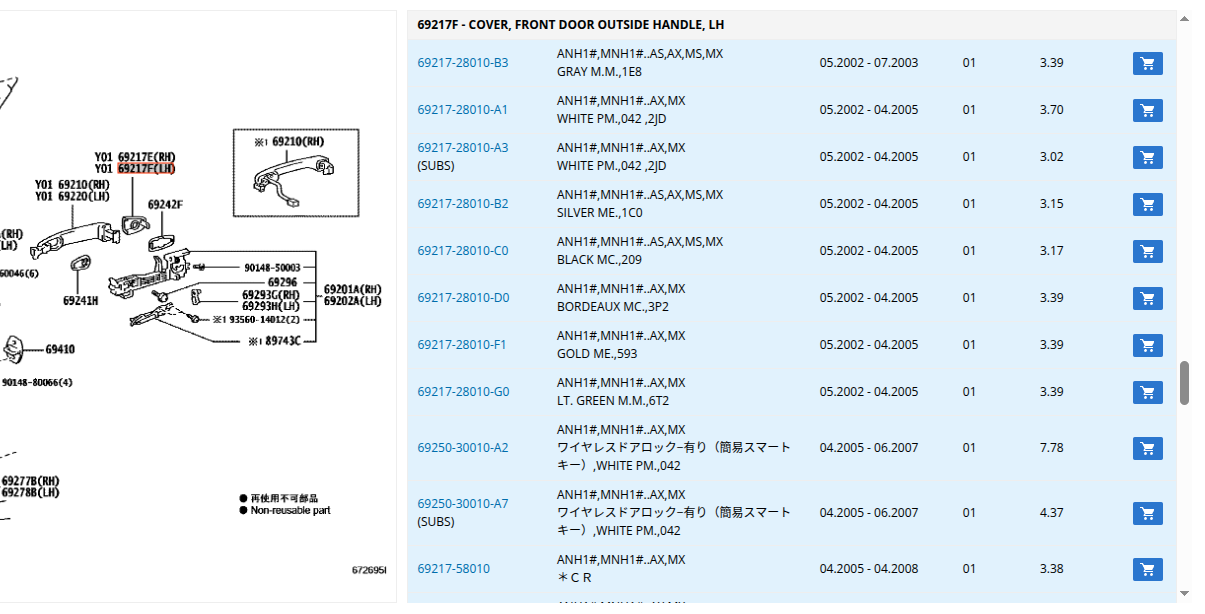
I would try amayama.com first to find the part number and then use that to search Ebay etc. You can order from them but delivery from Japan will take a while. On my AH10 it looks to be part number 6921728010A1 but yours is a later vehicle. the last two are for the colour so you will need to get the right one.

-
There is a second fuel/air ratio sensor in the exhaust, maybe that needs some tlc or replacement? Otherwise it sounds like some good progress. Have you cleared the old codes, waited for the issue to appear and re-read for new codes?
-
Only a thought - some photos of your wiper arms and what you have so far might help - it's possible that some custom arms have replaced the stock ones.
-
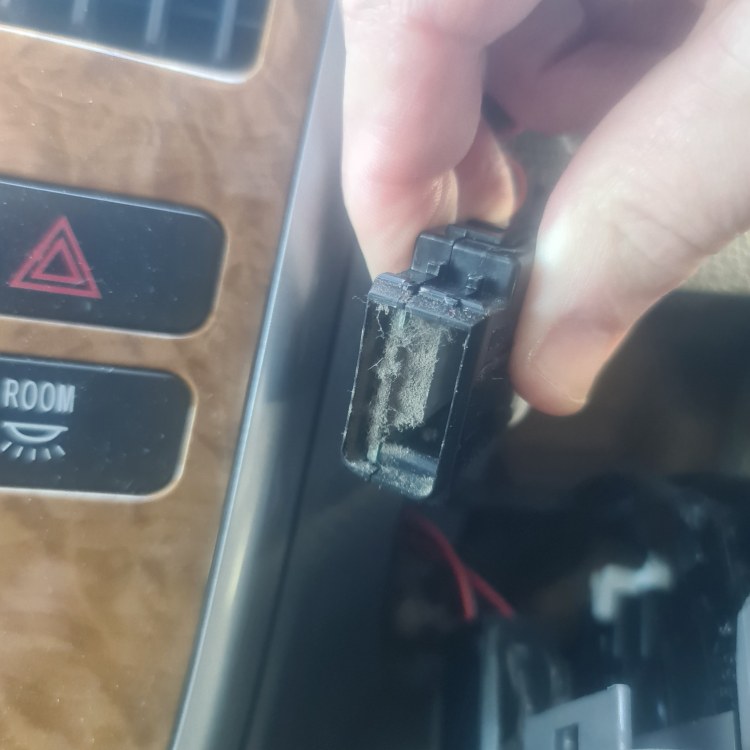
There was a post a little while ago about cleaning those air quality monitors - there is one in the back as well. The little grill on that switch hides a suction system that passes cabin air over a sensor. As you can imagine this builds up a collection of dust etc. over time and then the sensor is unable to work. Mine looked like: So definitely worth taking a look when you get a chance. A toothbrush or vacuum cleaner should be able to clean it up, just don't push more crud into the unit. :-) I hope this helps.
-
-
Having replaced the battery the only things I had to do was reset the clock and then the windows (fully lower, keep the button down for 5 seconds and then raise it up to closed, hold for 5 seconds and then do the next).