Leaderboard
-
Rojie
Moderators604Points4,218Posts -
Chris.ac
Moderators322Points1,134Posts -
Picasso
Moderators253Points1,278Posts -
Alphard Club
Administrators184Points593Posts


Popular Content
Showing content with the highest reputation since 08/16/2017 in Posts
-
We have the complete list of wiring diagrams for up to the 2008 series Alphard both models. Same wiring on both the hybrid and non hybrid. SRS.pdf Smart Entry and Start System Wireless Door Control lock.pdf Smart Entry and Start System Steering Lock.pdf Smart Entry and Start System push start button.pdf Smart Entry and Start System - Immobiliser.pdf Smart Entry and Start System.pdf Seat Belt Warning.pdf Rear number 1 seat.pdf Front Passengers seat.pdf Drivers Power Seat.pdf Power outlet.pdf Internal Lighting.pdf Illumination.pdf Combination Meter.pdf Backup Light.pdf AC.pdf Door Control Wiring.pdf Parking Assist.pdf sound system.pdf9 points
-
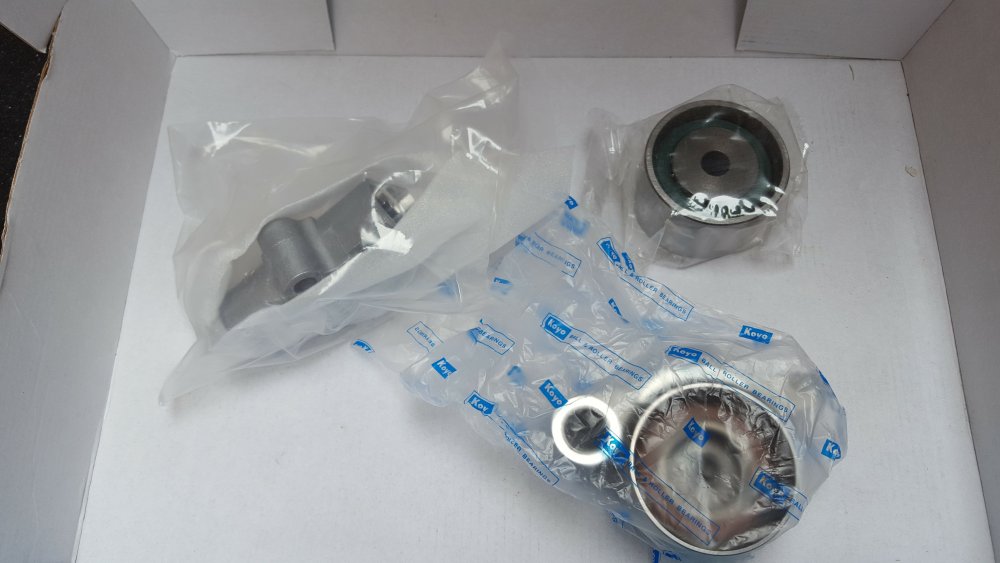
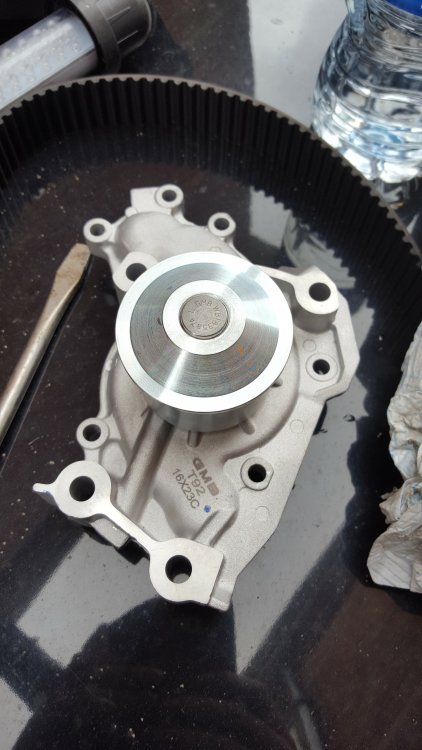
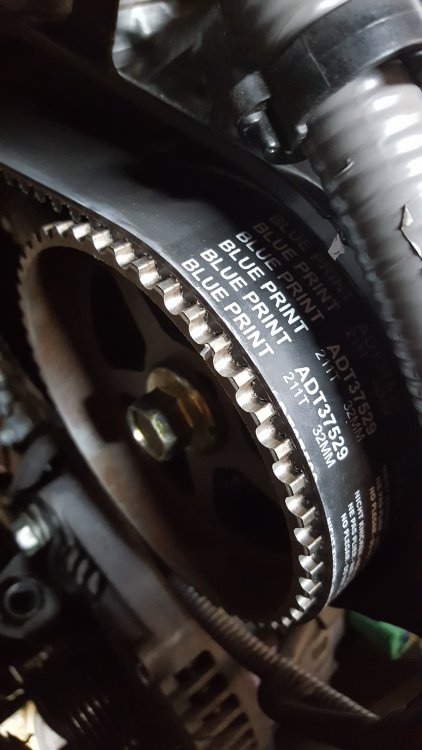
8 pointsNot totally complete but almost. If you have any part numbers then let us know and we'll add to the list. 3.0 V6 & 2.4 Alphards Cam Belt Kit (Buy from a reputable seller as many cheap fakes available online) Blue Print: ADT37334 (3 Litre) 2.4 Does not require timing belt. Water Pump Blue Print: ADT39148 Oil Filter Blue Print: ADT32108 (3 Litre) Blue Print: ADT32112 (2.4) 90915-10004 Toyota OEM 2.4 90915-20003 Toyota OEM 3.0 90915-YZZD1 Toyota OEM 2.4 Hybrid cabin filter (for 5 speed) Blue Print: ADT32512 (2.4 & 3.0 Ltr) 87139-28010 Toyota OEM Air Filter Blue Print: ADT32279 (3 ltr) Blue Print: ADT37267 (2.4) Oil Petronas 5w /30 Fully Synthetic (ACEA A1/B1) (3.0 Ltr) or other quality Fully Synthetic oils. Coolant OATS Anti-Freeze Spark Plugs Toyota OEM: 90919-01210 (3 Ltr) Toyota OEM: 90919-01184 (2.4) Fan Belt/ AUX Belt Toyota OEM: 99366-31040 (3.0 Ltr) Blue Print: AD06R1036 (3.0 LTR) Power Steering Belt 99364-80880 OEM Toyota High Level brake light Bulb: 955 12v 16W Wiper Blade Sizes 26' Driver 16' Passenger Side Lights 501 ATF Transmission fluids. Highly recommend Opie Oils http://www.opieoils.co.uk/c-1432-atf-automatic-transmission-fluid-for-cars.aspx Make sure the specifications are for the Toyota T-IV ATF oil. Fuches is a good brand. Oil Strainer: OEM 35330-28010 (Transmission Gear Box Oil Strainer Filter Assembly Accessory) You can get this from Lindop Toyota Mail order from john.devlin@lindop.toyota.co.uk Auto Jap Spares do a Kit with Plugs, Oil Filter & Air Filter. https://www.ebay.co.uk/itm/123377568634?ul_noapp=true8 points
-
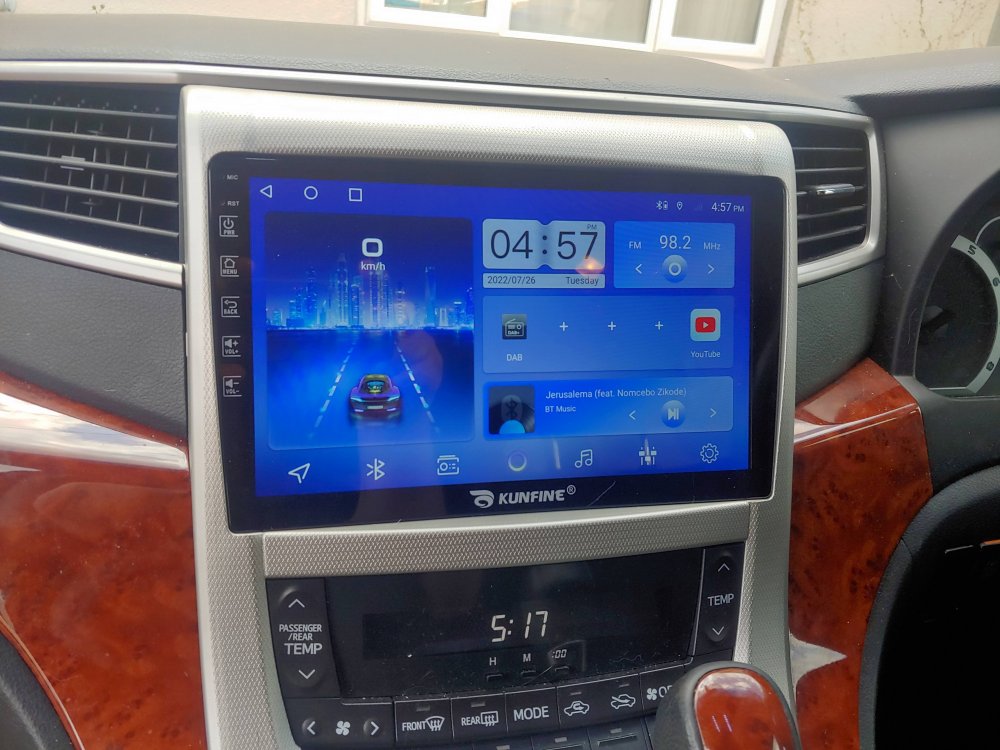
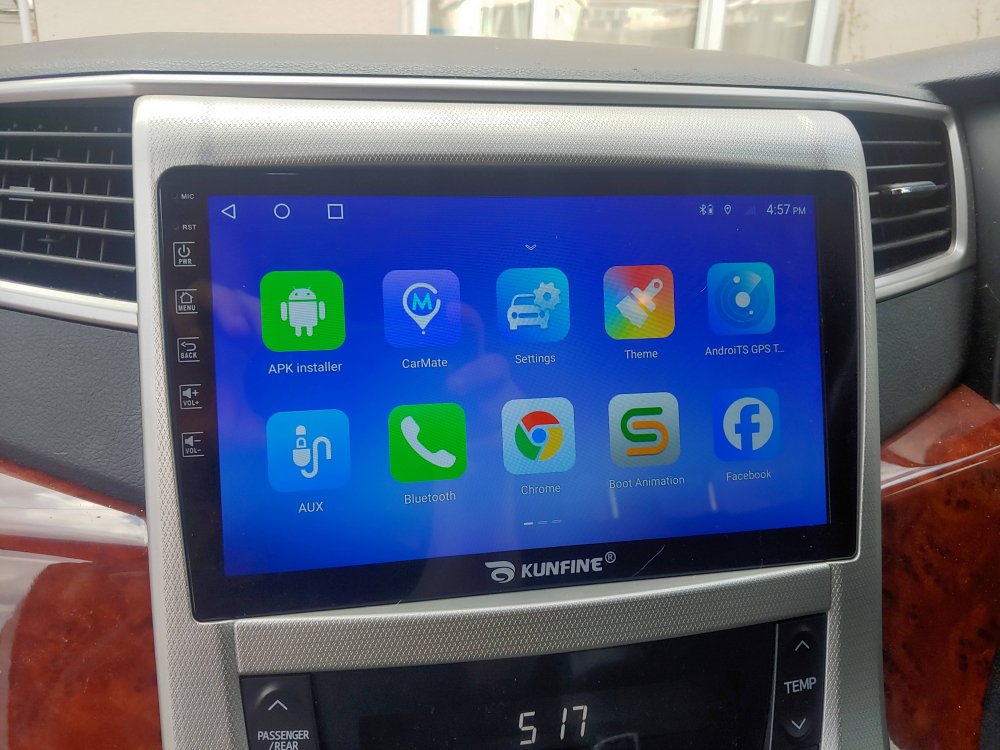
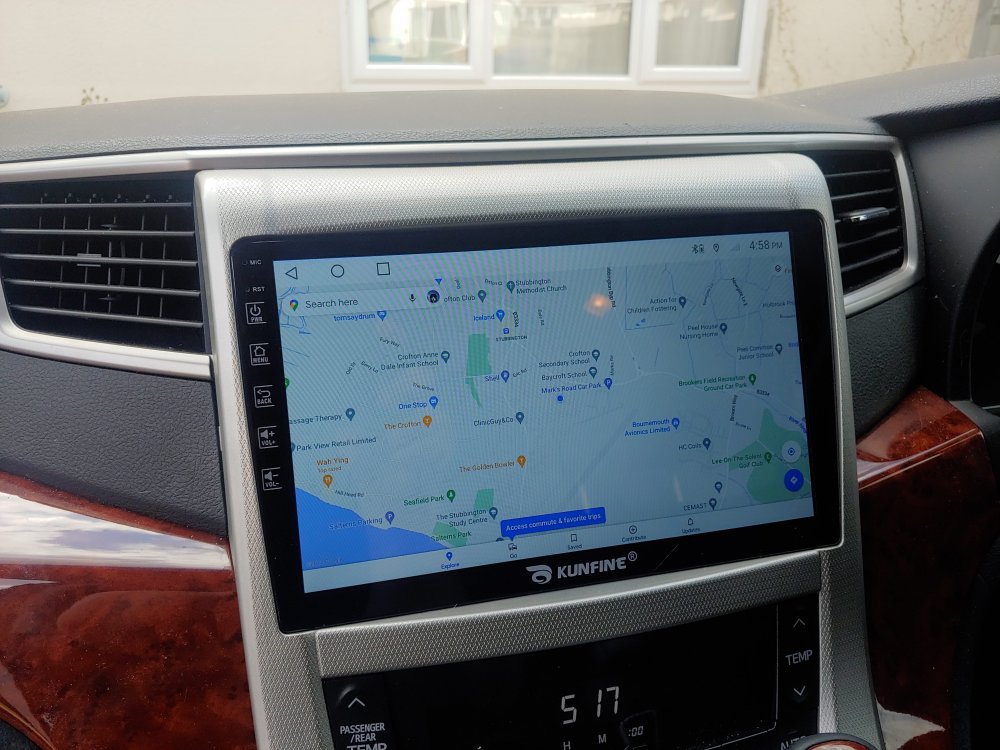
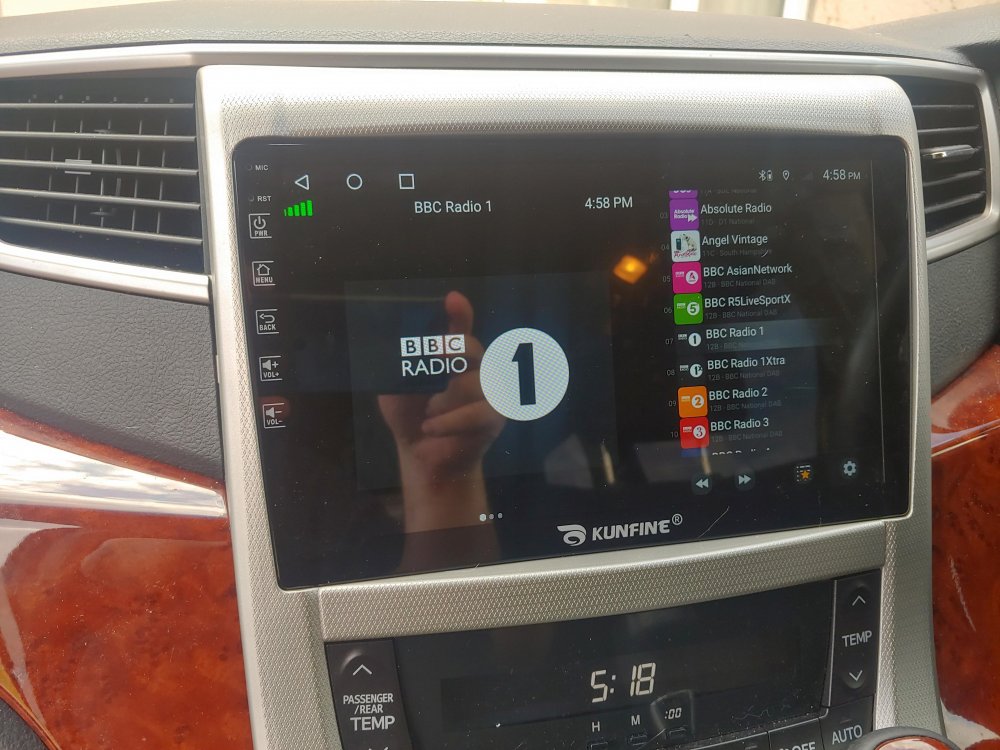
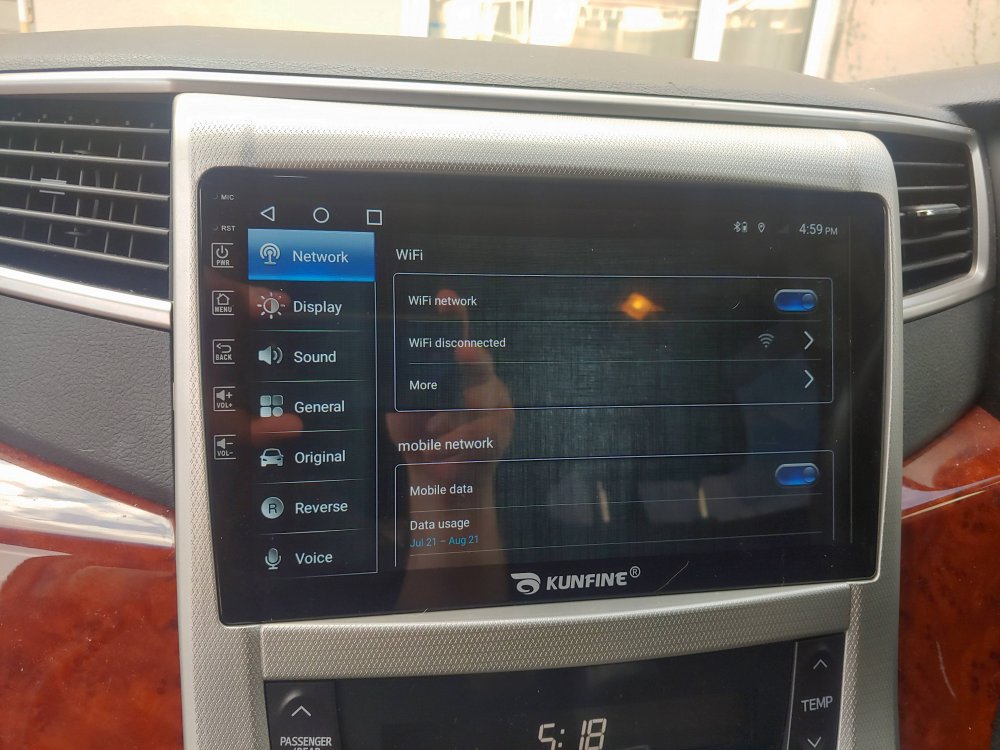
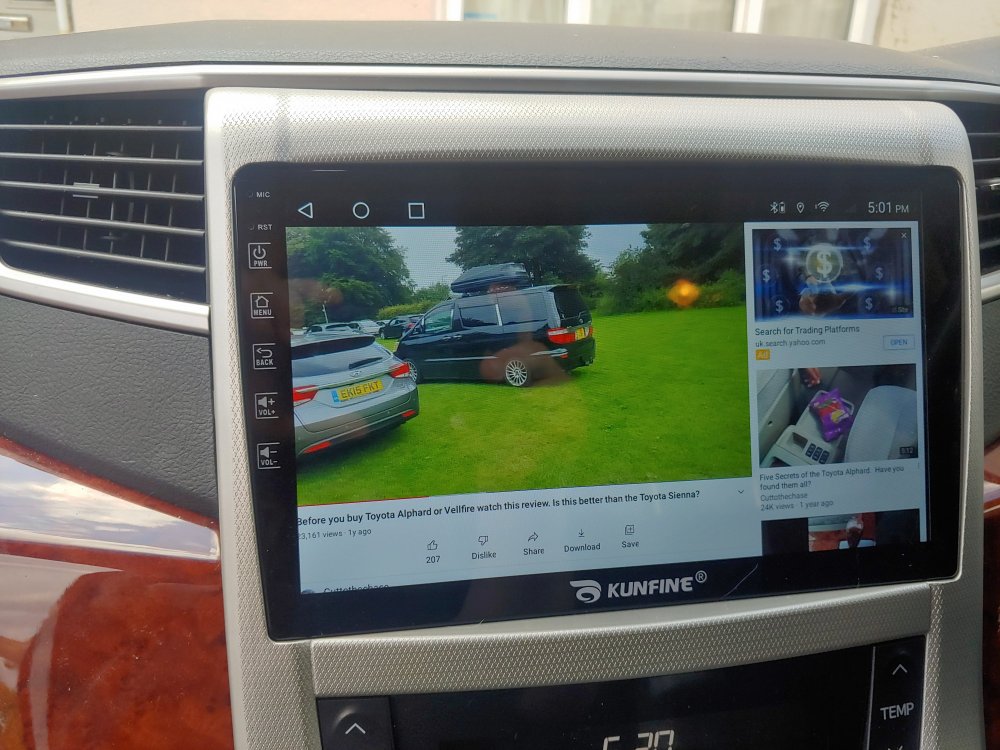
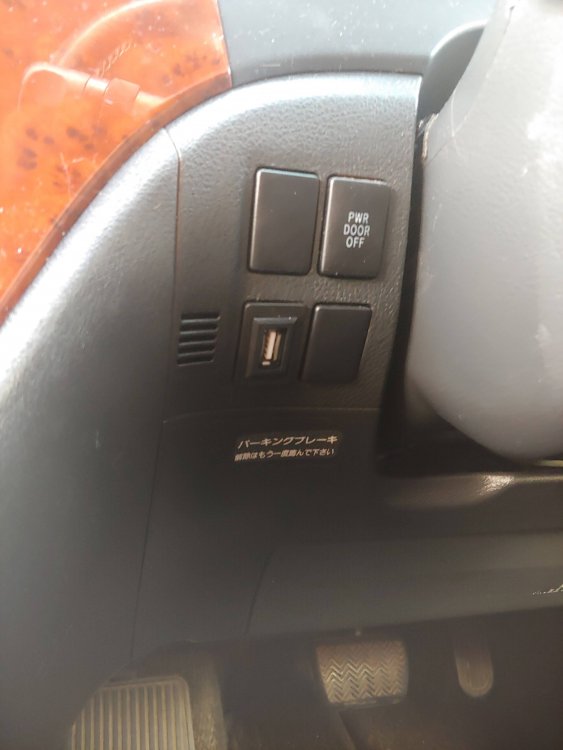
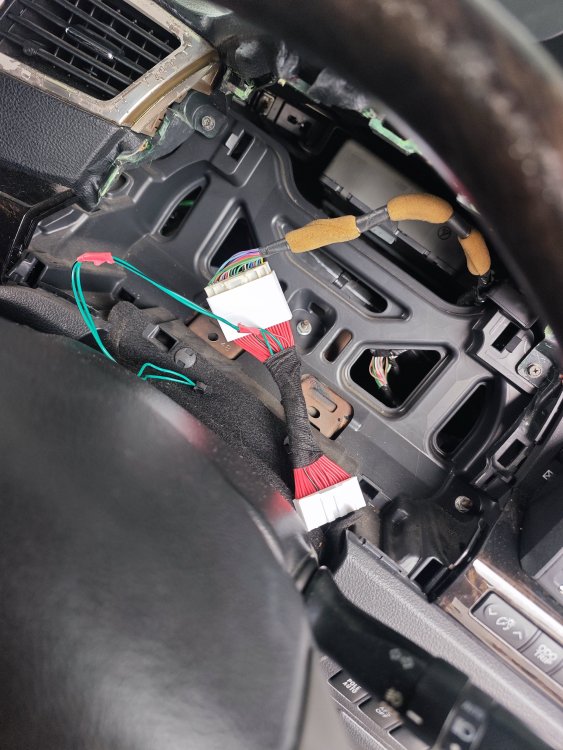
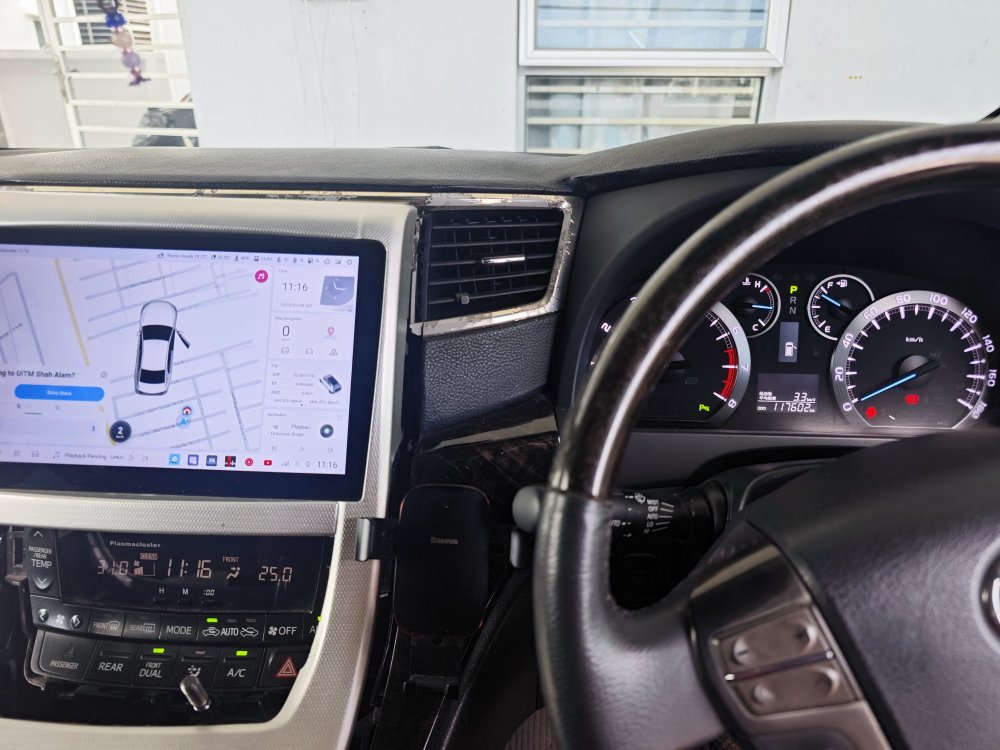
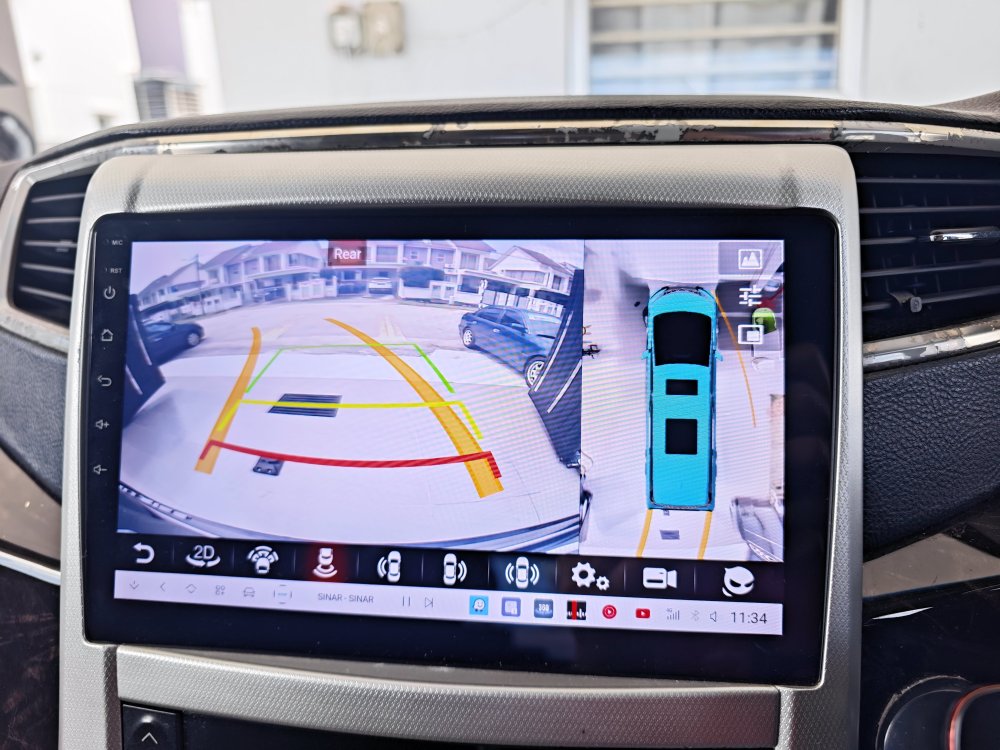
8 pointsJust received an fitted my new head unit from Aliexpress and I thought I would share if anybody wanted to get one. The one I got was this one - Car Radio For Toyota Alphard 2008-2021 Rhd Octa Core Android Car Dvd Gps Navigation Car Stereo Carplay Android Auto - Car Multimedia Player - AliExpress I got the 6gb ram / 128gb memory one as the price was cheaper then the basic ones in the UK. The unit arrived before the due date with all the cables. The only thing I have added in DAB USB unit which is easily fixed in (£28.99 on Amazon). Fitting was quite easy, however there are a few things to look out for. Mine was probably a bit harder because Micky Mouse had wired in a Sony after market unit so the wiring was all over the place. I found a few wires not connected to anything and these I deduced was connected to the screen aerials. I also had a phone wire that was sleeved with some other wires that had been cut. I assume the previous person thought it was for the reversing camera, but I am suspecting they go to the roof screen. I think I have found the reversing camera wire, but I need to order an adaptor. This was £25 on ebay. Once I had sorted out which was which it was easy fit. I did find a loose earth lead and when I connected it, the car started talking in Japanese. Ended up the earth was the wiring for Toll Road unit. The unit comes with two USB cables, one I used for the DAB adaptor, the other I ran next to the steering wheel, then added USB socket in the switch hole, to make it look more OEM. There is also a GPS unit. The cable is a bit short so I ran that to the passenger side of the window. It also comes with a 4G areal, which I have not mounted as I don't intend to pay for a data plan for the car, when I have unlimited data on my phone and can make a wifi hotspot. I booted the unit up, half expecting it to be the cheaper model or worse, not work at all, but it booted up great. It is very smooth and fast. I downloaded and ran AIDA64 to check that the specs had not been faked and it was exactly as it was stated. The steering wheel connection was easy to set up just by selecting the control then pressing the button on the steering wheel. Now the bad part. Changing over the gear selector was a pain as the original had pins that had been melted, these needed drilling then finding suitable screws to fit in the replacement bezel. I found some old screws from installing hard drives in a PC and these worked fine. Next the little storage unit in the bezel is a darker shade then the replacement bezel. I quite like it but some may not. I did think about wrapping it all in vinyl, but decided not to. Lastly I cant seem to get the top of the bezel to fit. I think there are some little plastic stems on the back that I need to file off. Other then that I am very happy. I have a connector that I think is the rear camera, if somebody can confirm it, that would be great.
 8 points
 -
7 pointsI'm a new owner of an 2013 Hybrid and i'm just searching relevant inf and documentation ref my model, so far i have the attached, if anyone else have any other, please share you never know when you need it maintenance-schedule.pdf auto-service-repair-manuals-and-wiring-diagrams-pr.pdf toyota-alphard-vellfire-em2441e-overall-electrical-wiring-diagram.pdf Toyota-ALPHARD-VELLFIRE-EM2441E-Relay-Locations-pdf.pdf Alphard-2-Vellfire-20-2008-2015-fuse-and-relay.pdf CAMSHAFT-VALVE-TOYOTA-ALPHARD-VELLFIRE-HV.pdf ALPHARD-VELLFIRE-Service-sheet.pdf hybrid-vehicle-dismantling-manual-for-ath20.pdf Alphard-20-Manual-pdf.pdf7 points
-
7 points
-
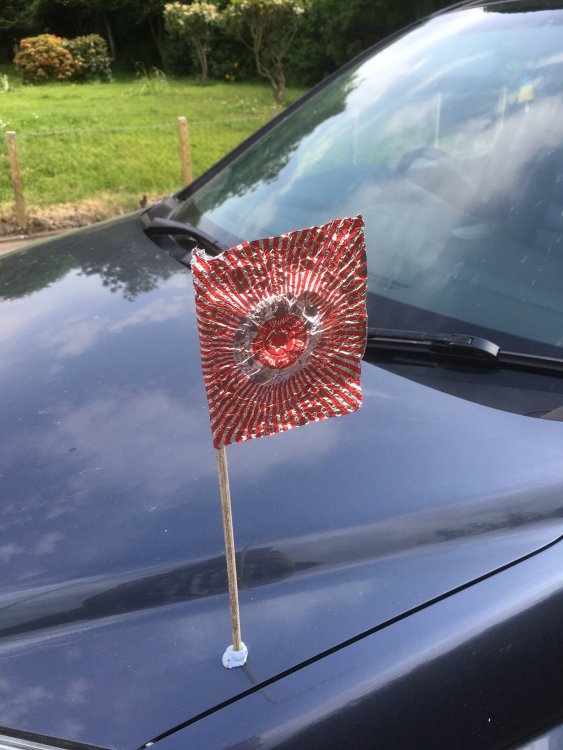
7 pointsSometimes i like to put a Tunnocks Teacake Wrapper on my Alphard and feel like I am transporting the president.... Discuss
 7 points
 -
7 pointsDid some research. Toyotas OEM Wipers for the alphards used blades provided by nippons blade division called NWB (nippon wiper blades) For the 10 series, the fronts are 26"(650mm) and 16"(400mm), with rear being 16"(400mm) For the 20 series, the rear is the same, but the fronts are 30"(750mm)and 14"(350mm) NWB blades are coded D** (** is the 1st 2 digits of the size in mm, E.g. D75 = 750mm) and the rear is GRB40 The 'D' is their design range that use graphite coated rubber. You can buy their HDA or HDB range (the frames are identical, but the rubber blade is coated in varying qualities of water repellant material that coats the glass (better performance with frost/snow)) You CAN buy just the rubber inserts (check that your existing blades are the nippons ones, they should have a metal clip/rail that needs to be removed and reused - the rubbers do not come with this metal part) I bought a set from amazon.co.jp (you can create an account in English) Search term for 10 series is NWB D65 D40 GRB40 Search term for 20 series is NWB D75 D35 GRB40 You can also buy DENSO, which is a decent OEM used by Toyota. Their largest blade, unfortunately, is only 700mm(28") so if you have a 20 series, you will have slightly less coverage on drivers side. DENSO codes are DU-070R (28") or DUR-065R (26") driver side DU-040(16") or DU-35(14") passenger side And DRB-040 rear. For all these wipers, the passenger and rears are about £8 to £12. The drivers side, being much larger is about £22 to £26 These are hook fixings, so any cheapo blade of manufacturers wipers will work if you get the sizes right. The rear blade has a different connector design, so probably best to stick with the NWB or DENSO designs. Opieoils (linked in a previous post) is very competitive of you are buying the denso blades, but you will be limited to a mac size of 28" If you still have the original NWB (Nippon) blades fitted, you can save money by buying the rubbers only, from Toyota, or amazon.co.jp7 points
-
Great news! My Alphard just passed its MOT. To celebrate, I've created a tutorial video on how to properly install the rear fog lamp using the OEM stalk and relay. This guide is specifically for second-gen Alphards, but based on feedback from first-gen owners, the process should be similar. This project took me months of research and gathering information from various sources. Since I couldn't find a single comprehensive video covering all the steps, I decided to make one myself. I hope this video is helpful to the entire Alphard community. Please like, share, and subscribe to help spread the word!6 points
-
6 pointsWith credit from Neil Pead. Here are the fuse locations and amp's. Alphard Fuses.pdf6 points
-
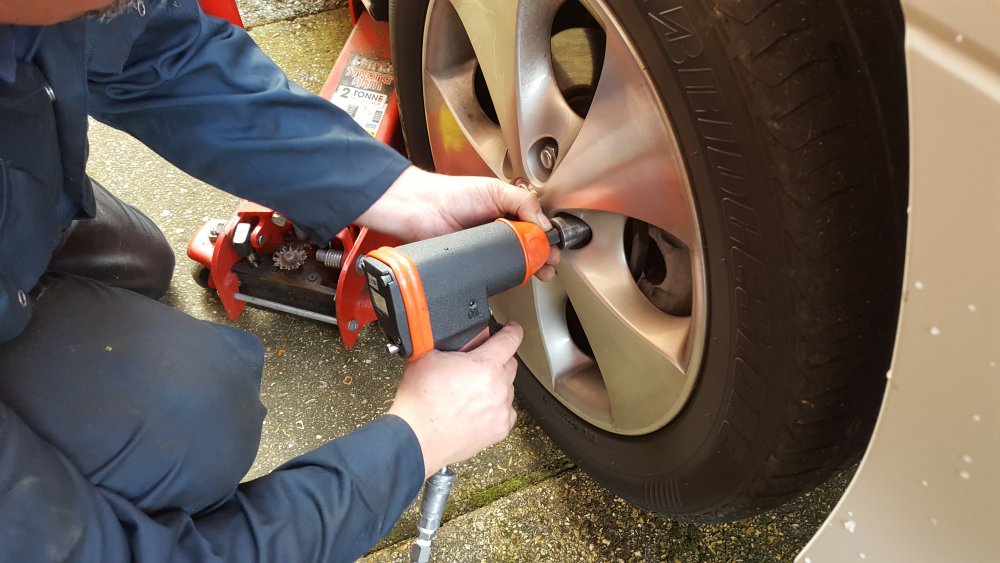
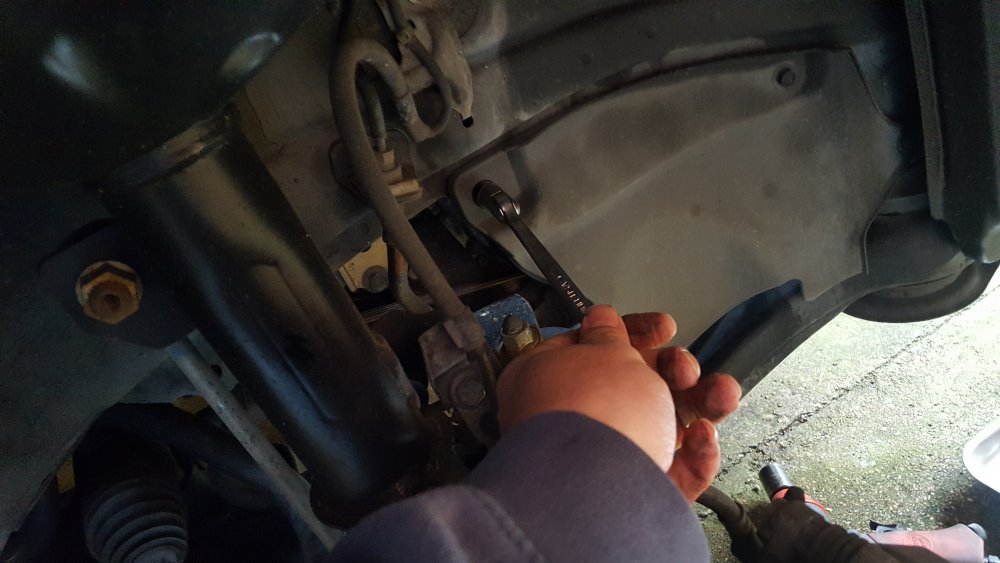
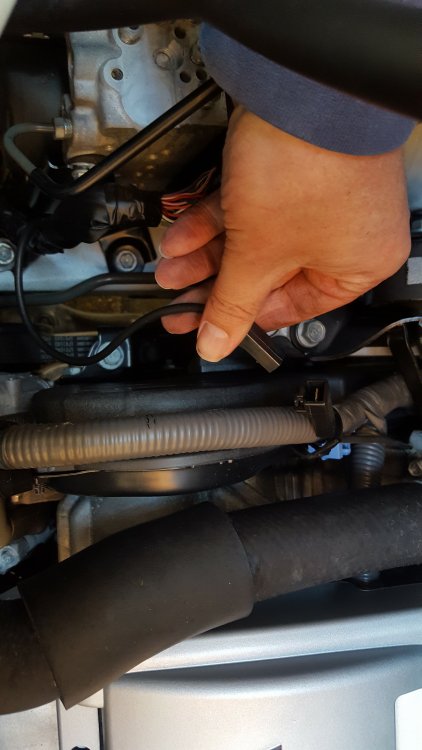
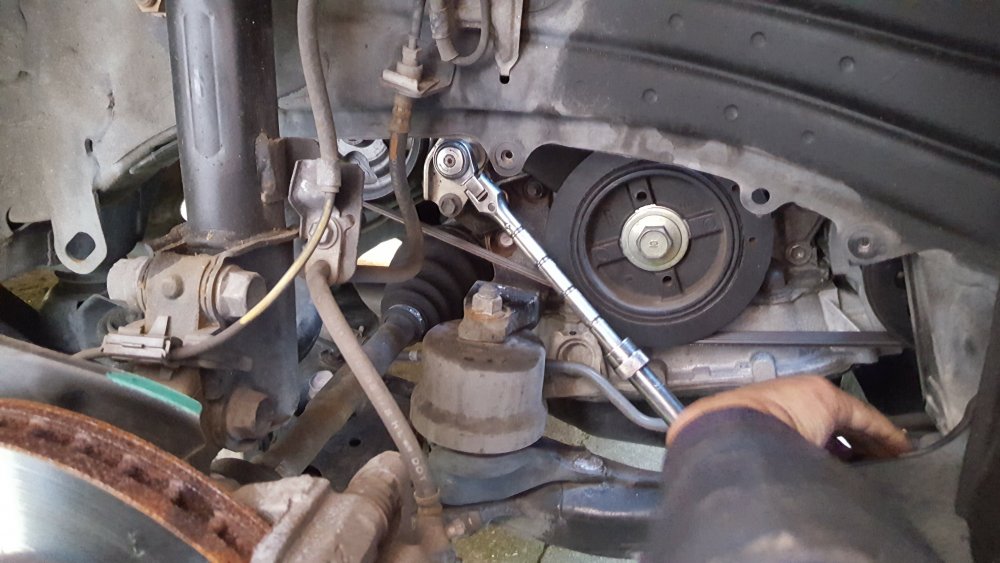
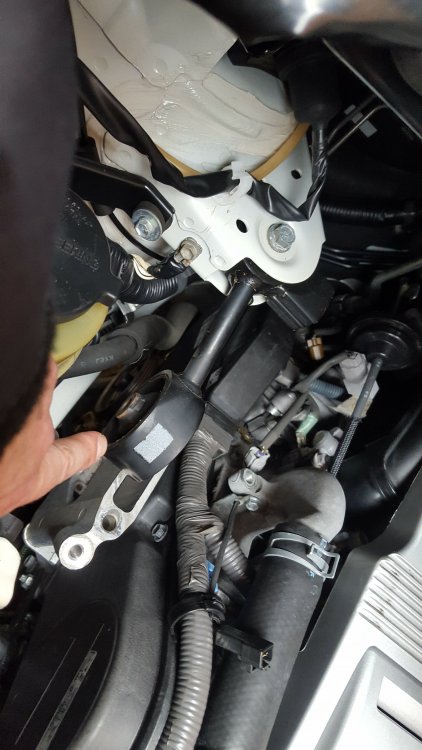
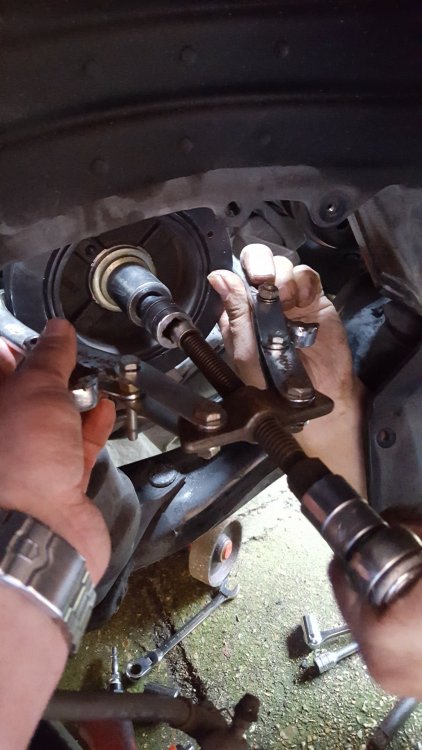
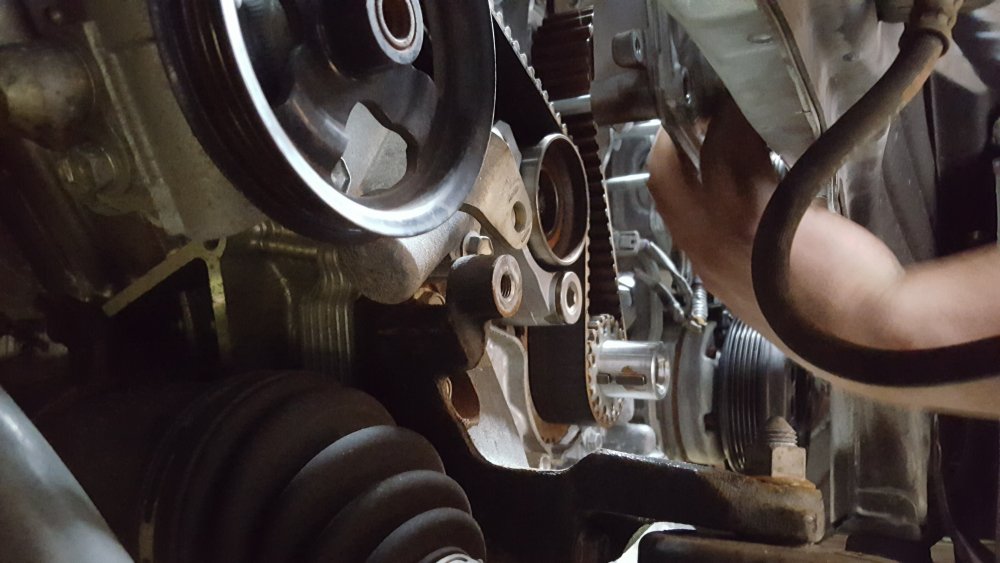
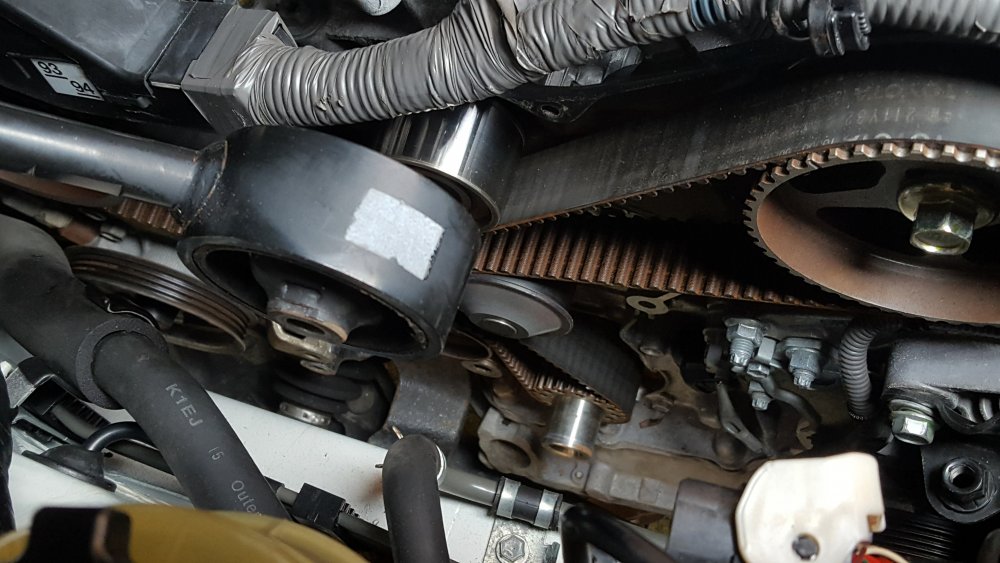
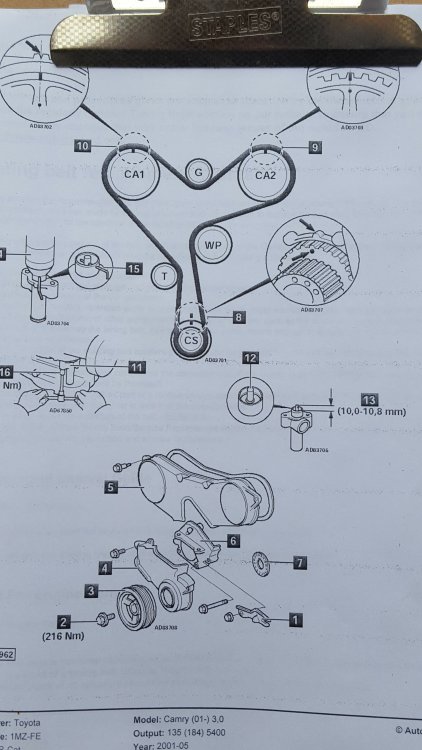
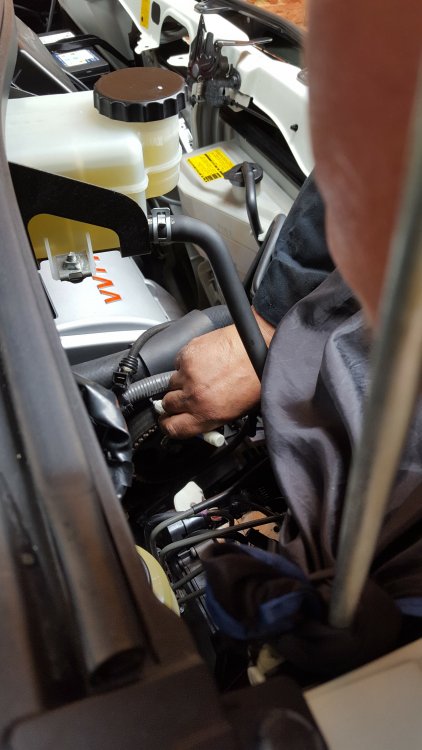
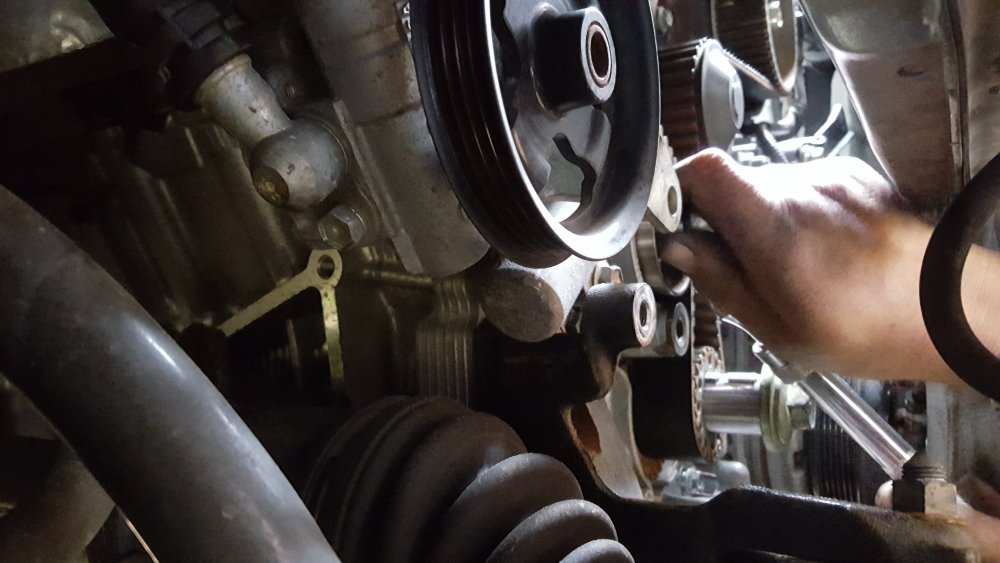
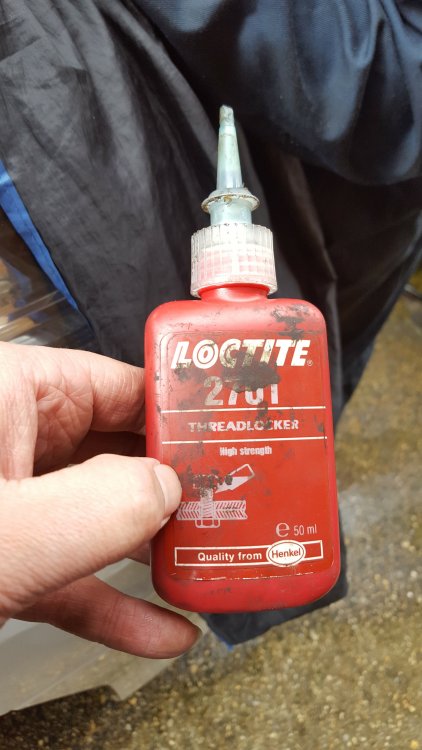
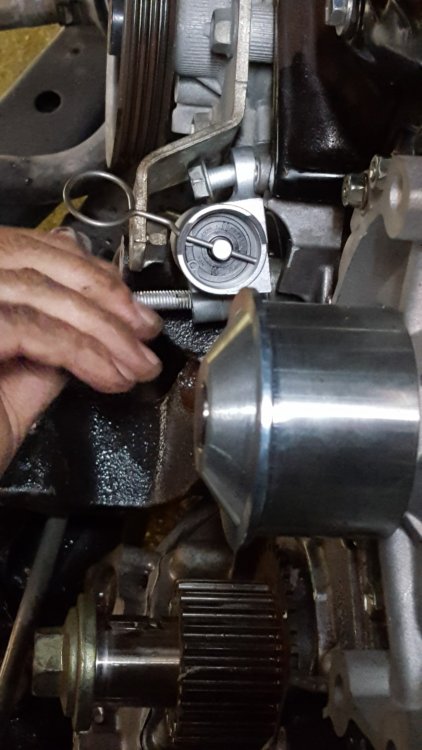
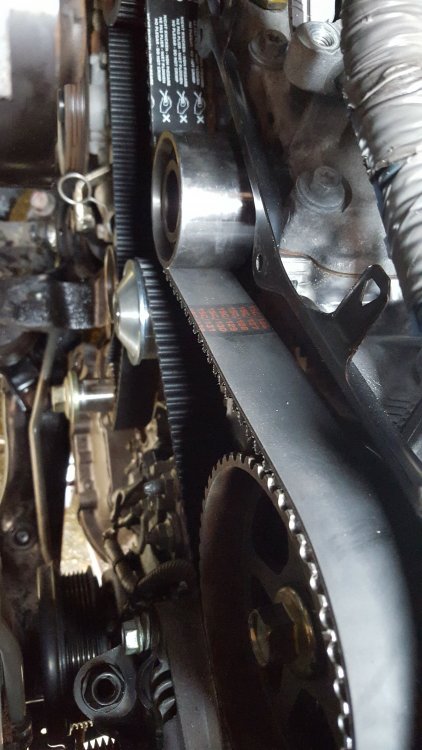
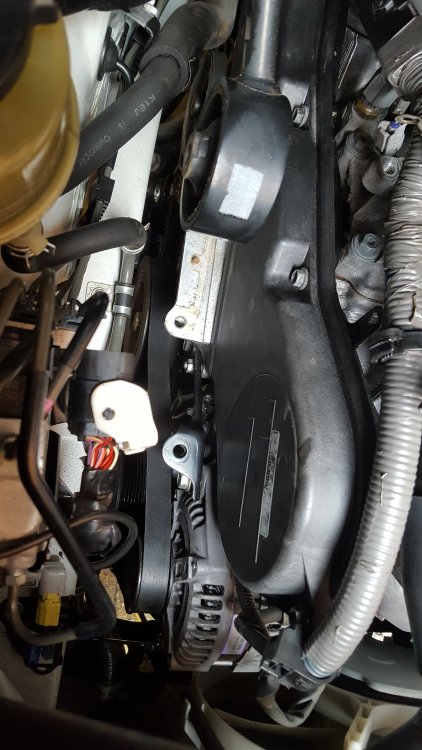
Note: No special tools are required to carry out the task except for general workshop and hand tools. Note: Disconnect the battery negative terminal before commencing work on the engine First step is to loosen the Right-hand Front wheel nuts, raise the vehicle on that side and support on an axle stand. Undo the wheel nuts and remove the wheel. Remove the plastic undertray at the lower part of the front bumper and also the one covering the auxiliary drivebelts under the wheel arch. Remove the auxiliary drivebelts and place aside if reusing, although if worn, then replacement at this stage would be the sensible option and cost effective in the long run. Tip: keep the old belts (if still serviceable) in the boot as a spare if needed in a road-side breakdown situation. Remove any electrical connections that are in the way and pull the loom in towards the engine and secure with a Bungy strap. Next, you are ready to remove the top engine mount. Before proceeding, it will be necessary to support the engine by placing some wood between the trolley jack and the sump and gently raise the jack until the wood is just contacting but no more. Remove any bracketry to gain access to the timing belt covers. The engine stabiliser bar is okay to be left in position or pushed over towards to the rear of the engine. Loosen the crankshaft pulley bolt and undo a couple of turns. Using a suitable puller, slightly withdraw the pulley from the crankshaft, remove the bolt and then fully remove the pulley. Once the upper and lower covers are removed you have then revealed the timing belt. It can be a fiddle to remove the alloy engine bracket (use a female torx socket to remove the studs) Replace the crankshaft pulley retaining bolt and tighten. Now you are at the tricky stage of timing up the engine prior to removing the belt. This is a good time to have a short comfort break because the next stage will require some concentration. Rotate the crankshaft pulley in a clockwise direction until all of the notches in the pulleys and castings are in alignment (see diagram). The camshaft pulleys should now also align with their respective timing marks. See diagram (below) for more information on the alignment marks. Slacken off the tensioner and remove the timing belt. Remove the tensioner, guide pulley and idler pulley. At this stage, it would be prudent to replace the water pump as well as this is also part of the timing belt setup and if it starts to wear on the bearing or leak then it can compromise the engine durability and it is the additional time to replace it at a later date. Bear in mind, the bearing in the pump has also done the same amount of work as the other bearings! On reassembly, it would be wise to use a thread locking adhesive to ensure that none of the fasteners loosen of with vibration from the engine. This should be applied sparingly to all crucial nuts and bolts within the engine. When fitting the new tensioner, ensure that the retaining pin is still in situ. This must only be removed once the timing belt is in position and the tensioner can then apply pressure to the belt. The belt should be positioned so that the timing points are still aligned and when you are happy, release the pin. Check camshaft and crankshaft pulleys are positioned correctly then turn the crankshaft two complete turns (760 degrees) in a clockwise direction. The timing marks should still be aligned correctly. A final tighten and check on all components within the timing belt area and you are ready to replace the plastic covers and rebuild the engine in reverse of removal. Remember to apply thread lock to all vital fasteners. Ensure all fasteners are torqued to the correct setting and refill cooling system (if drained) When starting the engine for the first time, it should be allowed to idle for a period to check for noises and leaks. Always a good idea at this stage to recap all of the work carried out and ensure that everything has been fitted and tightened correctly, including wheel nuts!


 5 points
 -
5 pointsBulb List for Gen 1 Dashboard/console led/bulb = t4.7 for the backlight of the clock etc and t3.5 for the buttons Buttons either side of steering wheel = T3 Headlights - Halogen Headlights = H4 60/55W Discharge Headlights - High Beam = HB3 60W - Low Beam = Not fitted with intelligent AFS = D2R 35W Fitted with AFS = D2S 35W Front Fog Light = HB4 51W -mz * mx * ax = 55W - MS * AS = 35w Clearance Lights = W5W 5W Front Indicator/Hazard Lights = 1W Side indicator/hazard = W5 12V Number Plate = W5W 93R Brake Lights = 21W Tail Light = 2DIW SW7443 21w Rear Indicators = 2FH 21W Reverse Light = W6W 21W Rear Fog Light = 21W optional change to the reflectors HERE Front Personal Light = 8W Rear Personal Light = 5W Vanity Light = 1.5W Front Door Courtesy Light = 3.8W Foot Area (not present cant tell you) = Luggage room light = 5W Ashtray = 1.2W High mount stop light =W16W 16W Bulb List for Gen 2. Here's a general list of common bulb types. It's highly recommended to double-check your vehicle's owner's manual or visually inspect the bulbs in your specific Alphard before purchasing replacements. Headlights: Low Beam: Halogen: H1, H7, H11, HIR2 Xenon/HID: D2S, D4S (These are usually for vehicles with factory HID systems. Note the voltage difference - 85V for D2S/D4S vs. 12V for halogen.) High Beam: Halogen: H4 (often combined with low beam in one bulb for some models), HB3 (9005) Fog Lights: H8, H11, H16 (H11 is very common) Exterior Lighting (other): Front Turn Signals: WY21W (amber) or 7440/7440A (some models might use W21W with an amber lens) Front Side Marker/Position Lights: W5W (T10 wedge) Rear Turn Signals: WY21W or W21W (if the lens is amber) Brake/Tail Lights: W21/5W (dual filament for brake and tail), P21/5W, P21/4W, R10W (some models may have LED tail lights, which would be integrated units) Reverse Lights: W16W, P21W License Plate Lights: W5W (T10 wedge) Interior Lighting: Dome Lights / Map Lights / Reading Lights: Typically use a variety of bulbs, including: Festoon bulbs (various lengths like 31mm, 36mm, 39mm, 41mm) W5W (T10 wedge) Some areas might use smaller wedge bulbs like T5. Vanity Mirror Lights: Often smaller festoon or W5W bulbs. Trunk/Boot Light: W5W or a festoon bulb. Door Lights: W5W5 points
-
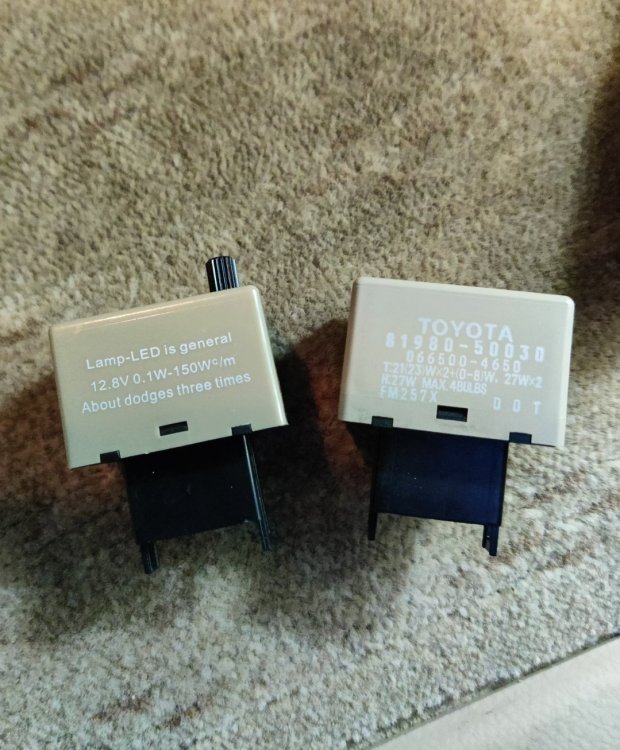
One thing I missed when driving my gen 1 Alphard is the indicator lane change 3 flash that is in many newer vehicles these days, and I got so used to using it that when driving my Alphard I often forget and just flick the indicator to change lane and, of course, I get one flash. I'd seen someone was selling an alternative direct replacement flasher relay for upwards of £50 that was modified to give the 3 flash, but that price was too much for me to just avoid holding the indicator down a bit longer. A bit of research turned up a potential alternative for less than £10 on eBay. It didn't specifically mention the lane change function as it seemed to be more aimed at people retro-fitting LED indicator bulbs and messing up the flashing rate, but I had a suspicion so I took a punt and bought it. The original Toyota item and the replacement are shown below. Notice the knob for adjusting the flash rate, and poorly translated "about dodges three times" on the replacement relay. Fitting it was easy enough. Simply pull out the coin drawer thingy just above the bonnet and fuel flap release levers on the driver side of the dash and look in. The relay is fairly obvious. The relay put up a fight and was reluctant to release, but a bit of jiggling and a little bit of leverage from a screwdriver got it out. This photo shows the new one fitted. I turned the hazards on and the flash rate was very fast, but with a quick twiddle of the knob on the relay I had the flash rate back to where it should be. Then the moment of truth - ignition on and flicked the indicator stalk. Three flashes and stop 👍. £10 and 10 minutes work. Bargain! This is the one I bought on eBay, but there appears to be loads of sellers as the original Toyota relay was used on many different models, as you could imagine. https://www.ebay.co.uk/itm/386806258020?mkcid=16&mkevt=1&mkrid=711-127632-2357-0&ssspo=xfg_a3ycs9s&sssrc=4429486&ssuid=ql8_keC9RJe&var=&widget_ver=artemis&media=COPY
 5 points
 -
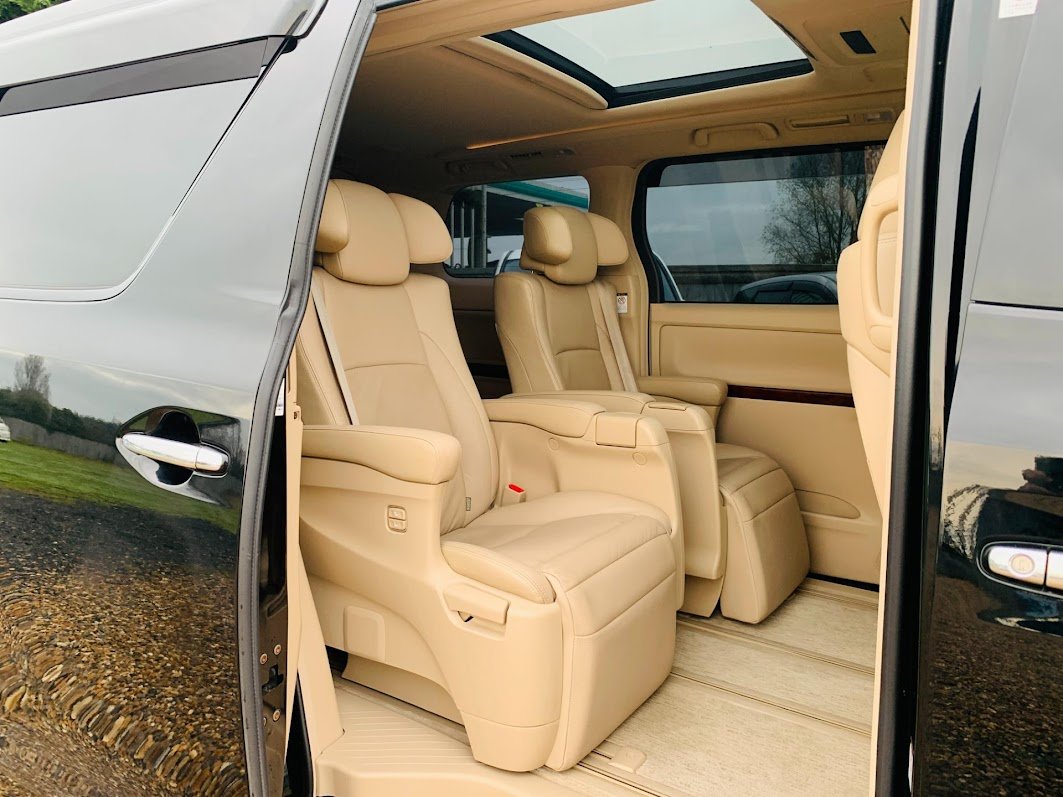
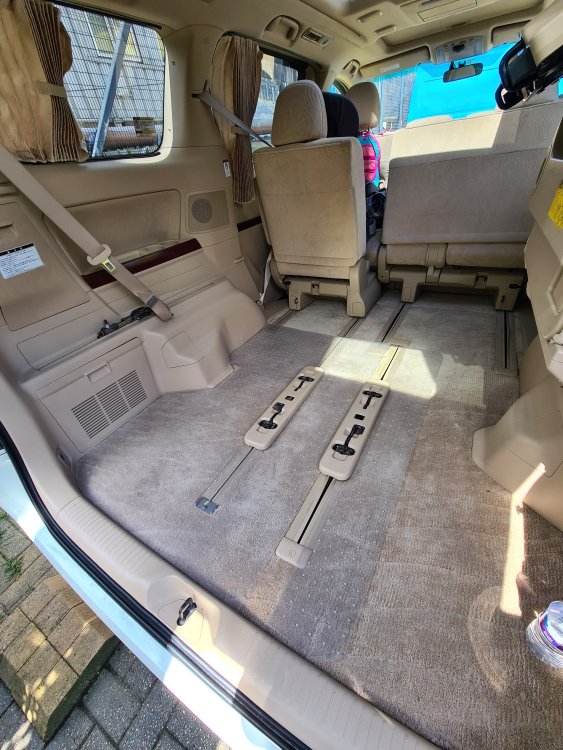
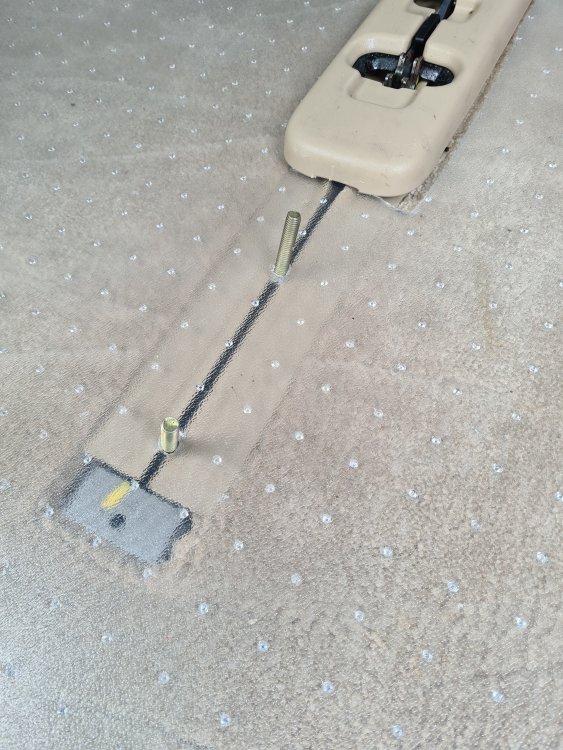
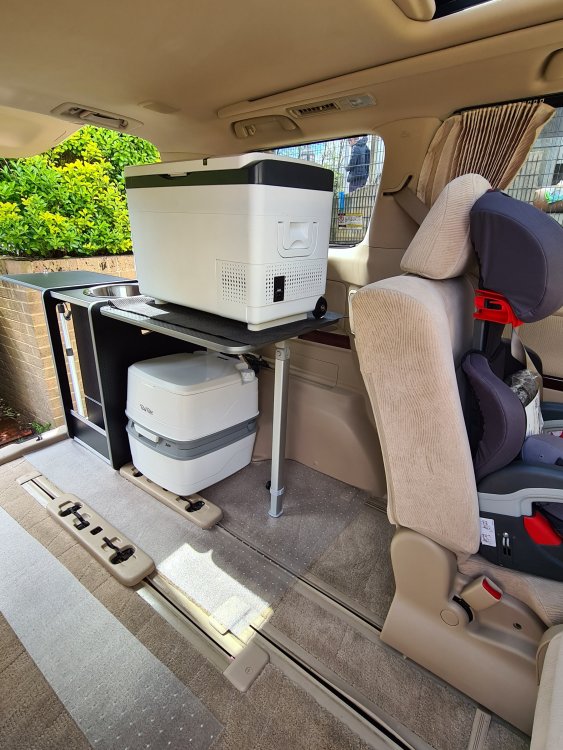
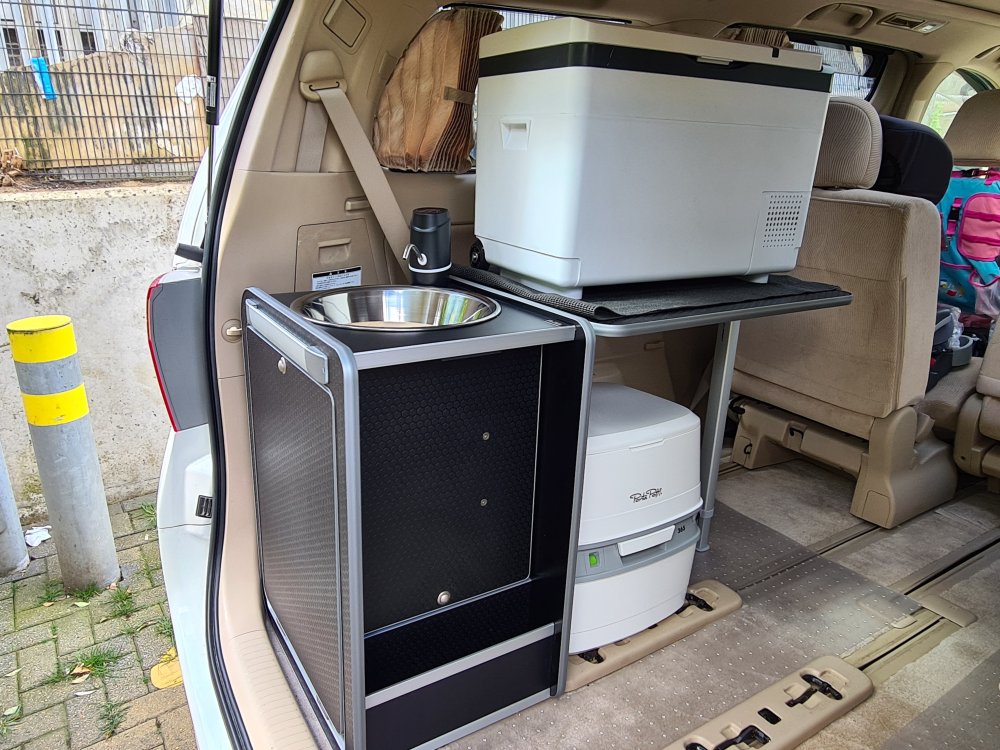
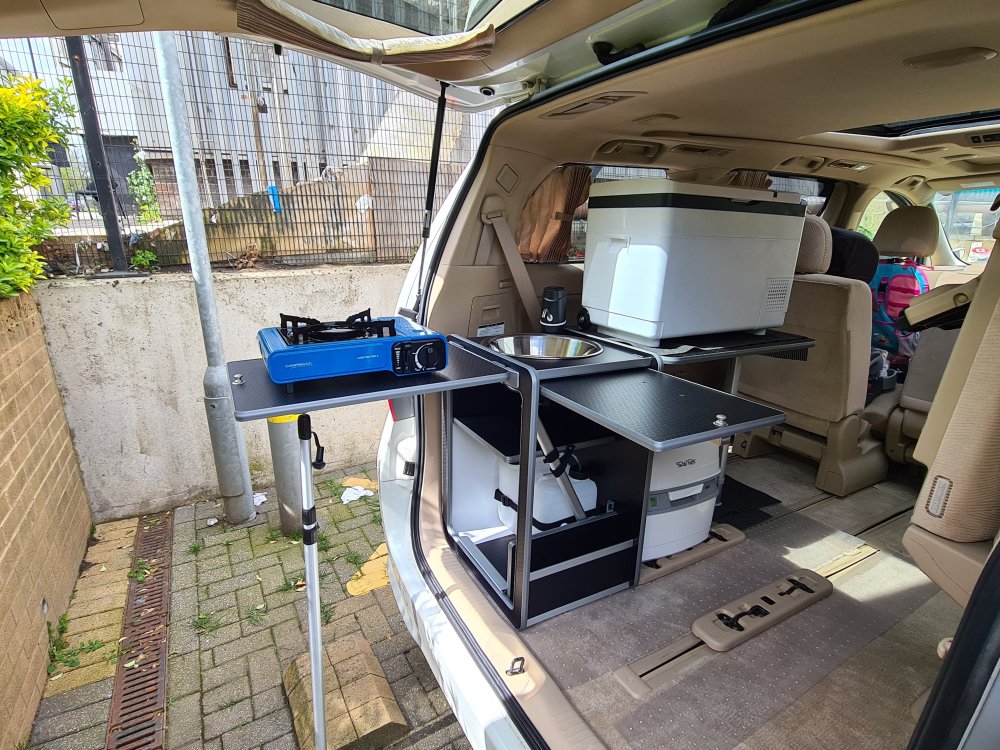
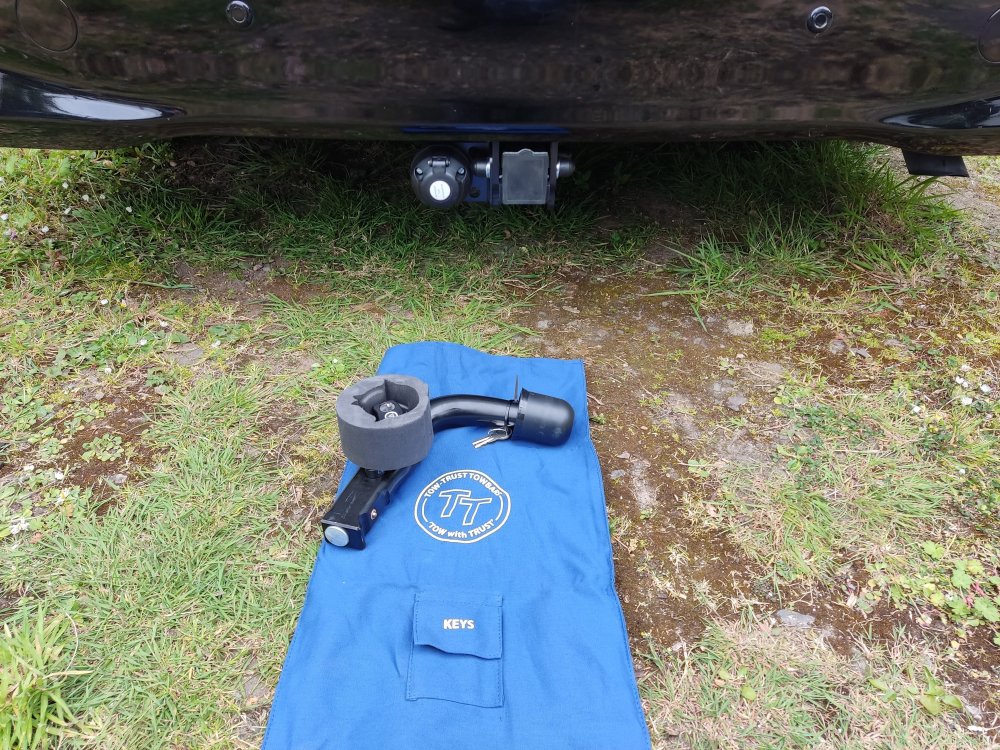
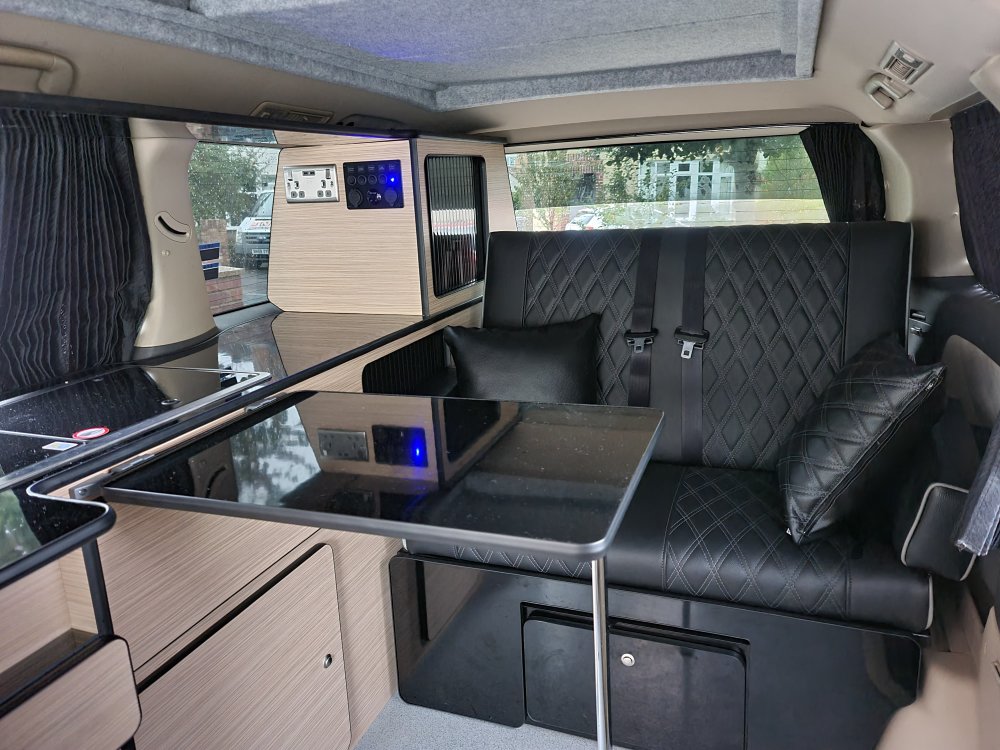
5 pointsHi Guys I just wanted to share pictures and details of the Vangear mini pod I just brought and installed in my Alphard. There were some members who were interested in this so I thought I'd start a new topic. I ordered the unit about 3 weeks ago and requested they fit an extra rail for an additional table I wanted. I had removed one of the rear seats and placed a plastic mat before fitting the pod.. which took about 20 minutes to fit. I've placed all my utensils, ridgemonkey, camping bits in the cupboard and behind the unit. I have enough space under the table to put my Thetford loo and my poweroak power station, with space on top to put my stove, picnic rugs and blankets etc..My 30L fridge sits on top when I'm parked up. The only issue I had was that the leg for the table facing the tailgate was not meant to be long enough to reach the floor outside. I instead used an extended tent pole which I already had.. this was perfect. The pictures I've attached were taken when I fitted the unit. I placed all the above items and more in and around it afterwards. This still give me the use of 6 seats 😀 I can remove the whole unit and bolt back the seat in 40 minutes if I had to. It's a brilliant unit. I hope this inspires you all to get out and to enjoy these brilliant vehicles. Aftab
 5 points
 -
I am in no way affiliated with them, but I just wanted to let everyone know that I've just had some great service on my 2007 Hybrid from a garage near Cambridge. It was having loads of issues, kept cutting out, hybrid system stopped working properly, overheating battery etc etc and I hadn't been able to find anyone to help locally to even diagnose it, let alone fix it. No one would touch it! BUT, I took it to Cambridge Hybrid Vehicle Specialists (DAG Group), who diagnosed and fixed the problem in under an hour for less than £140 including parts and labour. (Turned out it was a couple of fuses and a broken relay causing all the problems.) Nice guys, seem to really know their stuff, and they've just opened a location here to get ready for the new taxi rules that come in to effect in Cambridge in Feb next year, and apparently they service fleets of over 800 hybrid cabs in London and somewhere else I forget. Anyway it was a nightmare finding anyone who could look at it at all and they were great, so I just thought I'd give them a shout out on here in case anyone else is looking!5 points
-
5 pointsHi. Managed to track cause off fault Broken link arm on rear axle offside for levelling headlights repaired and afs fault gone. Thanks for all your help and advice5 points
-
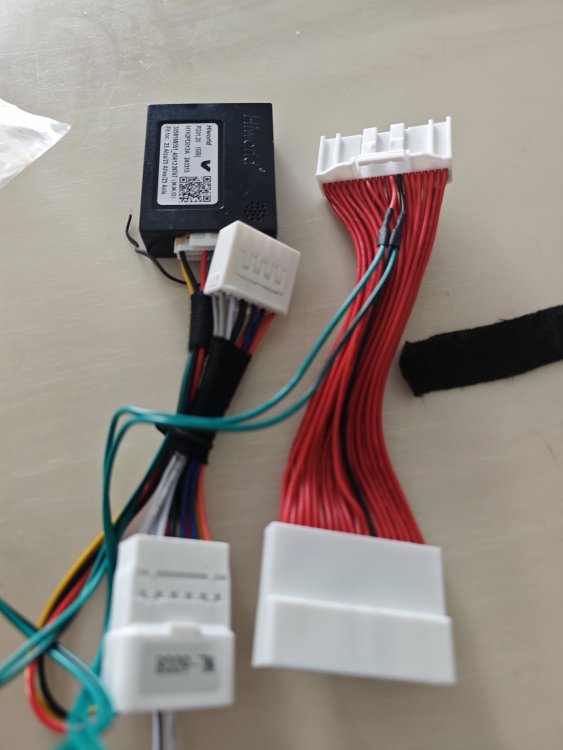
Hey everyone, I successfully did a full radio upgrade in my 2007 MZG, it was hard to find any info on how to, so i hope this helps someone in the future. overall it was fairly easy. I used the beatsonic harnessess for the entire install. I used the SLX-131 from car audio express in the UK, if you get the steeringwheel package it already comes all wired up and ready to use, they also include the radio side adaptor which you configure yourself with the guide included, you do not need to buy any extra radio side hardness. This kit also came with the dash kits and everything needed. Beat-Sonic SLX-131 Audio Adapter for Toyota Alphard (caraudioexpress.co.uk) Wiring of the SLX-131 was very easy, its all plug and play, just get the right plug connectors, and everything plugs in. You only use the front L & R speakers from the radio side harness. You dont need to hook up the Ant Rem either unless you have a remote antenna. For the front and rear cameras you will need BC1 and BC15. These two kits install under the passenger seat, there is an ECU there with a 40 pin connector. You will need to run ACC+ and two RCA lines to under the seat. I was lucky enough that the car had previously had the TV module installed under the passenger seat so I had ACC power already available. You will hook up the BC1 in the front camera configuration, with the purple going to red. I ran the two RCA cables just under the floor mat to under the glove box and then up through the dash to the new radio headunit. Beat-Sonic BC1 Rear Back Up Camera OEM Interface Adapter (caraudioexpress.co.uk) Beat-Sonic BC15 Reverse Camera Adapter for Toyota (caraudioexpress.co.uk) I used the Pioneer DMH1500NEX headunit for the replacement radio, overall it works fairly well, but doesn't have wireless carplay, and they use their own OS which is fairly limited for videos. It is Web Link compliant, so I can watch YouTube and app store videos on the rear and front displays. The rear display also is working, but with this head unit is fairly limited on what i can play. I would definitely recommend getting something with an android OS for more video flexibility if thats what you want. You may also want to consider a unit with HDMI input as well if you want to have more video input options. I will upload a video on to YouTube at some point as well.5 points
-
what worked out well was we all seem to turn up at the same time, we then were directed to the wrong carpark, so we have to come back the way we came out and we were all passing each other, it was a great spectacle to see. Then we all queued down the hill to line up. It was ace! Thanks to everyone who came and hope you all got home safely. See you in the spring at the next meet.5 points
-
5 pointsHere's my 2p worth ! When driving an automatic and coming to a temporary stop, it is not necessary to take the transmission out of drive, just apply the footbrake until you are ready to go again. This reduces wear on the transmission. When about to set off again on an uphill section , SWIFTLY move your foot from the foot brake to the accelerator and apply a few revs. No rolling back occurs when done with confidence. The transmission has a pawl which engages on selecting PARK, but this should not be used as a brake, and PARK should really only be selected AFTER you have applied the hand(foot)brake. There is is a risk of expensive damage in an auto transmission if you abuse the PARK facility. If you don't believe me, check out a few Scotty Kilmer videos on YouTube. He knows a think or two about cars, and Toyota in particular.5 points
-
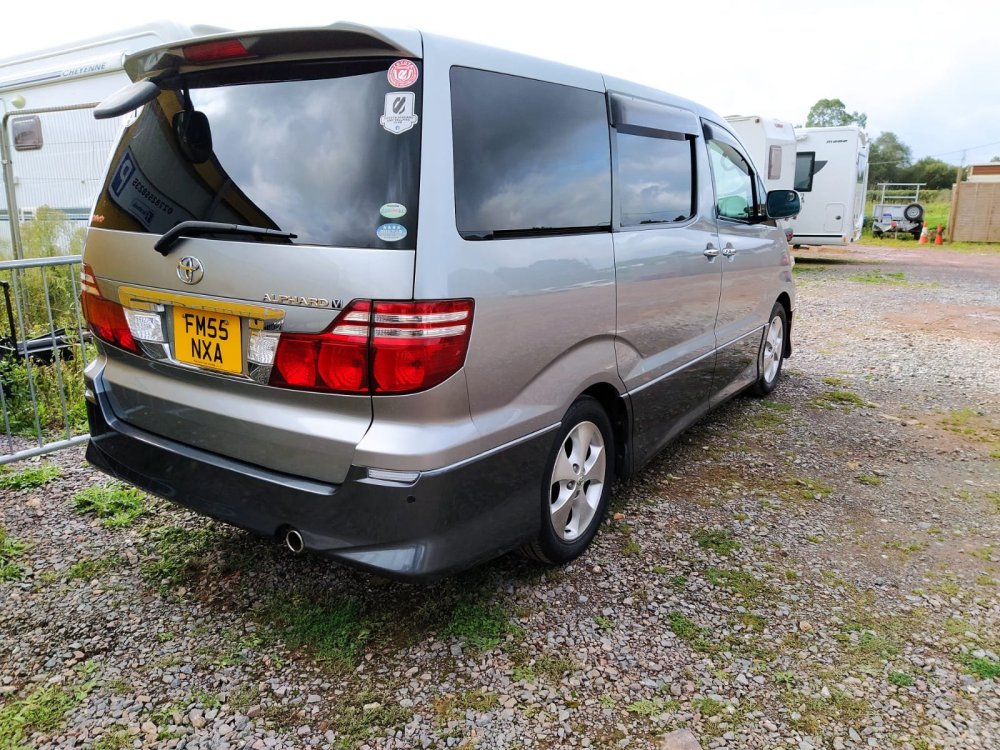
4 pointsFitting a tow bar to a Toyota Alphard MNH10 (3.0L V6, 2002–2008) in the UK involves a specific legal procedure that you must address before picking up a wrench. Because these are "grey imports," standard UK towing laws apply differently than for UK-market cars. 1. The Legal Hurdle: VIN Plate & Towing WeightsMost imported Alphards do not have a Gross Train Weight (GTW) stamped on their VIN plate. The Risk: If your VIN plate does not show a GTW (the second biggest number on the plate), your legal towing limit is 0 kg. Towing a trailer in this state can void your insurance and is illegal. The Fix: You must get the vehicle "replated." A specialist engineering firm will calculate the safe capacity and issue a new, legal VIN sticker to stick over the old one. Recommended Specialist: SVTech (UK-based) is the standard go-to for this. Estimated Cost: Approx £150 – £170. Action: Check your VIN plate (passenger door pillar or under the bonnet). If the GTW field is blank, contact SVTech before towing. 2. Weight Limits & SpecificationsOnce legally replated, the 3.0L V6 MNH10 typically has these limits (using an online calculator): Towing Capacity (Braked): 1,600 kg – 1,800 kg (Dependent on the replating certificate). Towing Capacity (Unbraked): 750 kg. Nose Weight (Vertical Load): 75 kg. Note: The rear suspension is soft. If you tow near the limit, the rear will sag. Many owners fit "assister springs" (e.g., from Grayston) inside the rear coil springs to stiffen the ride. Kerb Weight: ~1,900 – 2,000 kg. 3. Mechanical Fitting ProcedureTime: 2–3 hours | Difficulty: Moderate DIY Key Note: The tow bar usually replaces the rear crash beam. You will remove the crash beam and not refit it. Tools: Socket set (10, 12, 14, 17, 19mm) + Extension bars. Torque Wrench (essential). Jigsaw or Padsaw (for bumper cut). Drill with 12.5mm metal bit. Step-by-Step: Preparation: Lower and remove the spare wheel to clear the work area. Exhaust: Detach the rear exhaust rubber hangers. You don't need to remove the exhaust, just lower it enough to work above it. Remove Towing Eye: Remove the factory towing eye (usually held by 4 bolts) from the chassis rail. This will not be refitted. Chassis Access: The mounting points are pre-drilled in the chassis rails but may be covered by tape or underseal. Drilling: Some kits (like Tow-Trust) require you to drill through the outer face of the chassis rail, using the existing inner holes as a guide. Insert Spacers: Crucial Step. You must insert the metal spacer tubes into the chassis rails before bolting. If you forget these, tightening the bolts will crush the box-section of the chassis, causing structural damage. Mounting: Lift the tow bar crossbeam into place (ideally a 2-person lift). Insert bolts loosely. Bumper Cut: Most MNH10 tow bars require a cut on the underside of the bumper (non-visible from standing). Typical Dimensions: 90mm wide x 50mm deep. (Check your specific kit's manual to be sure). Tightening: Torque the bolts to the manufacturer's spec. If not specified, standard ISO ratings for M12 bolts are: Coarse Pitch (Standard): ~102 Nm Fine Pitch: ~111 Nm Reassembly: Raise the exhaust back onto its hangers. Winch the spare wheel back up (check it doesn't foul the new tow bar structure). 4. Electrical Wiring (The "Bypass" Requirement)The MNH10 uses an analogue lighting system, but it is sensitive. You cannot simply scotch-lock wires directly to the bulb holders without a relay, or you risk blowing the lighting control module. Required Kit: A "7-Way Universal Bypass Relay" wiring kit. Connection Point: The best access is behind the Nearside (Left) Rear interior trim panel. You will often find a Blue and White connector block here which carries the rear lighting feeds. Wiring Colors (Guide Only - Always Test with Multimeter): Earth: White/Black Stop: Green/White Tail: Green Indicator (Left): Green/Black Indicator (Right): Green/Yellow Tip: Use a multimeter or 12V test light to confirm these before cutting. Power Feed: You will need to run a dedicated 12V power feed from the battery (front) to the bypass relay (rear), fused near the battery. 5. Critical Consideration: Transmission CoolerThe 3.0L V6 (1MZ-FE engine) is paired with a specific automatic gearbox. The Risk: The radiator cools both the engine and the gearbox fluid. When towing, the gearbox fluid gets incredibly hot. The stock cooler is often insufficient for towing >750kg, leading to gearbox failure. The Fix: Fit an external Transmission Oil Cooler. This is a small radiator (approx £50-£80) that sits in front of your A/C condenser. It is cheap insurance against a £2,000 gearbox rebuild. Summary Checklist for UK OwnersCheck VIN: Is GTW stamped? If No -> Contact SVTech. Buy: Tow bar (e.g., Tow-Trust or PCT) + Universal Bypass Wiring Kit + Transmission Cooler. Install: Remember the chassis spacers and the torque settings (100Nm+). Test: Verify lights and ensure the spare wheel is secure. Oil Cooler For the Toyota Alphard 3.0L V6 (MNH10), you specifically need an Auxiliary Air-to-Oil Transmission Cooler. Do not buy a "standard replacement" transmission cooler from a general parts site (like AutoDoc or Euro Car Parts). Those are usually the stock water-cooled units that fit inside the radiator—they are what you already have, and they are not sufficient for towing. You need an external radiator kit that sits in front of your air conditioning condenser to provide extra cooling. 1. Recommended Kit & SpecificationFor the Alphard V6 towing up to 1,600kg, the "Gold Standard" specification is: Brand: Mocal (highly reliable, UK standard) or Setrab. Size: 13-Row or 16-Row (13-row is standard, 16-row is better for heavy caravans). Width: 235mm (Standard width, fits easily behind the Alphard grille). Hose Size: Typically 10mm (3/8") for Toyota transmission lines (check this on your van before ordering). 2. Where to Buy in the UKOption A: The Specialist (Best Quality)These suppliers sell complete "Universal" kits that include the cooler, hoses, mounting brackets, and clamps. Demon Tweeks (Wrexham / Online): Look for "Mocal Universal Oil Cooler Kit". They are very helpful on the phone if you are unsure about fittings. Merlin Motorsport (Castle Combe): A dedicated race/performance shop. They stock Mocal and Setrab and sell the hose by the meter if you need extra length. Think Automotive (Isleworth): They are the actual manufacturers/distributors of Mocal products in the UK. If you call them and say "I need a transmission cooler kit for a 3.0L Toyota," they can build a kit with the exact right hose barbs. Option B: Budget / General (eBay & Amazon)You can find "Universal Transmission Cooler Kits" for £40–£60. Search for: "Universal Transmission Oil Cooler Kit 10mm". Brands: Hayden or Mishimoto are decent mid-range options. Warning: Avoid the very cheapest unbranded kits (<£30); the hoses are often low quality and can burst under pressure, which would destroy your gearbox in seconds. 3. What to Order (The Shopping List)If you are buying the parts individually, you need: The Cooler: 13-row or 16-row Mocal oil cooler. Fitting Kit: 4x Mounting brackets (often plastic ties that go through the radiator fins, or metal brackets). Hose: 2 meters of high-pressure transmission oil hose (10mm / 3/8" internal diameter). Joiners: You do not need complex screw fittings. You need barbed joiners to splice into the existing rubber hoses coming from the gearbox. 4. Installation TipThe Alphard V6 gearbox lines exit the gearbox and go into the bottom of the main water radiator. Correct Flow: You should plumb the new cooler in series after the main radiator. Route: Gearbox -> Main Radiator -> New Cooler -> Back to Gearbox. Why: This uses the water radiator to get the fluid up to temp quickly, and then the new air cooler sheds the excess heat before the fluid returns to the delicate gearbox mechanics. Correct Flow Positions & Tests For the Toyota Alphard MNH10 (V6), the transmission cooler lines are not consistently colour-coded or stamped "In/Out". Because guessing incorrectly can overheat your gearbox, you must confirm the flow direction physically. The only 100% safe way to identify the return line is the "Bucket Test". 1. The "Bucket Test" (Fail-Safe Method)You need to intercept the fluid after it leaves the main radiator but before it goes back to the gearbox. Locate the Hoses: Find the two rubber hoses connecting the gearbox to the bottom of the main radiator. Disconnect One: Disconnect one of these hoses at the radiator end. Prepare: Place the open end of the rubber hose into an empty bucket. Place a clear plastic tube (or just a finger/rag) over the open metal nozzle on the radiator to catch any fluid. The Test: Have a helper start the engine and immediately turn it off (run for 2–3 seconds max). Identify the Flow: Option A: If fluid spurts out of the Radiator Nozzle, that nozzle is the Feed (coming from the gearbox). The hose you are holding is the Return line. (This is the hose you want). Option B: If fluid spurts out of the Rubber Hose, that hose is the Feed from the gearbox. The radiator nozzle is the Return. Reconnect this hose and test the other one to be sure. 2. How to Plumb the New CoolerTo get the maximum cooling for towing, you should install the new cooler in Series (after the radiator). Correct Flow: Gearbox -> Main Radiator -> New Auxiliary Cooler -> Gearbox Why: The main radiator helps warm the fluid up quickly in winter, and the new cooler sheds the excess heat generated by towing before the fluid returns to the sensitive gearbox mechanics. Connection Steps: Identify the Return Hose using the test above (the one that carries fluid back to the gearbox). Disconnect this hose from the radiator. Connect the Radiator Output (where you just pulled the hose off) to the New Cooler Inlet. Connect the New Cooler Outlet to the original Return Hose (which goes back to the gearbox). 3. Parts ConfirmationHose Diameter: The MNH10 uses 10mm (3/8") internal diameter transmission hose. Clamps: Use proper fuel injection clamps (solid band), not the cheap worm-drive jubilee clips which can bite into the rubber and leak. Top Up: Installing a cooler adds volume to the system. You will likely need to add 0.5L – 1.0L of Toyota Type T-IV fluid (or equivalent JWS 3309 spec). Check the dipstick with the engine running and warm after installation.4 points
-
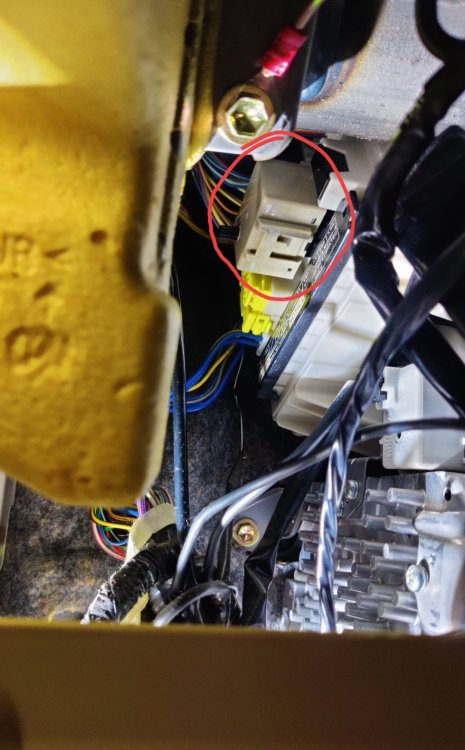
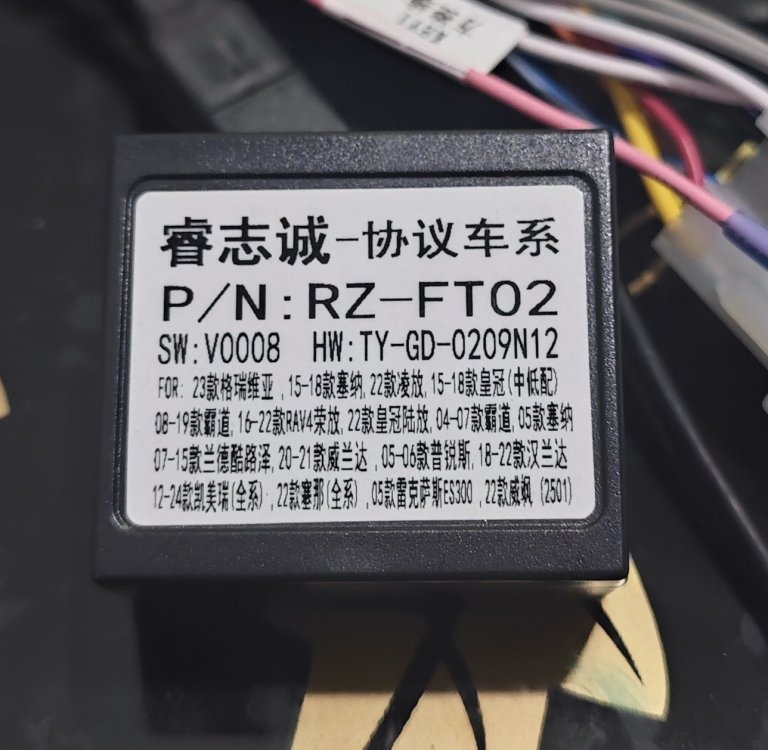
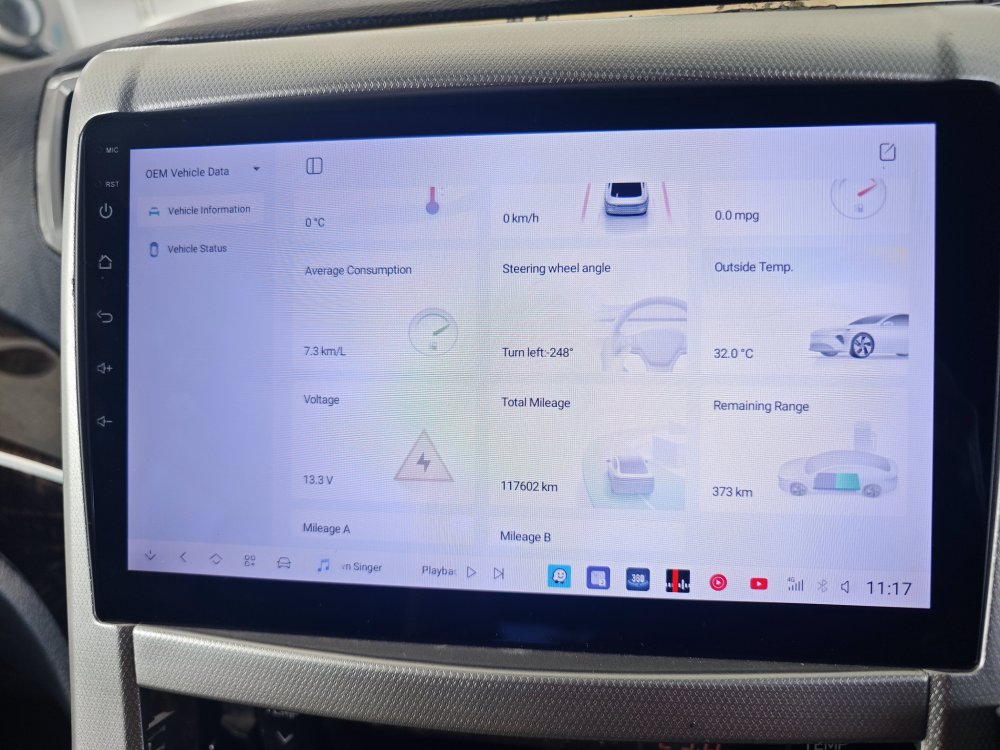
4 pointsHi everyone. I installed android player to my car since 2022. Before this I never bother about the extra function using canbus box because my car didn't come with 18 unit speaker. Last year I make a study about the function of canbus and make some modification. 1) I bought the socket for meter 40pin. This socket connect to canbus box and HU. Original for other car. 2) I change the connection point to 13&14 follow the diagram 3) then I bought canbus Toyota from raise. 4) after that setting the HU You can get information like - parking trajectory - door information - parking radar - outdoor temperature - millage odometer - average consumption
 4 points
 -
I have translated the Japanese text into Engligh for many of the wiring diagrams for the ANH1# models 2002 onwards. This was to help me debug the A/C on my 2004 Alphard ANH15. If anyone is stuck and needs something to help please get in touch and I may be able to help.
 4 points
 -
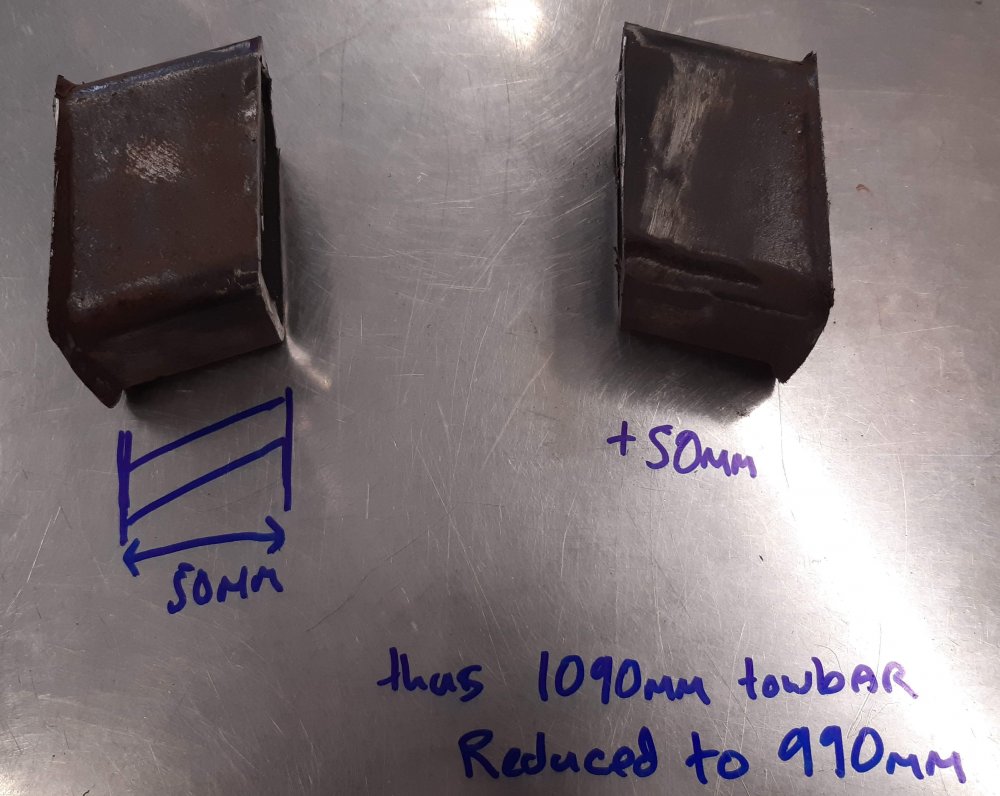
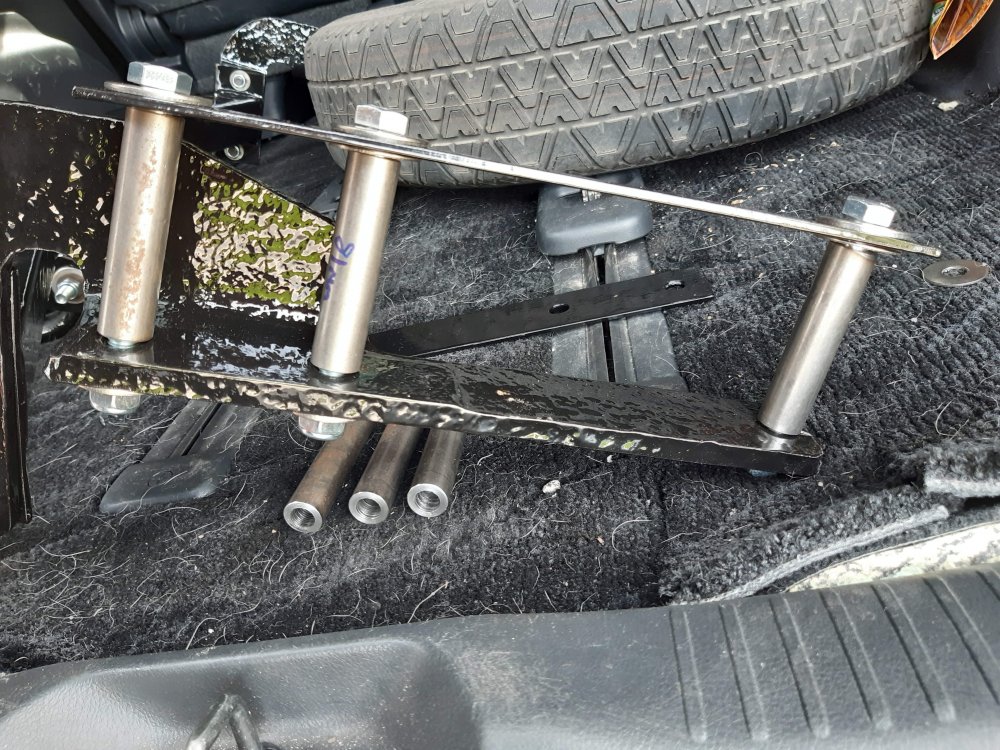
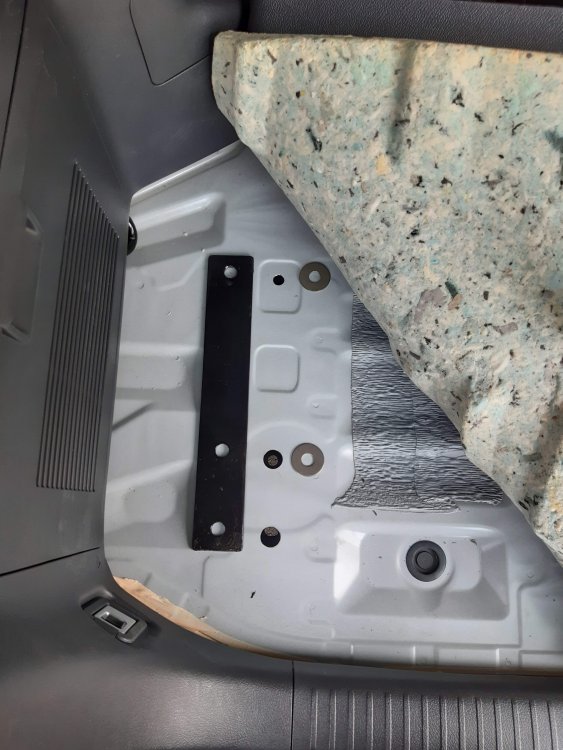
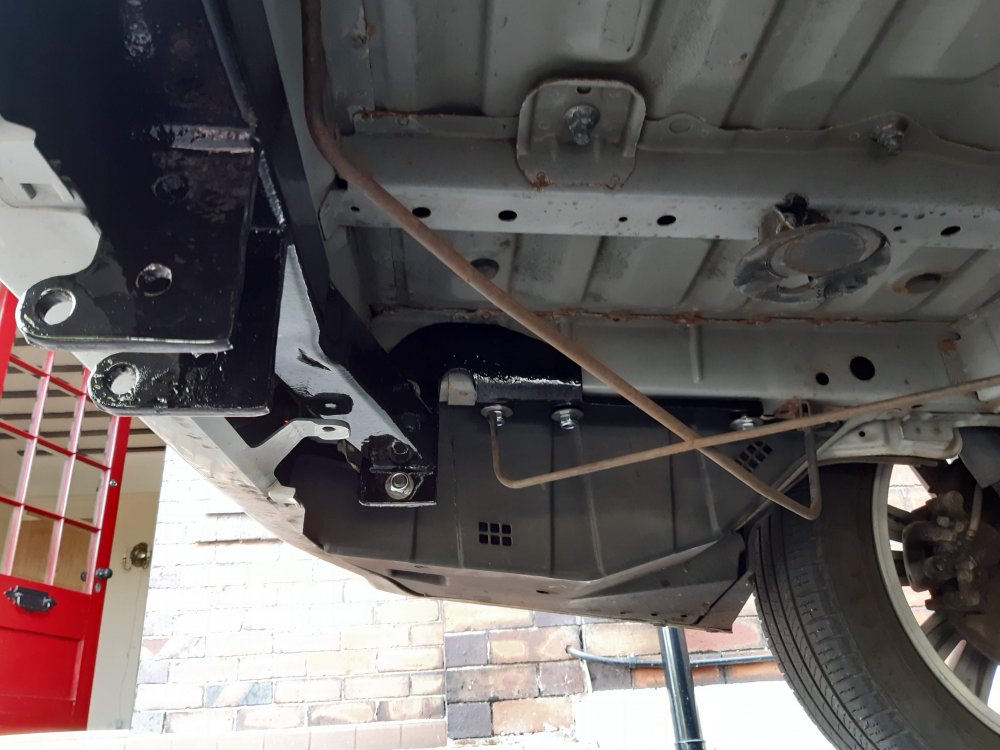
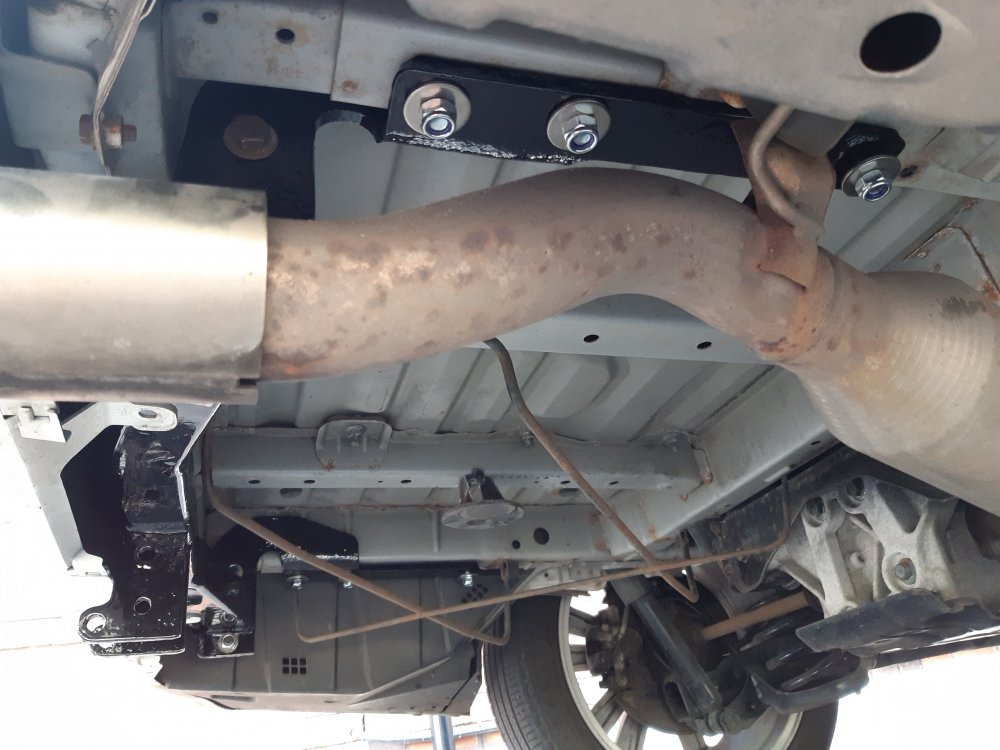
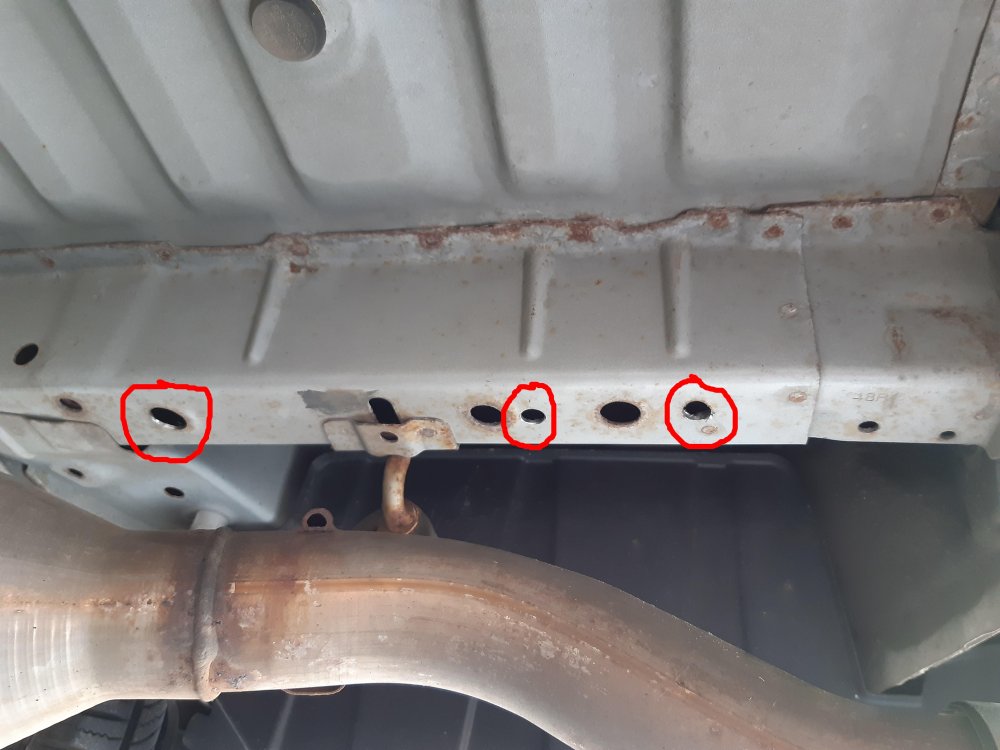
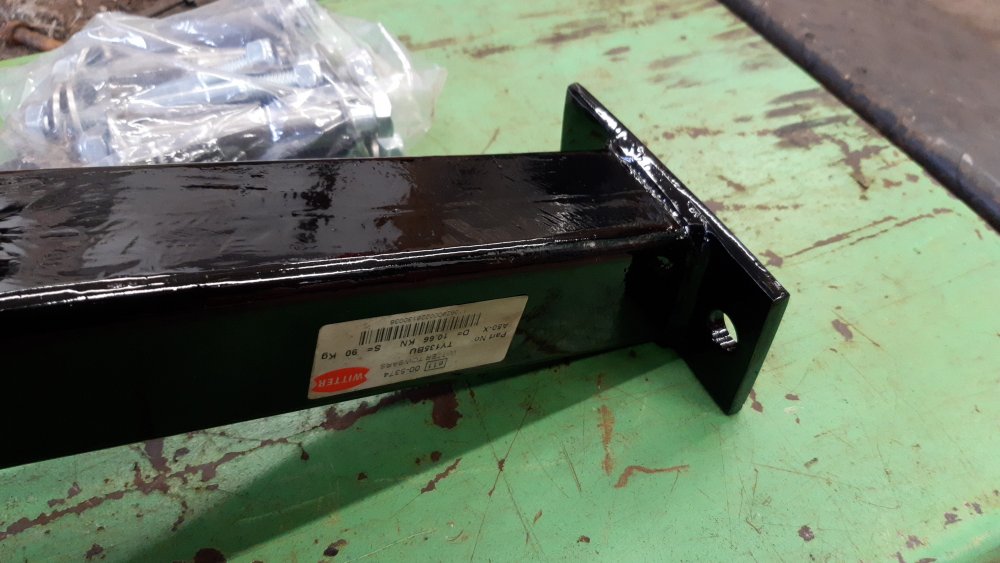
Those who have hunted will know, finding a towbar for a the 2008 onwards Vellfire / Alphard isn't easy. You can order a "Suntrex Tugmaster" towbar from Japan, but they are best part of £600, plus shipping (£200), plus duty and VAT.... its over £1000 to your door Or you could fabricate something from scratch if you are that way inclined. But what I found was the Lexus RX300-400h tow bar from Witter is nearly a direct fit, but some modification are required. Part number TY135BU First the main beam across the back is 1090mm long, and it needs to be reduced to 990mm end to end. Simply measure 50mm from each end, mark it very accurately, then slice it with a slitting disc. Clean up the end plates and re-weld them back on. Then I made up two flat plates to sit on the inside of the boot floor to act as a load spreader. And 6 spacer collars I made from some 20mm steel bar, that I drilled out with a 12mm bore for the M12x125mm bolts. These need to be exactly 81mm long. I made them on a lathe. If you do nice job of it, you end up with a towbar that looks straight out of the factory, with a branded e11 type aproval sticker on it 😂 Strangely, one of the bolt holes lines up perfectly with one of the factory holes and floor indentations. You only need to drill a couple of holes for the bolts. Spare wheel still fits perfectly. All looks like a proper one, whatever that might be. Keep in mind the photos are mostly during the mock up fitting so the bolts haven't been tightened up.

 4 points
 -
4 pointsI couldn't find a definitive video or explanation on YouTube on how to change the interior light bulbs in the car. Apologies if this has been done to death but I couldn't find an explanation on getting to the bulbs. All the bulbs I found below were 12v8w w5w type bulbs. Sunshade mirror vanity lights. Left edge with a nail file or fine screwdriver to push the clip before pulling out the grey assembly with the bulb. Bulb is facing sideways. Pull out bulb and replace. This seemed to be the only one needing the grey assembly to be pulled out. Central lights between sunshades. Prise off the clear plastic starting from the top. You'll see the silhouette on the edge where the plastic holds onto the plastic. Bulb facing you. Pull out and replace. Light next to 2nd row and third row seats. Prise off the clear light reflector from the top using a fine screwdriver or flat spectacles screwdriver. Bulb faces you. Pull out and replace.
 4 points
 -
Hi, piece of information if your front sunroof ( the one that only lifts up 3/4".) Leaks slightly... Had this happen this morning, it was closed during a heavy down pour overnight and the roof lining was slightly damp towards the front part of the sunroof aperture. It took a couple of hours to find the best way to remove the glass sunroof and check the seals and ensure the drain holes were clear. I discovered that these vellfires/Alphard designers are literally at the top of their game. It would be easy to remove most of the front edge of the roof lining to find a way to remove the glass roof, remove the sunscreens, remove the interior lights and grab rails, it's not necessary ! The front edge of the roof lining that meets with the front edge of the sunroof has a velcro attachment ! Pull it gently and it will come away and reveal the 2 X 10mm nuts that holds the front edge of the glass sunroof in place. Remove these and you can lift the glass front edge up to reveal the 2 front drain holes. Mine had mister spider hiding in the left one, causing it to block and fill up, clear him out with a length of wire and put it all back. Job done, took me 3 hrs, but with the above, its a 30 minute job.....4 points
-
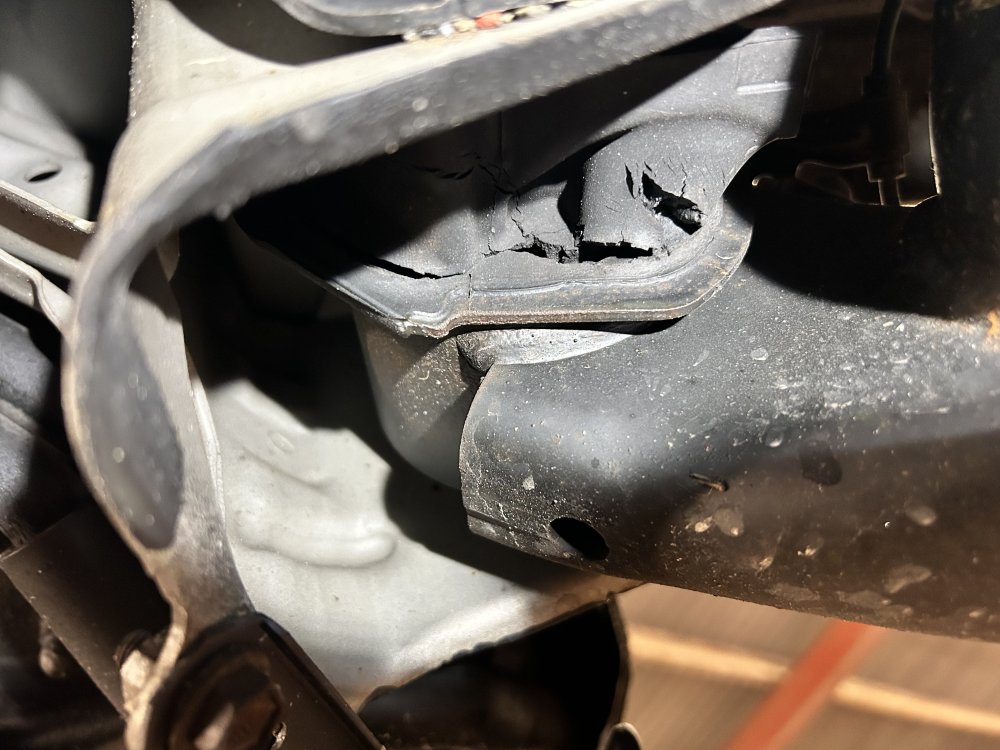
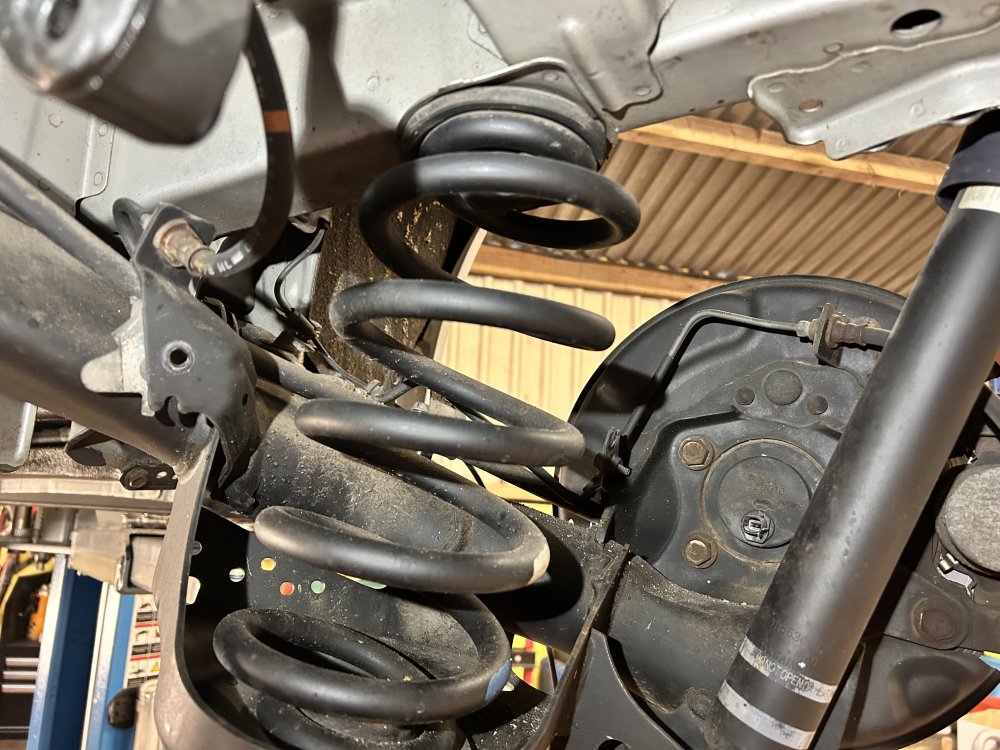
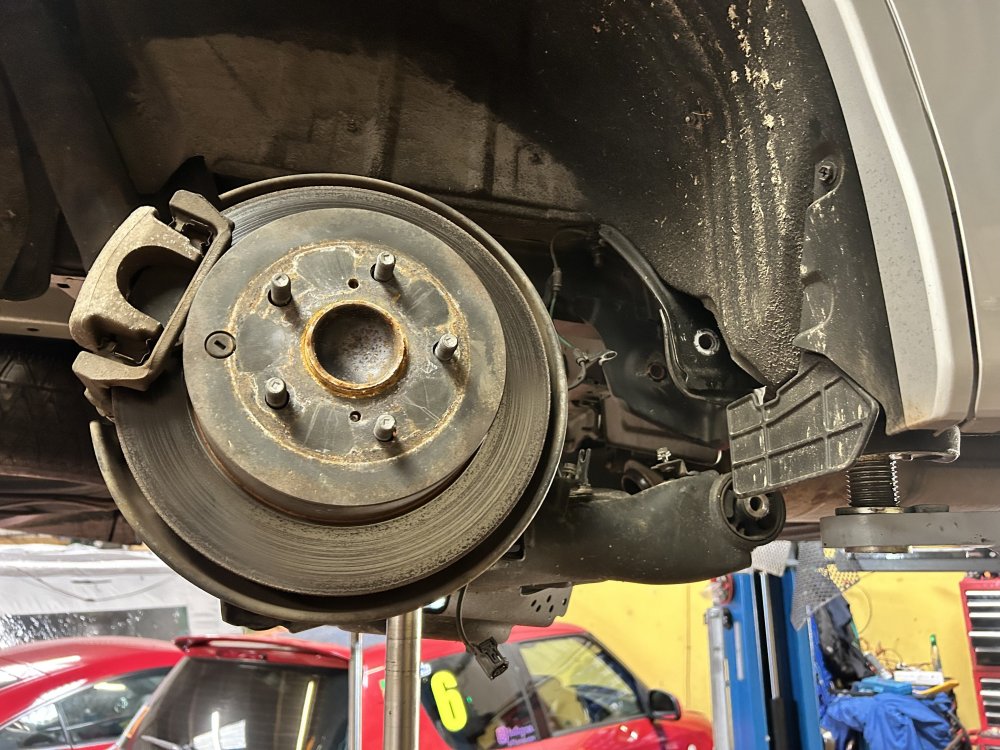
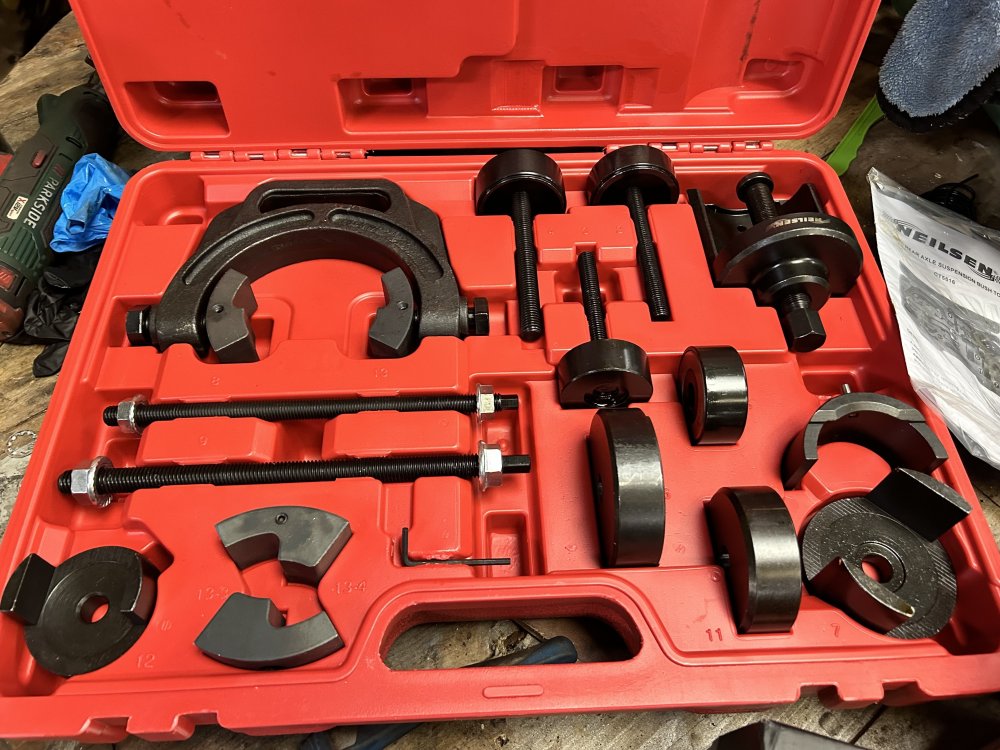
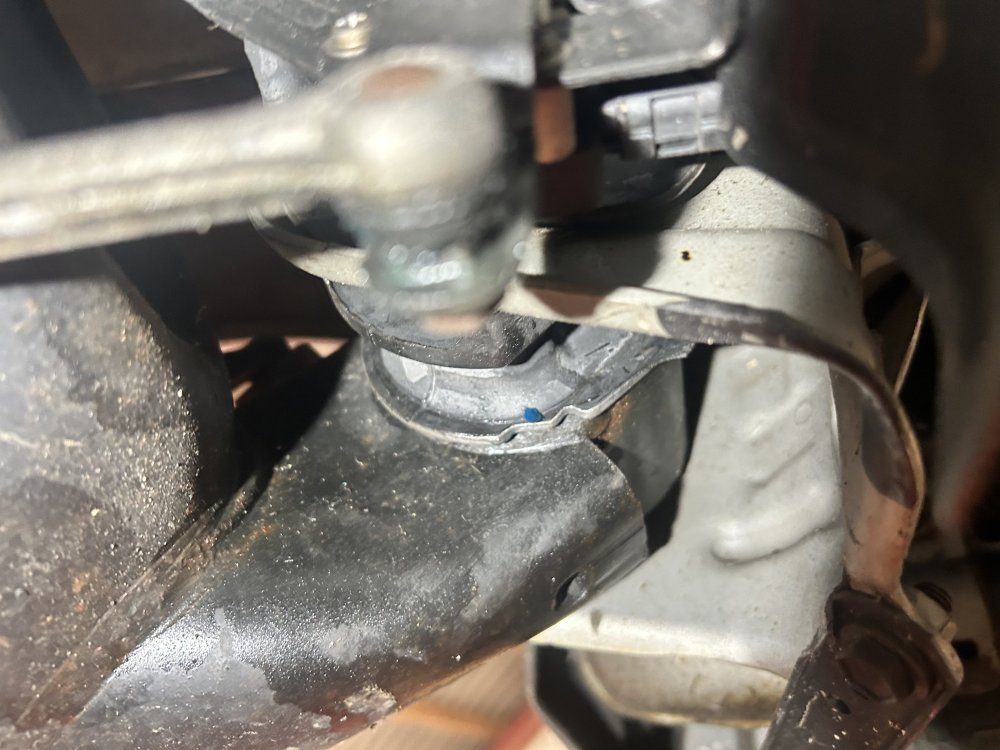
I'll start this by saying I'm not a mechanic (I'm actually an accountant). I do have my own lift but would be more of a tinkerer than anything, so my techniques may not be best practice, but it got the job done. One other word of advice is that even though these were not clunking, nor even mentioned on a recent MOT I decided to go ahead and replace now BEFORE corrosion had a chance to take hold. As a result, using the right tools, this job took me, a novice, just over 3 hours. The offending bush: First job after removing wheels and getting the vehicle in the air is to unplug wheel speed sensor in the rear hubs. Loosen & remove 10mm brake unions both sides. There are four in total, however I only needed to remove three. The drivers side handbrake cable routes under a hardline which is bolted to the axle. When you swing the axle down the axle will effectively hang on the brake cable held up by the hardline, so undo this now to stop this from happening. I plugged all lines to stop fluid running everywhere. Unbolt handbrake cables and wheel speed bracketry on rear axle. Remove level sensor on rear axle, passenger side Double check you've nothing else bolted to the axle that would prevent it from swinging down. Next job is to unbolt the bottom bolt of the rear shock. Take the weight off the axle, remove bottom bolts both sides and this will allow the full assembly to rotate down. Caution: It's heavy!! Rotate enough to allow you to remove rear springs. Remove springs and set aside and then raise the axle back up and loosely bolt the shocks back in. At this stage you could, if you wanted, take the handbrake cables off altogether and remove the entire axle. It's unnecessary in my opinion but bushes might be easier removed that way. Next is to remove the bolts for the rear bushes. Once loose both sides the axle will want to fall down so ensure it is supported and lower it gently taking care that you haven't missed any connected pipes / wires / hoses, etc Once it's lowered enough you have access to the bush. I used a Nielsen tool for this job. It wasn't explicitly advertised as fitting an Alphard but turns out the leaflet in the box confirms it'll work. Neilsen CT5516 is the kit you want. Attach tool to bush, clamp and turn the bush out. It's hard work but the tool did the job. Remember to note orientation of original bush! And with some effort the old bush is removed At this point I cleaned the inner surface of the axle with a little steel wool and then applied a smear of corrosion resistant marine grease. Then, using the same tool, press the new bush in And in. Building back up, is, as they say the reversal of disassembly bar the exception of bleeding the brakes. A good chance to renew the fluid. I also ended up replacing discs and pads. I hope this helps someone. It's not a particularly difficult job with the right tools (and a lift). I would feel confident tackling this on the driveway provided I was able to get the vehicle high enough in the air. My axle bush tool will be for sale soon if anyone's looking one. Ideally we could have a group rental set-up but I don't know how to organise that. Craig

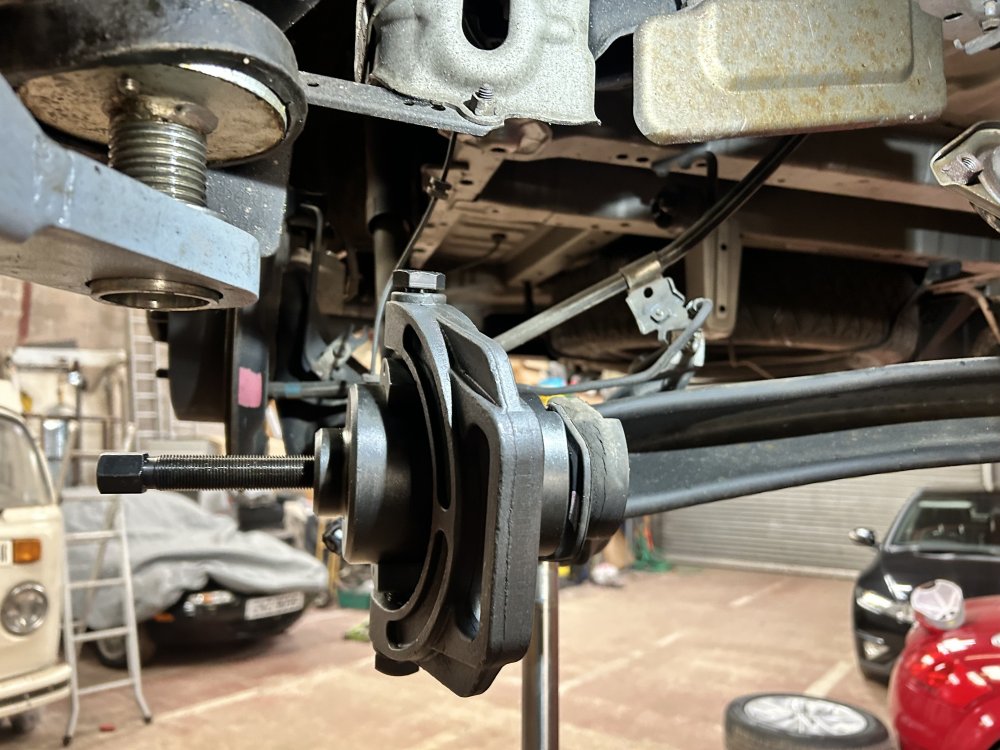
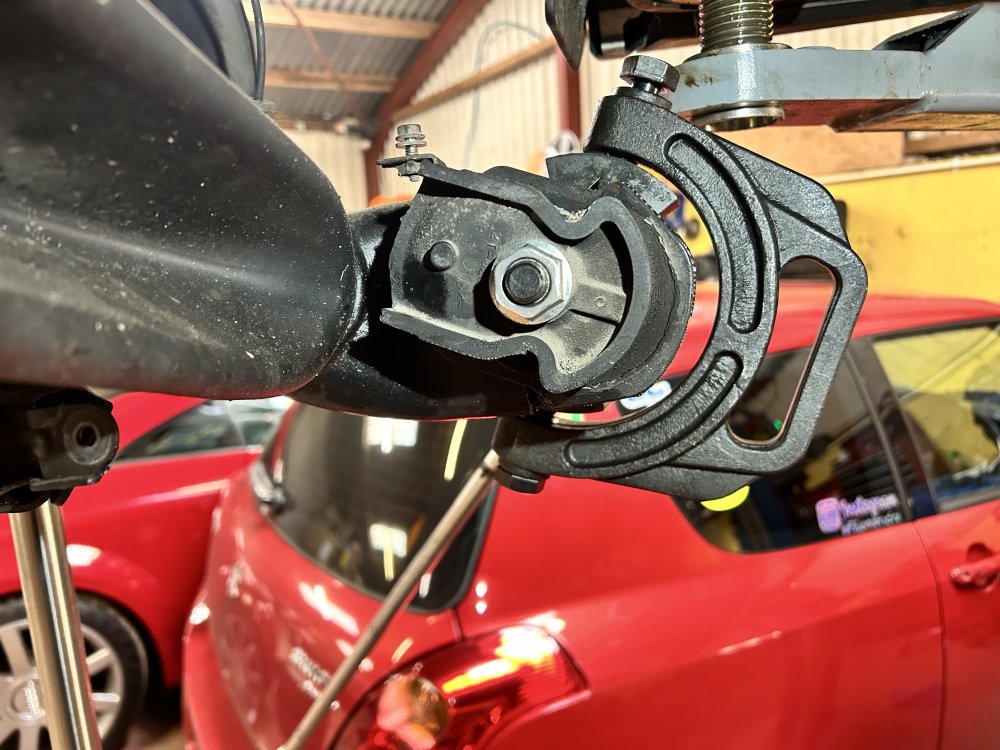

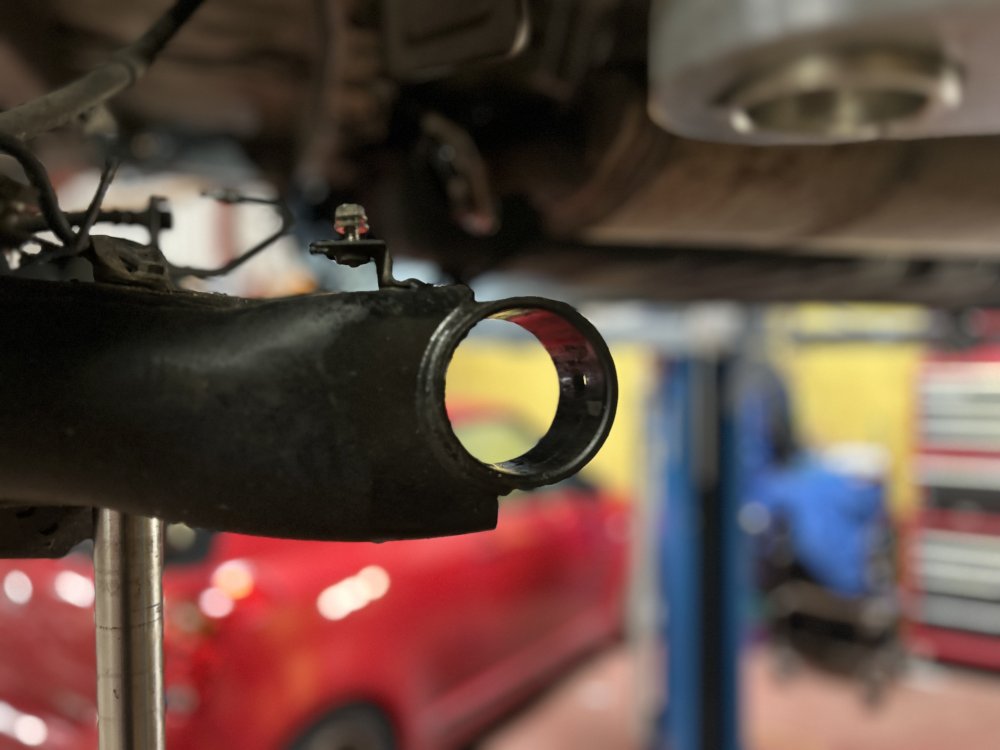
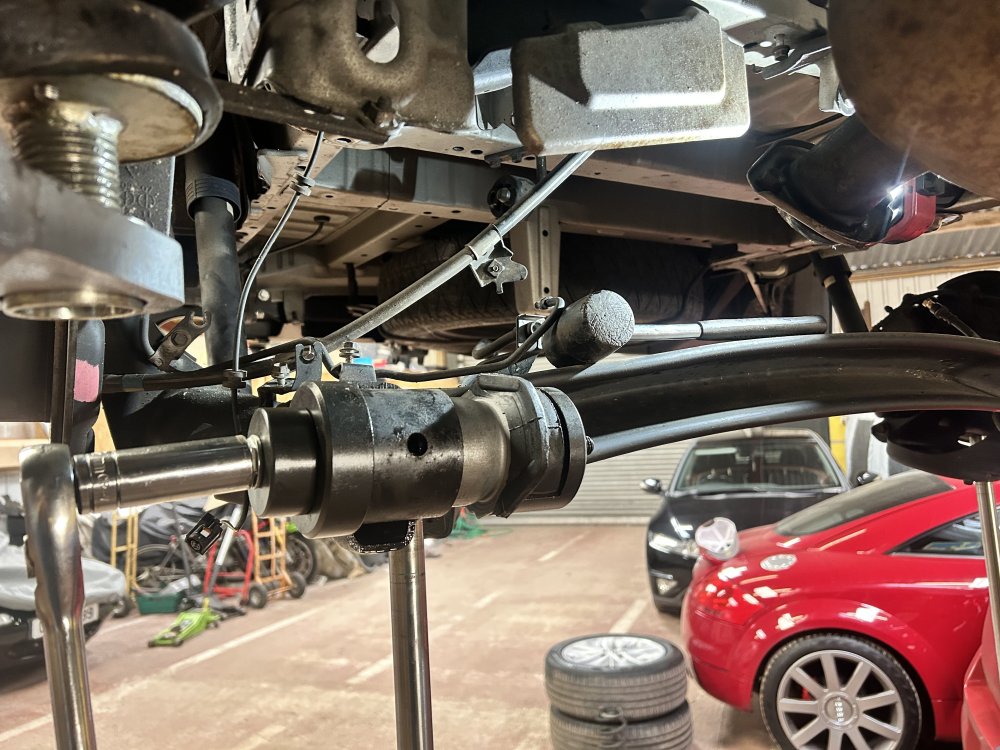
 4 points
 -
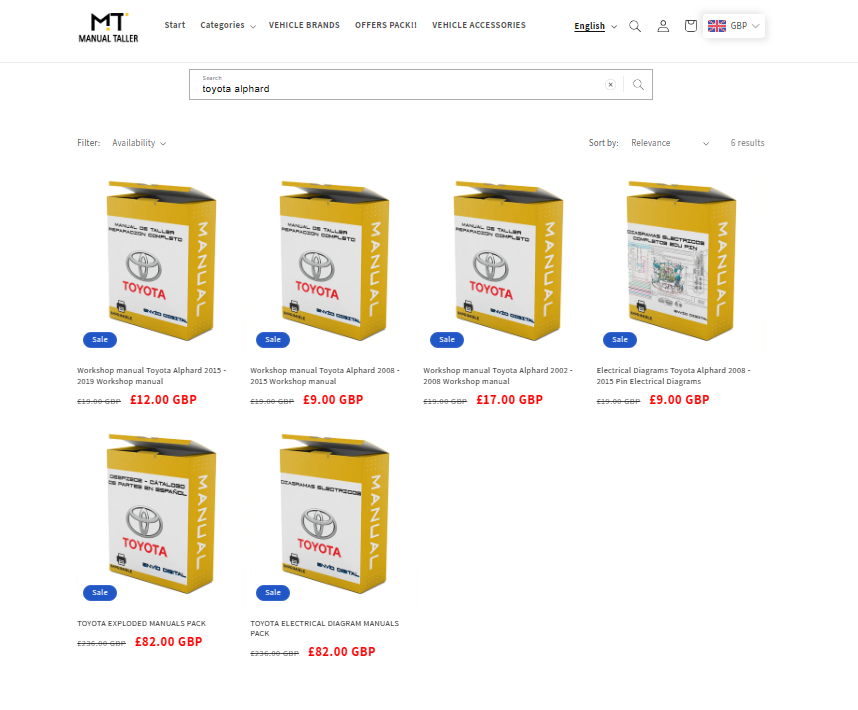
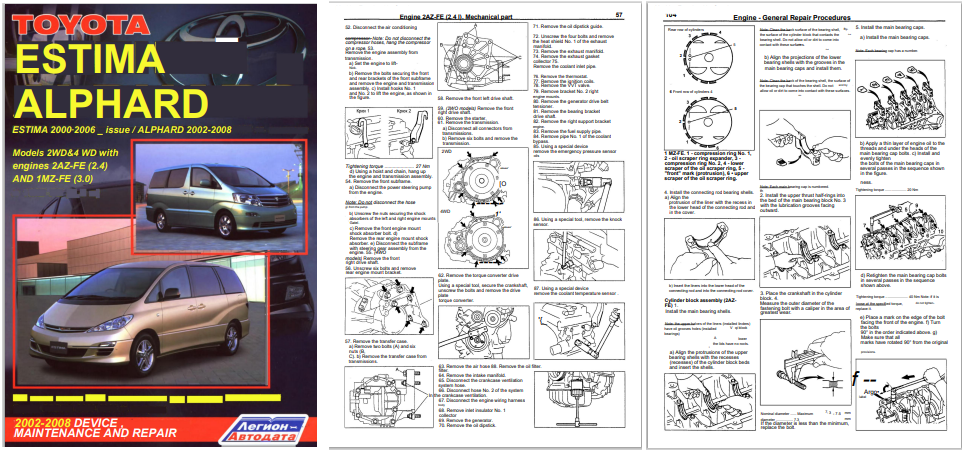
I Found these on a Mexican website and downloaded the series 1 manual and it appears very detailed. 1375 pages via pdf and it only cost £17. There are other series also at low prices. I think these may be similar to the Russian manuals you see online as a few Russian words come up. The link is below and I have added a couple of screenshots to give you an idea. Regrettably no hybrid manuals. Search: 6 results found for "toyota alphard" – MANUAL TALLER
 4 points
 -
4 pointsSo, here we are safely moved from the wilds of Argyle & Bute to chilled out East Dunbartonshire. 10 mins along the road a garage was found for van MOT, passed with minor comments. Advised a Velfire in the area also frequents said garage, maybe a group will be formed! New gaff a big improvement, excellent dry garaging for bikes & van fettling. Surrounding countryside a bikers joy. Life is good 😎4 points
-
So.....had the misfortune of breaking the passenger mirror glass on the Alphard. Thankfully the mirror housing and folding mechanism itself is fine, just the glass dropped off the plate and wasn't salvageable! Anyway, trying to drive a vehicle the scale of the Alphard without a passenger mirror is no fun so I quickly looked into sorting it. As bad luck would have it (unless I was being daft) whilst there seems to be a proliferation of AH20 glass on the likes of eBay, but not AH10 which was frustrating. I did pop down to Halfords and they didn't have anything either, though their booklet seemed to suggest a part that could be ordered in. That glass it transpires is actually for a later model (2000 to 2006) Previa/Estima, and not for the Alphard specifically. I tried one of these cut to size temp mirrors from Amazon, absolute garbage and regret even trying. Definitely don't use one of those. Off the back of the Previa/Estima thing, I ended up taking a chance on some Previa glass from Amazon, which turned up next day and wasn't a great deal more expensive than the temp solution . Needless to say it's not a perfect fit, but it's the right shape to go into the backplate without any 'oversize' issues and can be mounted so that the loss of mirror area is minimal. So, if you are ever in need of mirror glass, need something temporarily/are happy to live with something that's not perfectly shaped I can confirm the 2000-2006 Previa/Estima glass is usable and a good solution - assuming you still have the mirror backplate (i.e. have only lost the glass!). I've ordered a new genuine replacement from Amayama, at rather extortionate cost, and I guess it will arrive eventually, but there is a temporary/permanent solution there if needed if anyone finds themselves in the same boat. I also learnt something very useful in the process.....transpires my MOT had lapsed somehow over the bank holiday weekend (no reminders unfortunately) so it also needed MOTing, which I thought ironically was just great given the mirror problem. However, transpires (and this is quite a recent change) that as long as the vehicle was first used/registered (whatever) before January 2010, you can pass an MOT without even an advisory with just the drivers and interior rear view mirror, the passenger mirror is still not required (believe it used to be anything after 1976 was covered but not anymore). Therefore, the passenger mirror for us lucky AH10 owners is just for vanity, just make sure you don't break your driver's mirror around MOT time!4 points
-
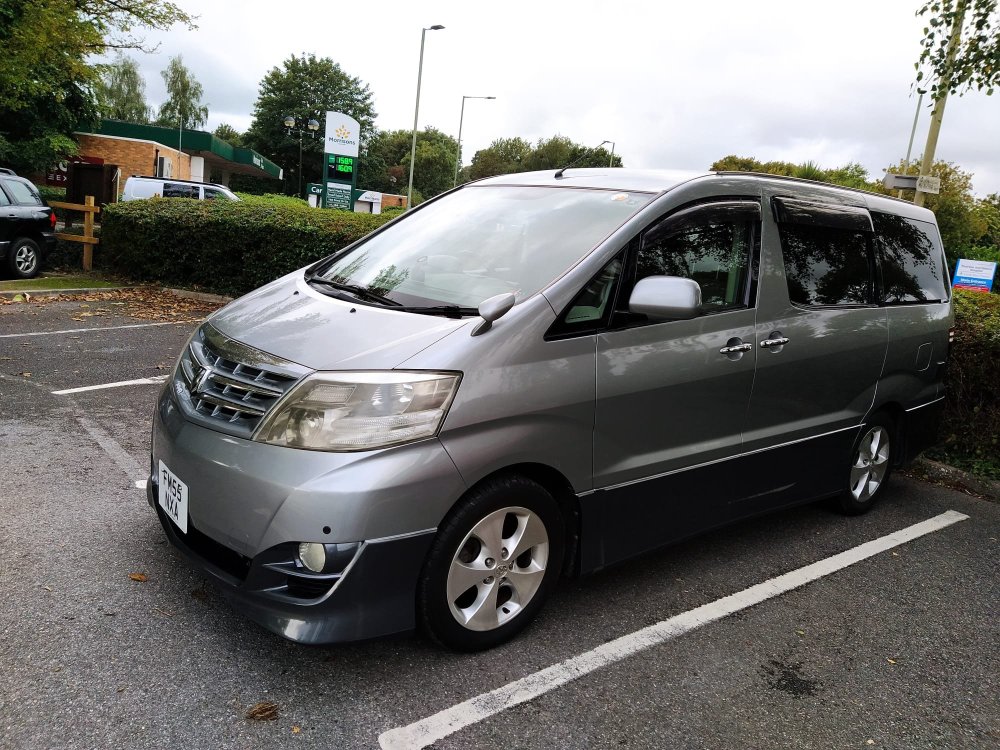
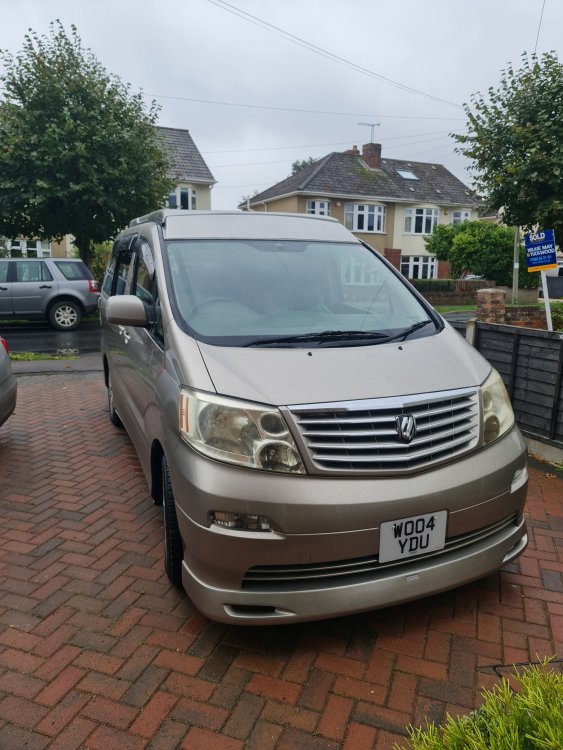
4 pointsInspired by paint jobs seen at Gaydon, I have just had the lower third(ish) wrapped with "Anthracite". Soooo pleased with the result - it really enhances the van IMHO. Cost was £700 and it took 2 days. 5 hours just for the front bumper due to the contours. I checked with insurance (A Flux) and no extra cost to the premium. Got to show it off, please forgive my indulgence! Here are some pics:
 4 points
 -
4 pointsHi all. Just dropping in to say hi. Great site. I've had an mz for 4 years so have made a lot of videos on my repairs. Feel free to subscribe and watch the videos as they are uploaded.4 points
-
Since getting my 2008 AH10, the drivers side wiper had always skipped. The initial sweep was fine, but the return used to miss/skip over a fair section of screen to the point it was quite annoying when it rained/you washed your screen. I initially put it down to the blade being bad (as they were the old frame style and clearly quite old) but changing it out (from the old style to aero blades) for a new one of the same 26" length it still skipped. I figured it was either a weakness in the arm or perhaps some distortion of the screen. I'd just lived with it up until now, but having recently had my windscreen replaced and it doing the exact same thing with fresh glass I thought I'd try something. I replaced the original AR26U Bosch blade for it's 24" equivalent, figuring that the loss of an inch of wiping either end of the blade wouldn't be a huge loss it would be worth a try to see if the skipping stopped. Well low and behold it did. Now wipes perfectly with barely any difference in coverage. Therefore if anyone experiences the same thing, can almost guarantee switching the driver's blade from 26 to 24" it'll sort it. Certainly cheaper and less problem than trying to source a new wiper arm!4 points
-
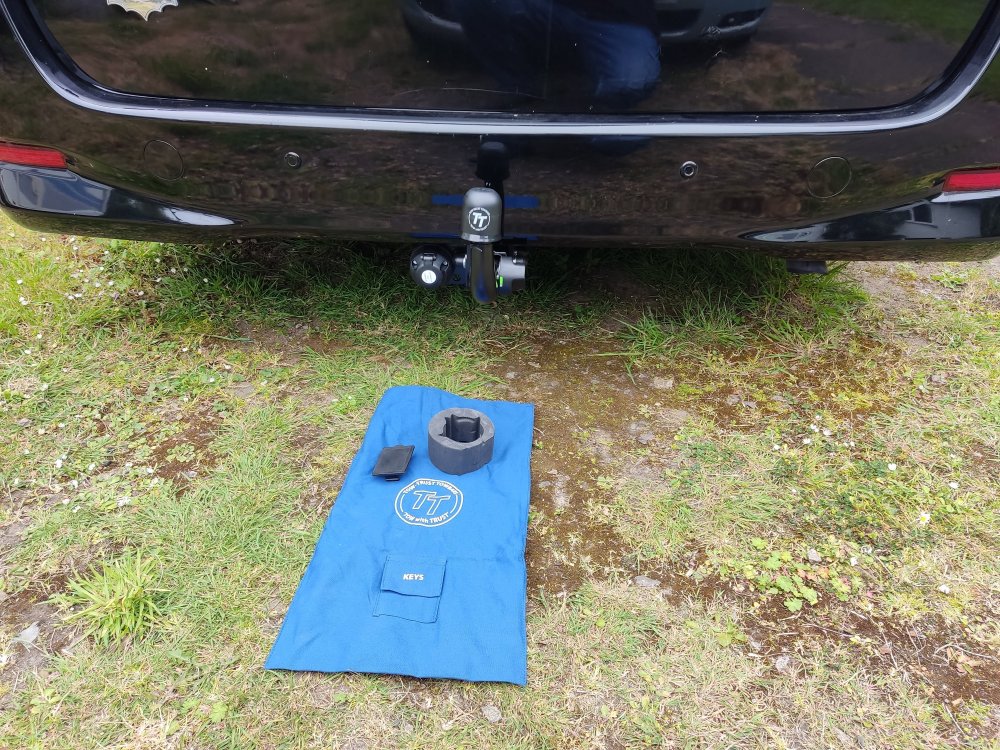
Great news for Gen-2 Alphard owners that are looking for a detachable towball. My van has just had a successful trial fitting of a new towbar developed at the manufacturers -Tow Trust Towbars in the Midlands. Will now go into production and offered in fixed flange, swan neck and detachable options.
 4 points
 -
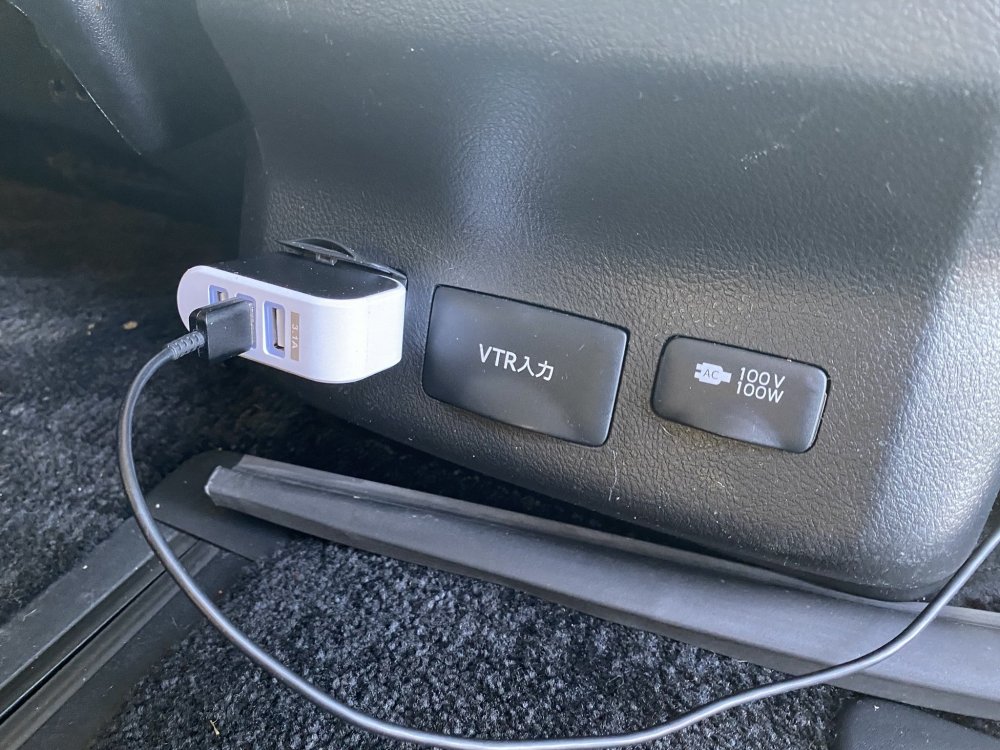
4 pointsProbable already well known, but if you are keeping the 100v sockets in the back, rather than changing one for usb, you can get a plug in for £3.59 on eBay.
 4 points
 -
I don't know if I am way behind some of you but I couldn't find anything on the forum regarding Identification of correct Toyota parts for the Alphard, or what to do if you are really struggling to get hold of a specific part from UK. But I have used the below mentioned link to find parts specific to my model from time to time. I have even used this website to order a part from Japan, and the Company - AMAYAMA were very professional and packaged my delicate part really well for the journey. It arrived in perfect condition. You can insert your precise VIN into the box and find any part number/ exploded diagram of all systems, prices of alternative non-original parts and more. You can look up parts from any car from Japan, and I have found it really useful over the last 8 years since I first bought a JDM car ( now on my 5th - have 2 at present ). Once you click on a part number, it takes you to the AMAYAMA website where you will see a photo of the part, and prices in U.S. $. Have a browse - info is almost all in English. https://toyota.epc-data.com/alphard/4 points
-
4 points
-
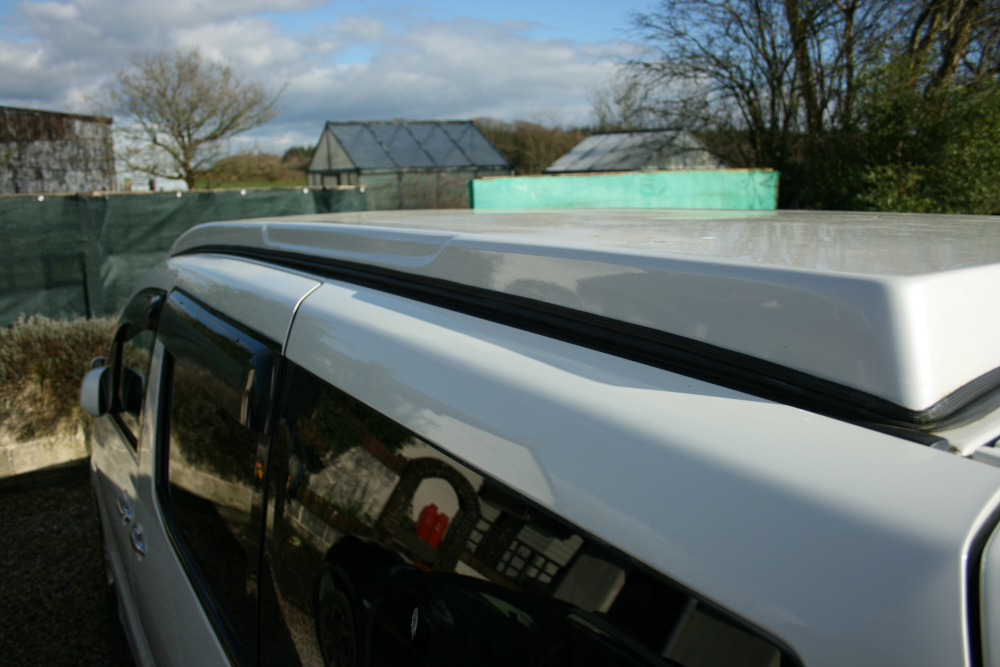
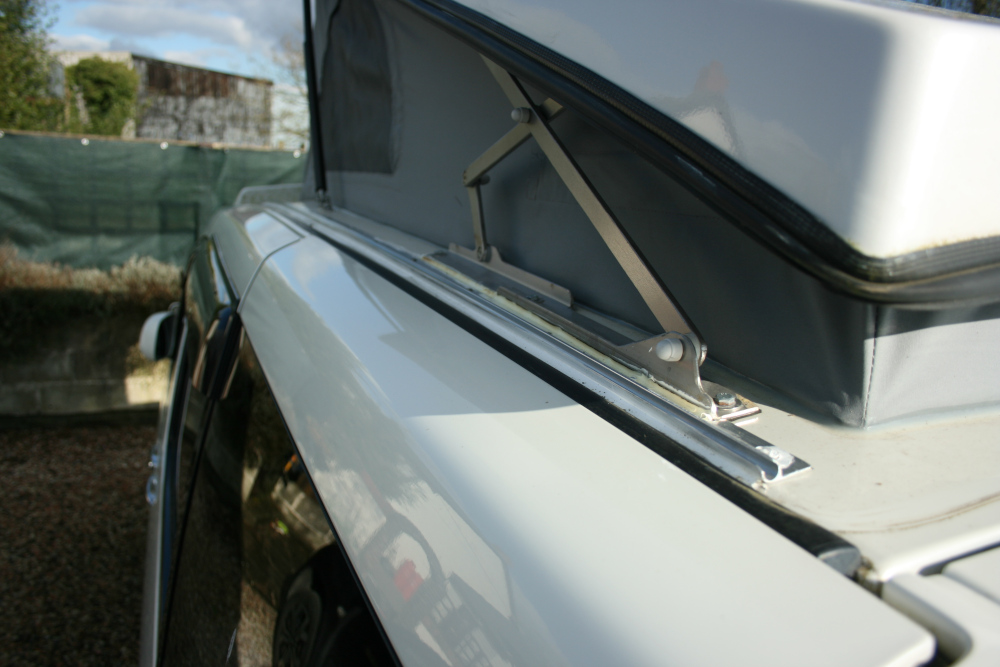
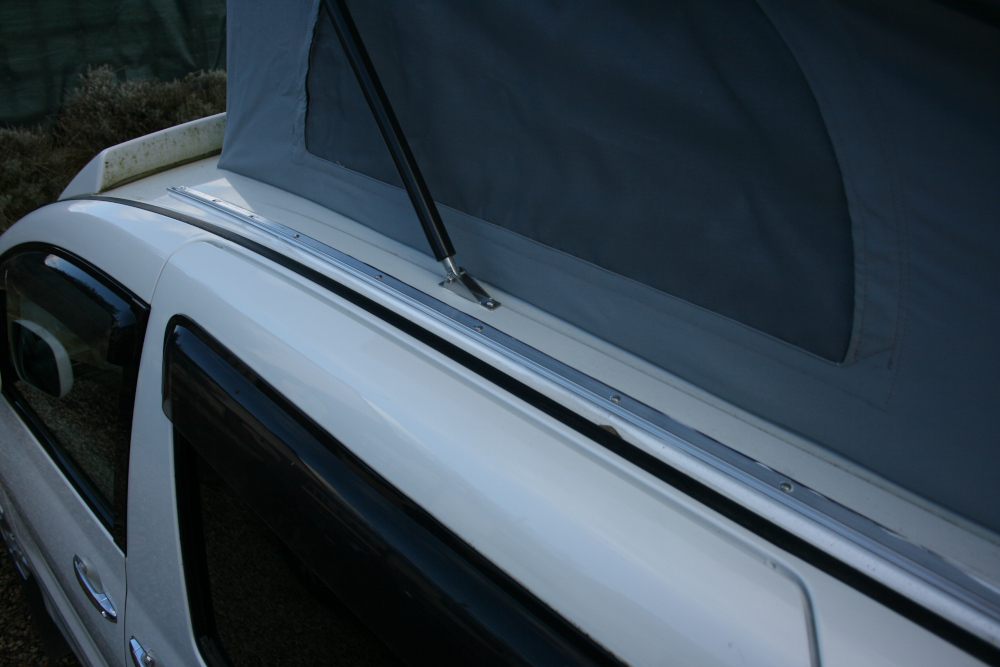
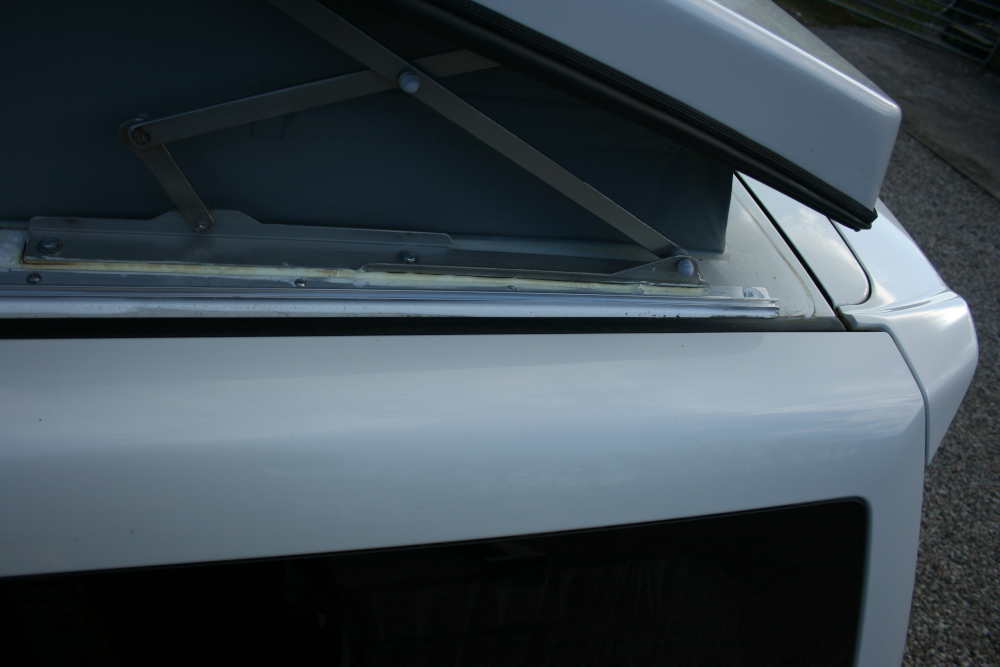
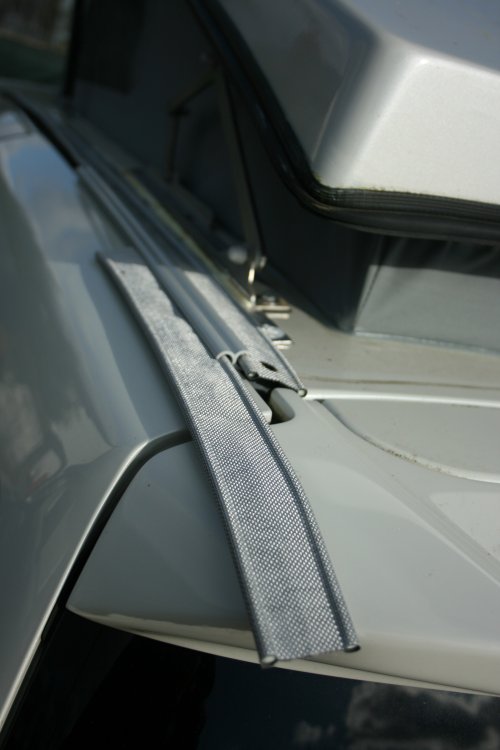
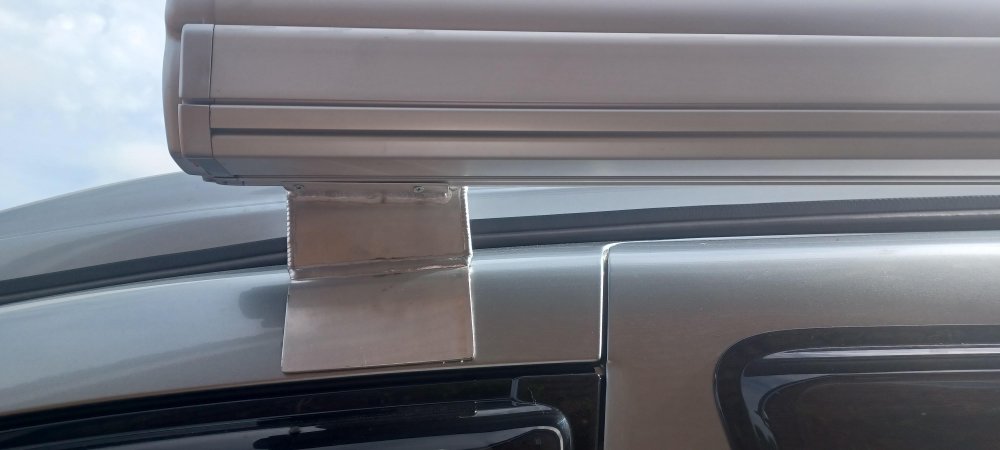
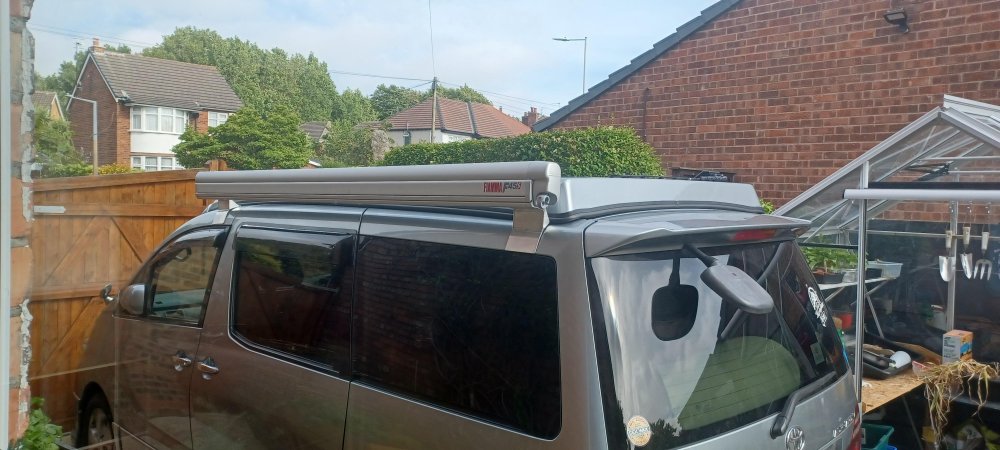
4 pointsAs promised:- Picture one and two show how neatly the rail fits out of sight,three and four the rail fitted. Five is how the awning porch rope fits to the camper using kadance strip and figure of eight joiners. Components from Right to LEFT:- Awning rail, Kadance strip, Figure of 8 joiners and a scrap length of "K" strip in place of Awning porch rope. The process is to site the camper and if using a "blow up" awning, slide the "K" strip along the camper rail [I punched and sealed a hole in each end to feed a piece of cord to easily pull the strip along]. Erect the awning close to the camper,wriggle the awning to the right distance from the camper and using the figure of 8 joiners, join the awning porch. to the "k" strip. The length of awning rail I used was 2.2m to ensure the strip fitted UNDER THE TOP WHEN LOWERED. The rail will need to be curved slightly{although not too important as it is not seen when top down or awning fitted],] as there is a slight compound curve in the roof. As I was going to use S/S self tapping screws I pre-drilled clearance holes in the rail. Whether using adhesive or drilling as well THIS IS THE TIME YOU POSITION the rail as close to the pop top brackets as possible and check the rail fits evenly when top is down it, stick it in position with double sided tape and mark along the back edge with a marker pen, removed the strip and tape, carefully squeezed sealer/adhesive in front of the marked line and began drilling[or not], into the roof with correct drill for self tappers, putting a dab of sealer in each hole before the scews. The figure of 8 joiners should come with the awning. Hope this helps,or if anyone thinks I've missed out any info please let me know ASAP.
 4 points
 -
4 pointsOn any gradient, I just hold the car in place using the foot brake. I leave it in drive - only manuals need to be put into neutral. When I want to pull away, I just move my foot to the accelerator. It doesn't roll back. First time you do it is a bit scary so try it when there is no one behind you.4 points
-
4 pointsHere's a datasheet on the anti-corrosion measures in place on 2008 onwards: m_bo_0012.pdf4 points
-
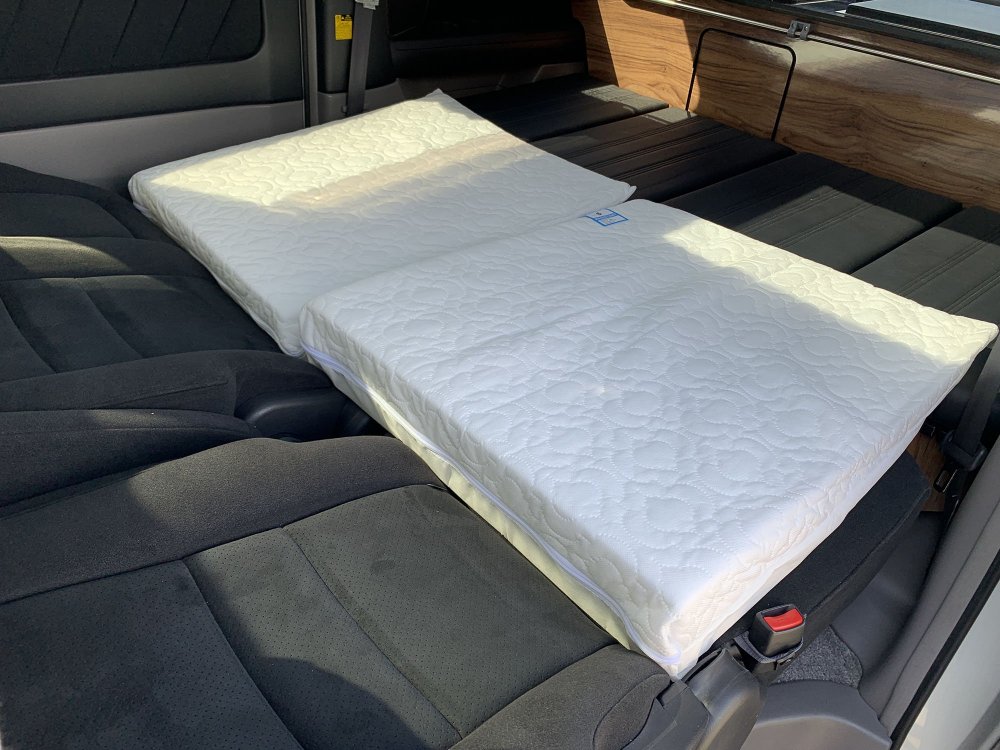
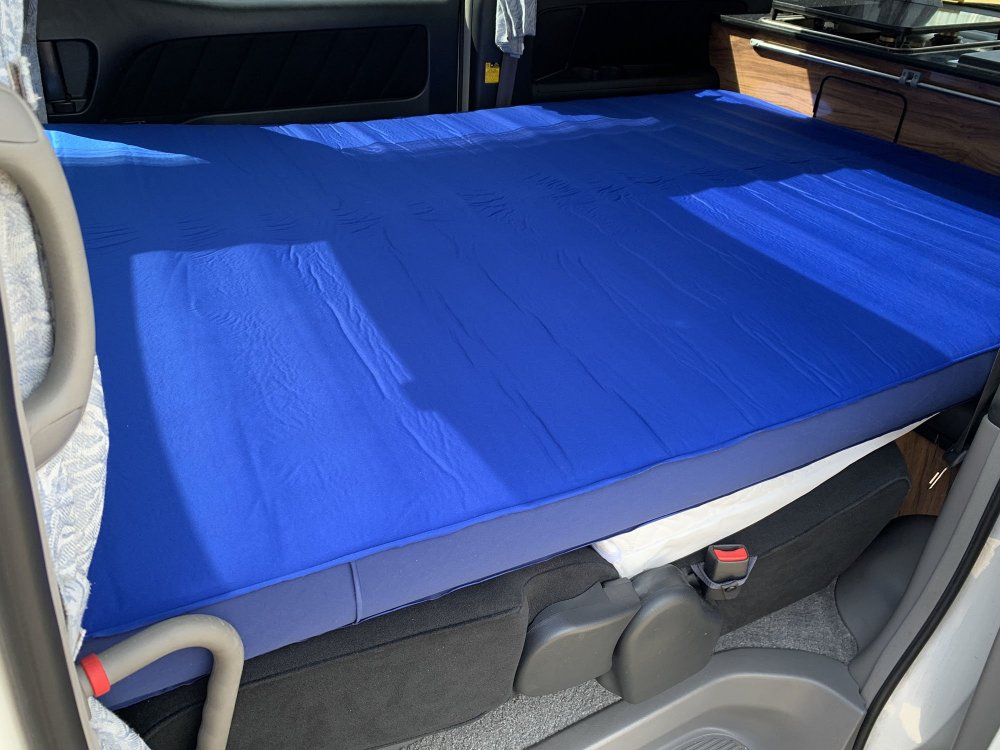
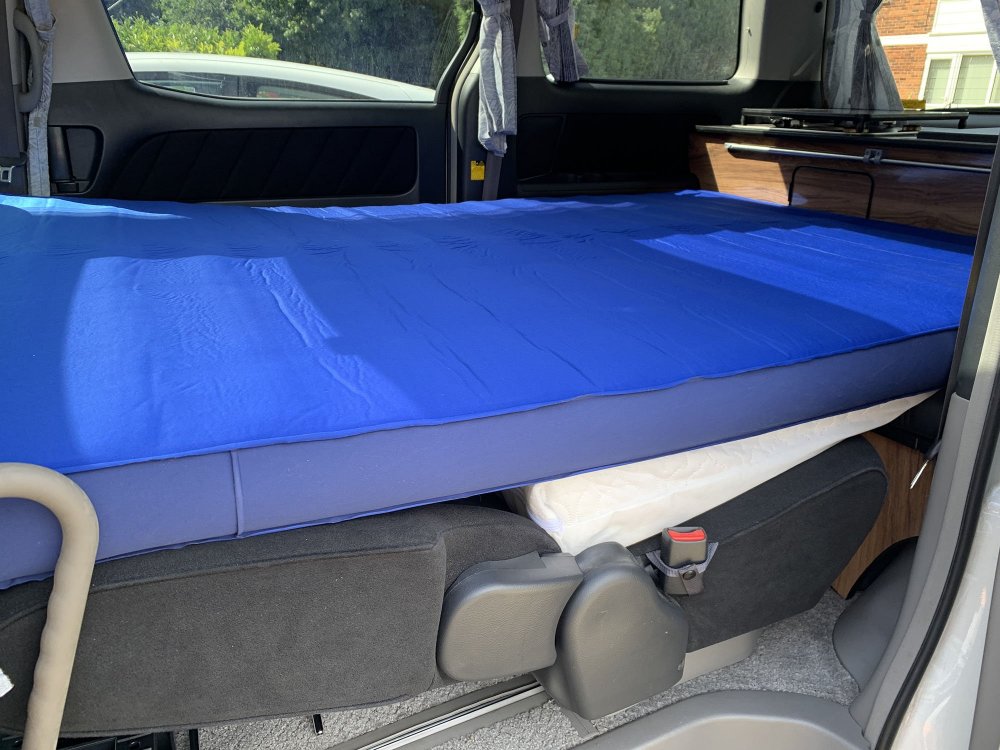
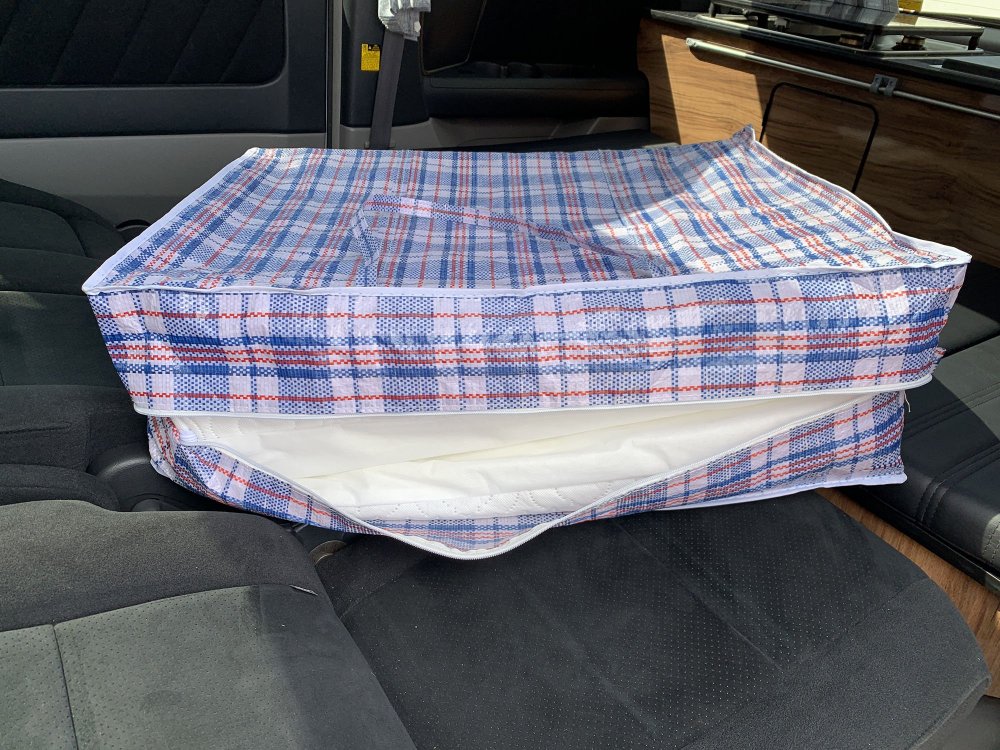
Hi Mark, Here's some photos showing the wedge pillows in place, self inflating camping mat on top, plus the laundry bag which fit the wedge pillows perfectly. Note, you'll see a gap between the thick end of the wedge and the seat back, we sleep with our heads at the back end, it's only our legs lying on that bit, so very little weight pressing down and with a good self inflating camping mat on top it feels pretty flat to me, and believe me, I'm a fussy sleeper! Just for your reference, I'm 6'1".
 4 points
 -
Photos that might explain...
 4 points
 -
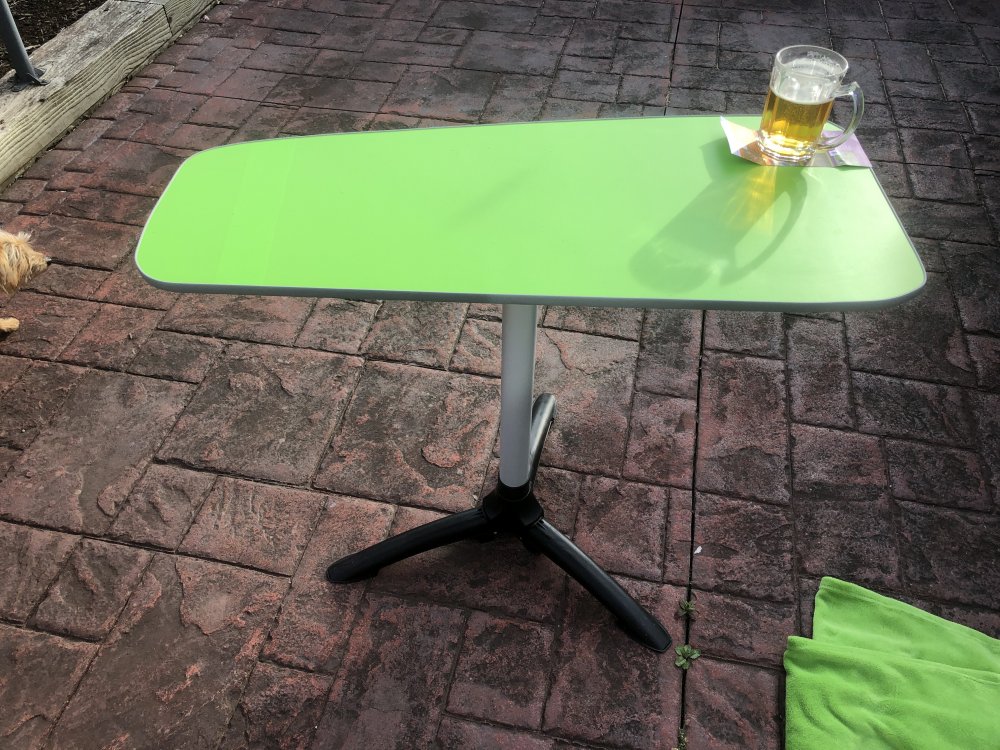
My van previously had a swing out bracket that held a table but it was missing when I bought it. I looked at what was available on ebay and found they were all quite small and expensive so I thought I'd knock one up. Found a cheap 70's formica coffee table(lightweight 12mm ply) locally for £5 and bought the fiamma tripod base, pole and table mount(expensive) which is now used by some conversion shops because they give the added advantage of being able to rotate it and take the table out the van and use anywhere, while folding up flat for storage. I put on some cheap vinyl I got online(£7) and some 12mm knock on T trim(£12). Routered the groove round the table top which was a doddle and fitted the edging. It's very stable on rough ground and fits the van perfectly. It's 100cm by 45cm which is a lot bigger than some others I've seen.
 4 points
 -
4 pointsHi All, I've recently taken delivery of an AH10 and decided to fit a mph speedo dial as my first project. Unfortunately the instructions from Lockwood on removing the old dial aren't very clear so I've made a short video of the steps involved and posted it on YouTube.4 points
-
4 pointsI've just had mine converted by funky ram in Bristol (Avonmouth). They were brilliant. Took a bit longer than expected but supply issues and covid meant that was inevitable really. Fit and finish are awesome, and it was a good chunk cheaper than most of the others. They're pretty new to Alphard conversions but I really can't find fault with the work. Upholstery in particular is amazing. Team are really helpful and friendly. Highly recommended. I've got a full side conversion with pop top.

 4 points
 -
4 pointsHi all, well we are now happy owners of our side conversion, pop top with the wider 120cm bed Alph. We chose Calder Campers in Livingstone, and whilst nowhere near 'local' for us, we liked the way they did things. We went for the side conversion, as this suited our needs, and also went for the wider R&R bed (wasn't aware this was available and was offered by Calder), which again suited our needs. We found our vehicle beginning of June - 05 3.0 V6 with low mileage and was spotless outside and inside. We chose our interior fit out, colour, style, seat covers etc on our 2nd visit, which they 'preferred' we went in person to do. Looking back, this was very much the best option, as we changed our minds about 4 times lol. Angela was brilliant in helping us choose the final options, and have to say got it right. It then took about 5 weeks to collection, and picked up end of August. I am now going to be a little critical of them when it came to collection....... I am fairly sure that before handover a proper PDI was not done, as the interior was 'grubby', the new front seats had stains on them, and the trim around the units had a couple of 'chips' in them. The curtains behind the passenger seat had holes in them (yes they were replaced immediately). The table leg literally came apart in my hand, as the screws barely pierced the table top (and were fixed with more substantial screws there and then) In our opinion, quite major in terms of handover, and if were honest just took the edge of it. The next major issue we encountered (but not till we got home), was the awning rail we paid to have added on. We were told it was 2.6l, but was only 1.7, no use nor ornament, so we had to return to Livingstone to have it fitted to the correct length, which CANNOT be 260. The max we got was 2.2, better, but when youve already bought an awning with a 2.6l.....does make it a bit harder. The rails themselves have to fit inside the pop top (which makes sense), and as the front of the vehicle slopes downwards, isn't able to take the rail. Yes, they sorted it (and compensated me for my petrol) but again, left a taste. In terms of the quality of the fit out though, we cannot fault them, it has been done very professionally, and the units are solid and look great. The re-cover of the seats/R&R bed is also excellent, and cannot fault it. From start to finish they have been helpful, gave great guidance on what we wanted/couldn't have, so no complaints there. Also we have a 3 year Guarantee on both the fit out, and the vehicle, so some peace of mind there. Would we recommend them, despite the issues mentioned - YES definately as the quality of the fit out is 1st class. HTH4 points
-
You can see how the wiring is done in the parts catalog https://toyota.epc-data.com/alphard/4 points
-
4 pointsxtrons, pumpkin do good radios but there are a few ebay listings that do the car radios. However i'm currently researching about a firmware update on the radios which i can then change it to english or at least put a english version of the radio software on. (still around 6 months away as i'm waiting on Toyota Japan to release the firmware code for me.)4 points
-
3 pointsAll you need to do is input your frame number in to get your parts. CLICK HERE3 points
-
3 pointsHi guys, thought I would update you on the issues I had with my Alphard. So turns out it was two seized capilers and nothing to do with Speedo sensors. I guess because they went at the same time as chip was replaced, the chaps working on it, it's was easy to think it was electrical, ABS issues . All back on the road, all be it with new speed sensors I didn't need but glad it's fixed. Cheers for everyone's help3 points
-
3 pointsThe Alphard fuses that are behind the passenger lower glove box are hidden. First remove the door of the glove box and the small panel right in the front corner next to the door, there is a plastic covered screw that has to be removed to get the small panel out, no tools just unscrew with your fingers.This panel also has the fuse diagram printed on it. At first inspection it looks like there are no fuses present, but if you get yourself a torch and get right under the panel and look up,you will see the fuses,they face down towards the floor. Once you have found them good luck getting to them as there is not much room.3 points


Important Information
We have placed cookies on your device to help make this website better. You can adjust your cookie settings, otherwise we'll assume you're okay to continue.